
Create a user group and manage membership
Introduction
Create a user group to share repositories, Connectors, and other repository objects through a group account in AnalyticsCreator cloud storage. Add the intended users and assign each member rights to read files, change files, or administer the group.
By the end of this how-to, you can reopen the saved group and check its name, members, and assigned rights. The same workflow lets a group owner update an existing group.
Applicability
Use this workflow in the AnalyticsCreator desktop interface to create a user group, edit its name, add members, or change member rights. User groups control shared access to cloud files. Object groups organize objects and diagram views within a Data Warehouse (DWH) project; see Related Guides for those tasks.
The steps cover the interface with User groups on the Options tab.
Prerequisites
3.1. An AnalyticsCreator account with access to User groups in the desktop application.
3.2. The AnalyticsCreator user account identifiers of the intended members and a decision about what each member needs to do with the shared files. The rights are explained in Add members and select their rights.
3.3. For an existing group, Group owner rights in that group to change its name or membership.
Steps
Open Options
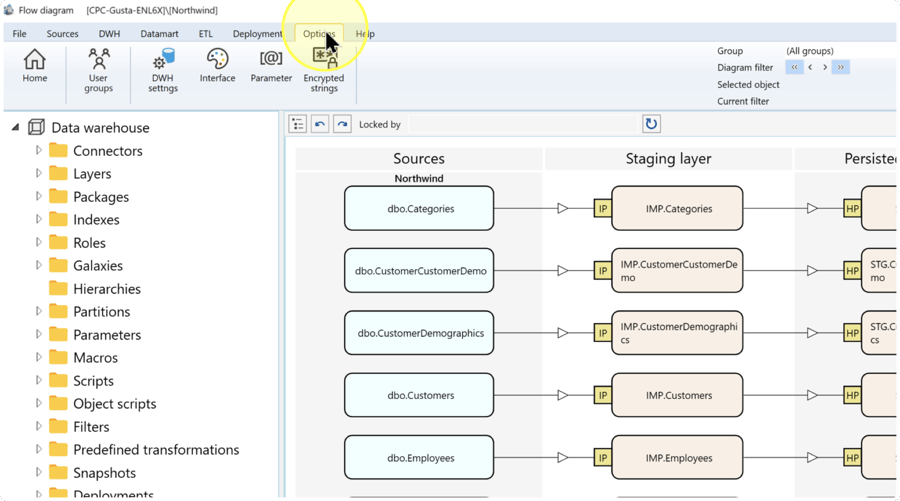
In the AnalyticsCreator toolbar, click the Options tab.
Open User groups
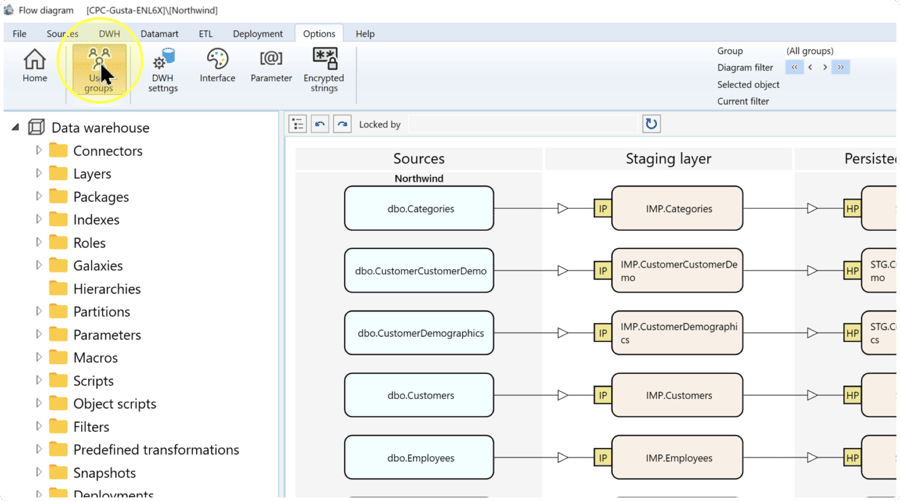
Click User groups on the Options tab to open the group list.
Create a group or open an existing one
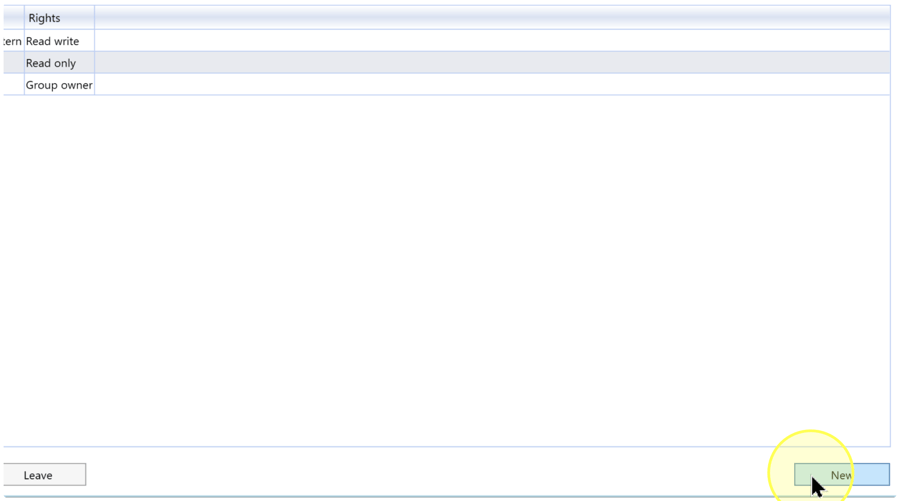
The group list shows the user groups you belong to. Its Name column identifies each group, and Rights shows your rights in that group.
To create a group, click New. To update an existing group, identify it by Name, check that your Rights are Group owner, and double-click its row. Group owner rights allow you to change the group name and manage its members.
Expected Results: the group editing page opens, with a Group name field and a Group members table.
Enter or check the group name
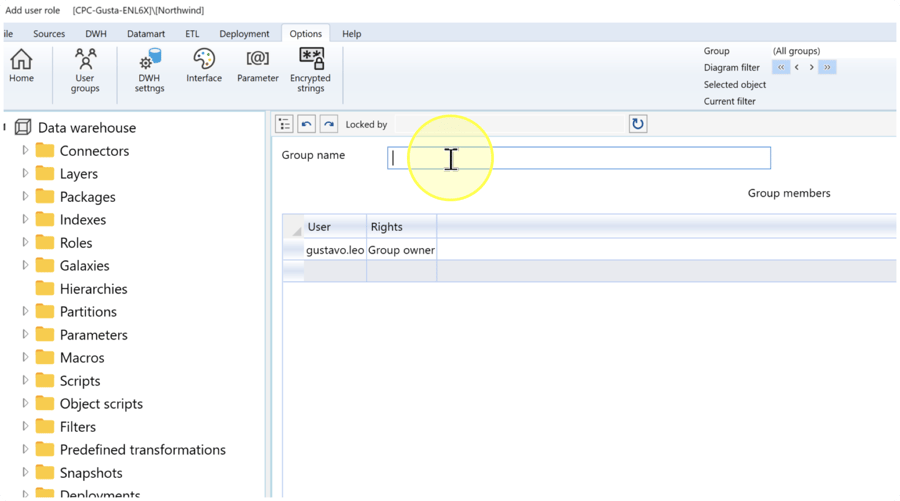
On the group editing page, enter a name in Group name that lets members identify the shared group. When editing an existing group, keep its name unless you intend to rename it.
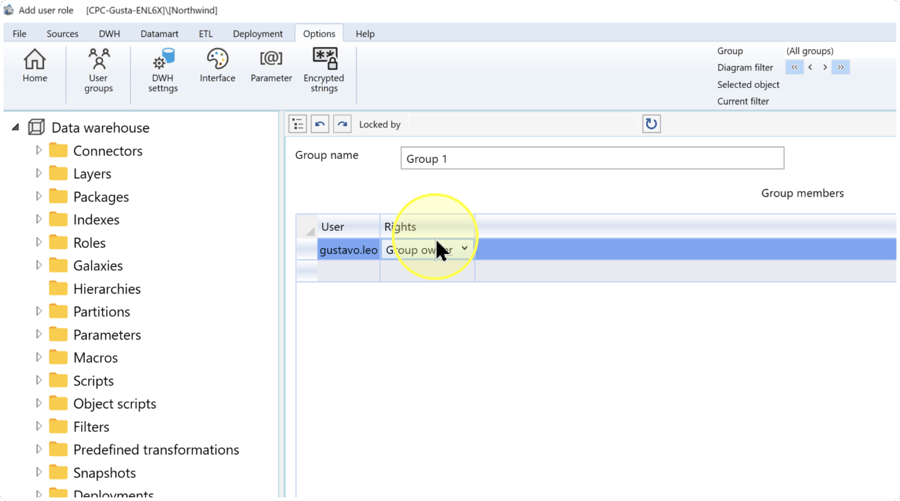
The Group members table below the name contains the member accounts and their assigned rights. The captured creation page is titled Add user role.
Add members and select their rights
In Group members, User identifies the AnalyticsCreator account and Rights specifies what that member can do in the group account. Configure each intended member as follows:
4.5.1. To add a member, enter that member’s AnalyticsCreator account identifier in the User column of a new row. To change an existing member’s rights, select the row with that member’s identifier.
4.5.2. In the same row, open the Rights drop-down and select the role that matches the member’s task:
- Group owner — Can rename or delete the group; add, edit, or delete members; and read, store, rename, or delete files in the group account. Select this role for users who need to administer the group.
- Read write — Can read, store, rename, and delete files in the group account. Select this role for users who need to maintain shared files without administering the group.
- Read only — Can read files stored in the group account. Select this role for users who need to use shared files without changing them.
4.5.3. Repeat for each member to add or update. Check the User and Rights values together so that each role is assigned to the intended account.
Example: Group 1, the pictured user account, and its selected Group owner role illustrate the interface. Use your own group name, member accounts, and required rights.
Review and save the group
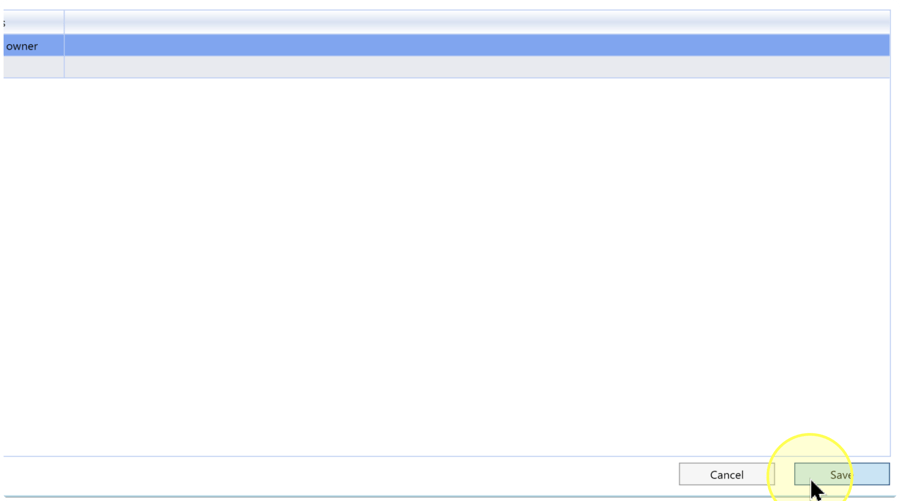
Review Group name and every member’s User and Rights values. When they match the intended group and membership, click Save at the bottom of the editing page.
After saving, reopen the group and carry out the checks in Expected Results.
Expected Results
The group is saved with the intended name, members, and rights. Verify the saved configuration:
5.1. Click Options, then User groups. Find the saved group by its Name. If you renamed it, look for the new name.
5.2. Double-click the group’s row and compare Group name and all User and Rights values with your intended configuration. Confirm that each member you added appears and each role you changed has the intended value.
5.3. When shared access also needs to be checked, have an intended member open File → Load from cloud and check for the group account. If the account already contains a file they should be able to read, have them load that file. Saving the group establishes its configuration; files are stored in the group account through the separate cloud save workflow.
Decisions and variations
New or existing group: use New for group creation. To change a group you own, double-click its row and update the required name or member rights as described in Create a group or open an existing one.
Choosing rights: use Read only for reading shared files, Read write for maintaining files, and Group owner for group administration. Review the full effects in Add members and select their rights before assigning a role; both Read write and Group owner permit file deletion.
Leaving or deleting a group: these are separate group-list actions. Leave ends your membership in a group you do not own. Delete deletes an owned group and all files stored in its group account. The effects are retained in User groups for lookup.
Troubleshooting
- Expected item is missing — Check that you are looking in Options → User groups for the intended group name. This list shows groups you belong to. If the group is absent, have a group owner check that your AnalyticsCreator account identifier is listed in Group members.
- A change is not retained — Reopen the intended group and compare its saved name, members, and rights with the changes you entered. Check your group-list Rights: managing the group requires Group owner. If you own the group and the saved values still differ, correct the affected values, click Save, and repeat checks 5.1–5.2.
