
Create a persisting definition
Introduction
Use Persisting Wizard to create a definition for storing a Transformation result in a managed physical table. Persisting can support repeated access to transformed data.
This how-to covers selecting the source Transformation, naming the destination table, assigning a package, choosing a replacement strategy, and reviewing the resulting definition. The intended outcome is a definition you can locate and check in your Data Warehouse (DWH) project. Data loading takes place when the persisting operation is executed.
Screenshot examples: object names and selected settings illustrate the interface. Use the objects, names, and refresh behavior required by your own project.
Applicability
Use this workflow in the AnalyticsCreator desktop interface to create persisting for an existing Transformation implemented as a view. Regular, Manual, and Union transformations can be persisted. The steps start from the Transformation in the diagram.
The replacement strategies explained here describe Full persisting. Other persisting types have different refresh behavior, which you review after creating the definition. Creating the definition and running its data load are separate tasks.
Prerequisites
3.1. A Data Warehouse (DWH) project that you can edit, containing the valid source Transformation whose result you intend to persist.
3.2. The intended destination table name and the existing or new package name for the persisting operation.
3.3. The intended refresh behavior and knowledge of any existing destination data. For Full persisting, the chosen replacement strategy must suit the destination table structure; see Choose the replacement strategy.
Steps
Select the source Transformation
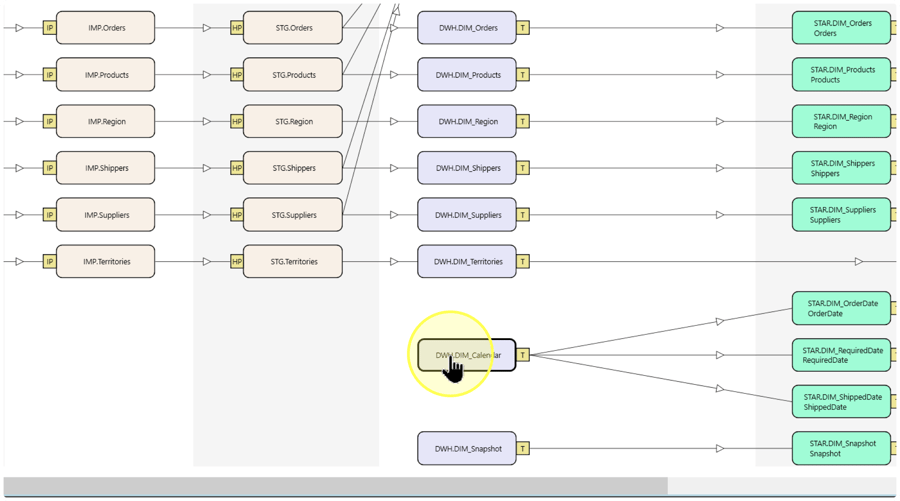
In your Data Warehouse (DWH) project, locate the required Transformation in the diagram and right-click it. A Transformation applies processing logic to input objects and produces a reusable result. Select the object whose output you intend to store, checking its schema and name.
Open the Add submenu
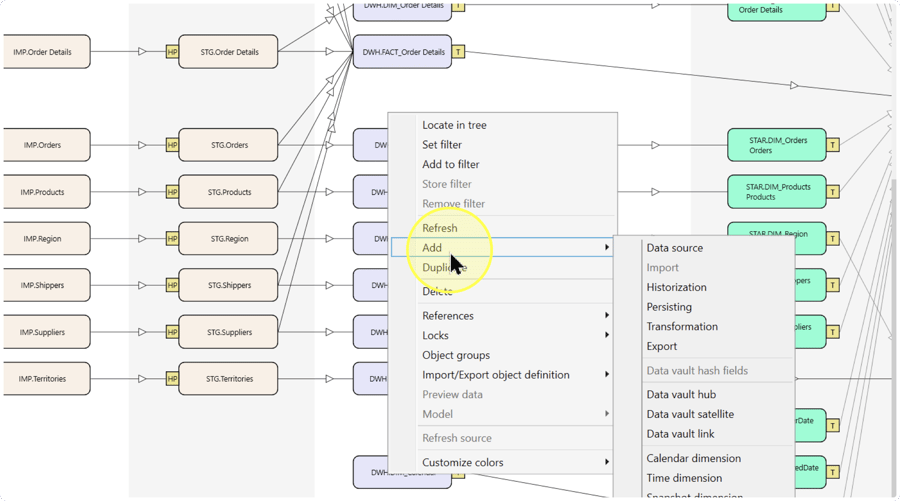
Point to Add in the Transformation’s context menu to display the submenu.
Open Persisting Wizard
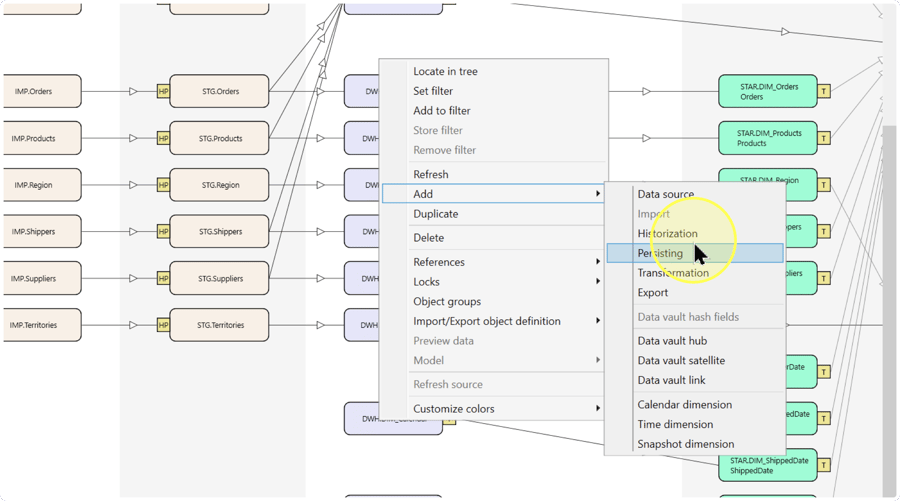
Select Persisting in the Add submenu. Persisting Wizard opens so that you can define how to store the Transformation result in a managed table.
Confirm the Transformation
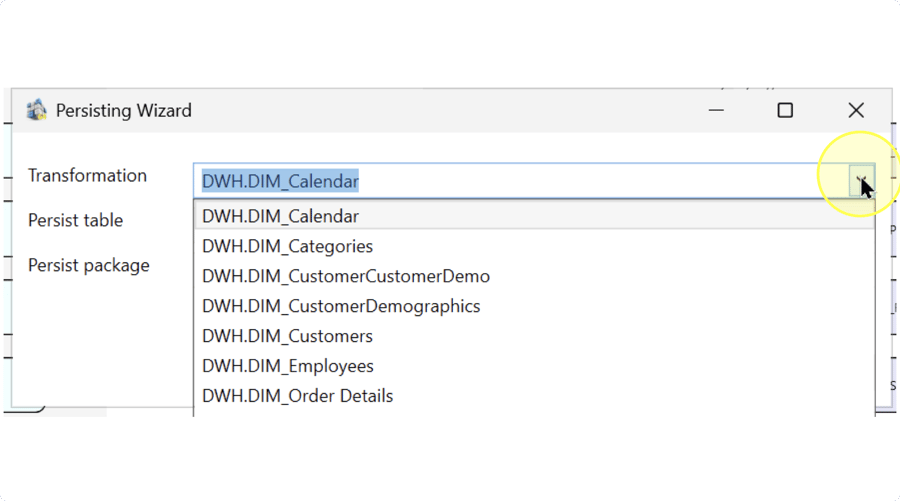
In Persisting Wizard, check Transformation. If it does not identify the required source, open the list and select that Transformation. This setting selects an existing object; it does not set its Regular, Manual, or Union transformation type.
The remaining settings identify the destination table, package, and replacement strategy. Complete them in the following steps.
Name the destination table
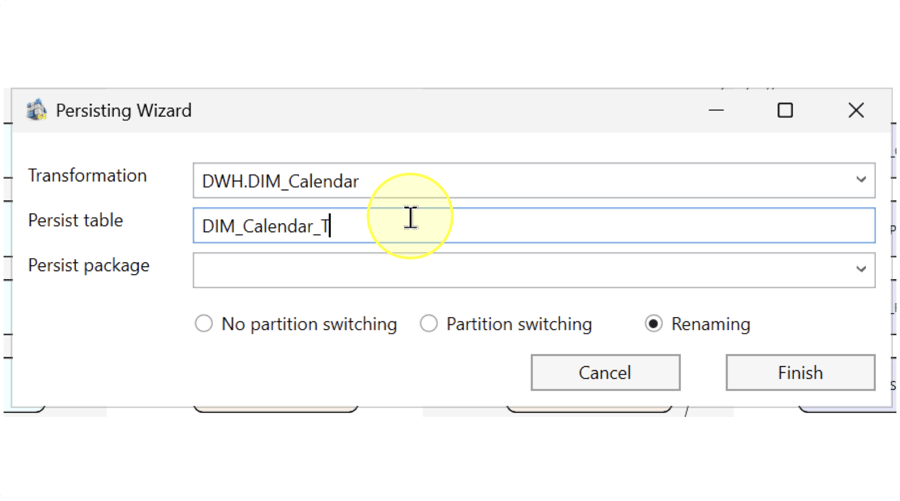
In Persist table, enter the destination table name using your project’s naming convention. The Persisting table stores the physical result when the persisting operation runs. If the name refers to an existing destination, confirm that the intended refresh behavior may affect its data before continuing.
Naming example: DIM_Calendar_T names the destination for the example calendar result. _T is a literal suffix in that name, not a placeholder or required syntax.
Assign the package
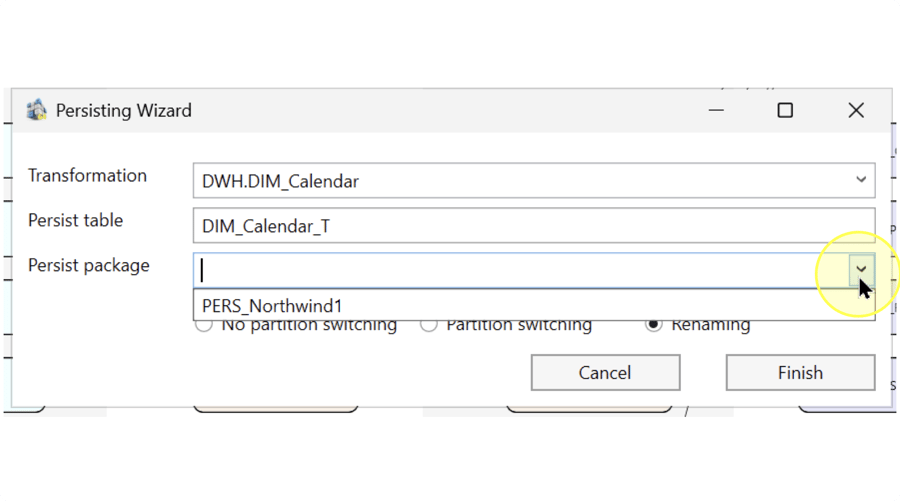
In Persist package, select the existing package that should contain the persisting operation. If the operation belongs in a new package, enter the new package name instead. The package groups persisting operations for execution.
Check that the field contains your intended package name. The open list in the image offers PERS_Northwind1 as an example; the field itself is still empty.
Choose the replacement strategy
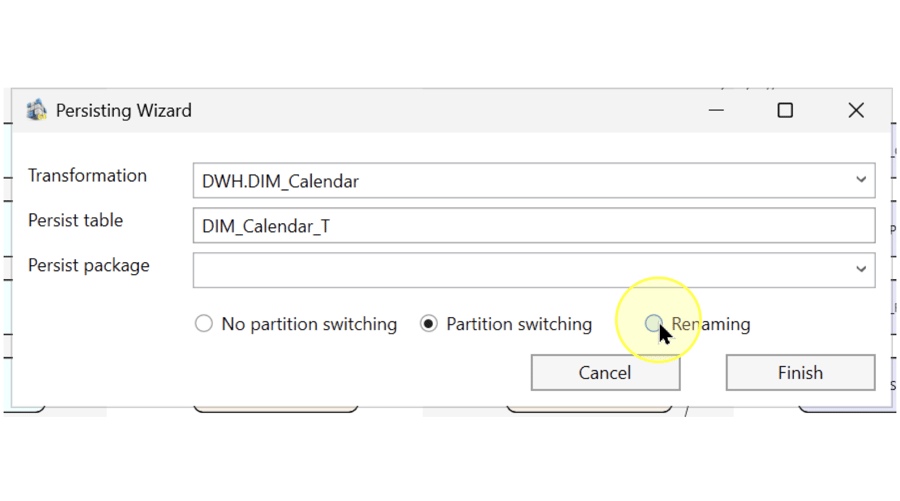
Select one of the three replacement settings. For Full persisting, a later execution replaces the destination data with the Transformation’s current result. Choose how that replacement should happen:
- No partition switching — For Full persisting, truncates the destination table and refills it from the source view. Select this for a direct full refresh without switching or renaming tables.
- Partition switching — Loads a temporary table, switches it with the persisted table after loading, and drops the table containing the old data. Select this when the table structures support switching; a different column order between the tables can cause switching errors.
- Renaming — Loads a temporary table, drops the old persisted table, and renames the new table together with its indexes and constraints. Use this alternative when different column order prevents partition switching.
Confirm that replacing the existing data is intended. These alternatives govern replacement strategy; they do not select the persisting Type. Review that separate setting in Locate and review the definition.
Finish the definition
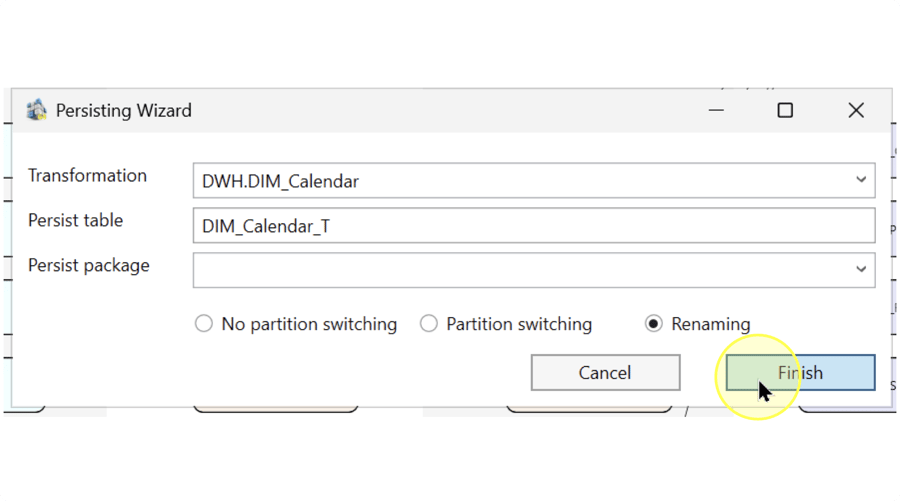
Review Transformation, Persist table, Persist package, and the selected replacement strategy. When they match your intended configuration, click Finish.
Locate and review the definition
In the navigation tree, expand Packages, then Persisting. Locate your new persisting item in the intended package and open it through Edit persisting. You can also open the definition by double-clicking its PP marker in the diagram. This marker identifies the persisting operation.
Check that the definition belongs to the intended Transformation and destination, and that Package matches the assignment in Assign the package. Review Type and the Partition switching and Renaming settings against your intended refresh behavior. Type determines what happens when the operation runs:
- Full — Replaces the persisted result with the source view’s current data, using the replacement strategy explained in Choose the replacement strategy.
- Merge — Compares the source view and persisted table with a
MERGEstatement and processes changes. - Historical — Uses historical information to detect and process changes. It requires a historized view containing the surrogate key
SATZ_IDand validity fieldsDAT_VON_HISTandDAT_BIS_HIST. - Incremental (insert-only) — Adds new rows using the maximum value of the selected Incremental column. This column must be numeric or date/time, and the source data must not be changed or deleted.
- Manual — Uses a custom persisting SQL routine. The Procedure text can be edited for this type; it is read-only for the other types.
Confirm that the saved definition matches the required design. Finishing the wizard and reopening the definition do not verify execution or loaded data.
Expected Results
5.1. The new persisting definition can be located under Packages → Persisting and opened through Edit persisting, as described in Locate and review the definition.
5.2. Its source, destination, package assignment, persisting Type, and replacement strategy match the intended configuration.
5.3. The definition is available for review before execution. This outcome does not establish that the destination contains loaded data. Before a development run, review the persisting SQL routine; validate the destination data after that separate execution.
Decisions and variations
6.1 Existing or new package. Select an existing package or enter a new name in Assign the package. To start from an existing package’s Content area instead of the diagram, use Add persisting content and choose a replacement strategy.
6.2 Replacement strategy and persisting Type. The three wizard choices are alternatives for replacing the Full persisting result; see Choose the replacement strategy. Full, Merge, Historical, Incremental (insert-only), and Manual are separate persisting types, explained in Locate and review the definition. Check both the Type and replacement settings before execution.
Troubleshooting
- Object not found — Check the current Data Warehouse (DWH) project and the Transformation’s schema and name. Confirm that the source is an existing Transformation before returning to Select the source Transformation.
- Configuration differs after reopening — Compare the opened definition with the source, table name, package, and strategy chosen in Confirm the Transformation through Finish the definition. Confirm that you opened the intended persisting item. A closed wizard alone is not evidence that the required definition is present.
- Runtime result differs — Check the persisting Type and SQL routine before assessing the loaded data; saving the definition does not test execution. If partition switching fails because the temporary and persisted tables have different column order, use the Renaming alternative described in Choose the replacement strategy.
