
Create a calendar dimension
Introduction
A calendar dimension provides one row per day for a selected date period, with reusable date attributes for reporting. In AnalyticsCreator, it is a Manual transformation whose output is defined by view text.
Use the Calendar Wizard to create the calendar in your Data Warehouse (DWH) project, name the generated Macro that converts dates into calendar identifiers, and assign the calendar to existing Stars when required by your reporting design. Then check the generated definitions and assignments.
Applicability
Use this workflow when your project needs a new calendar dimension for an agreed date range. It covers creation through ETL → Calendar dimension and verification of the resulting project definitions. Database execution and data loading are separate tasks.
A calendar can be created without assigning it to a Star. If reporting needs several datamart calendars based on an existing core calendar, review the reuse guidance in Decisions and variations before creating another core calendar.
Prerequisites
3.1. An open Data Warehouse (DWH) project that you can edit, with the intended target schema already available.
3.2. A name for the new calendar Transformation and a name for its generated date-to-ID Macro, following your project’s naming convention.
3.3. The start and end dates needed for reporting, including any historical or future dates the calendar must cover.
3.4. The existing Stars that should use this calendar, if Star assignments are part of your reporting design. No Star is required when creating an unassigned calendar.
Steps
Names, schemas, dates, and selected Stars in the screenshots are examples. Use your own project’s values; the interface labels identify the actions to perform.
Open the ETL ribbon
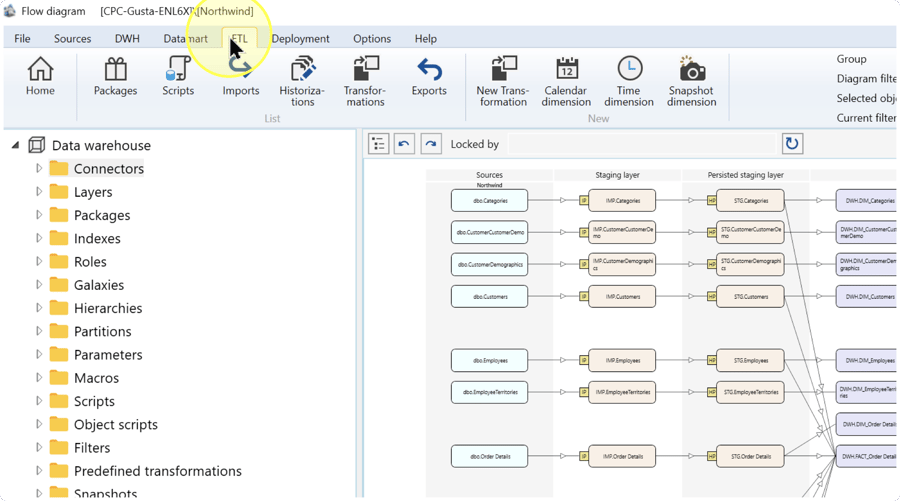
In your open project, click ETL on the toolbar to display the Transformation tools.
Open the Calendar Wizard
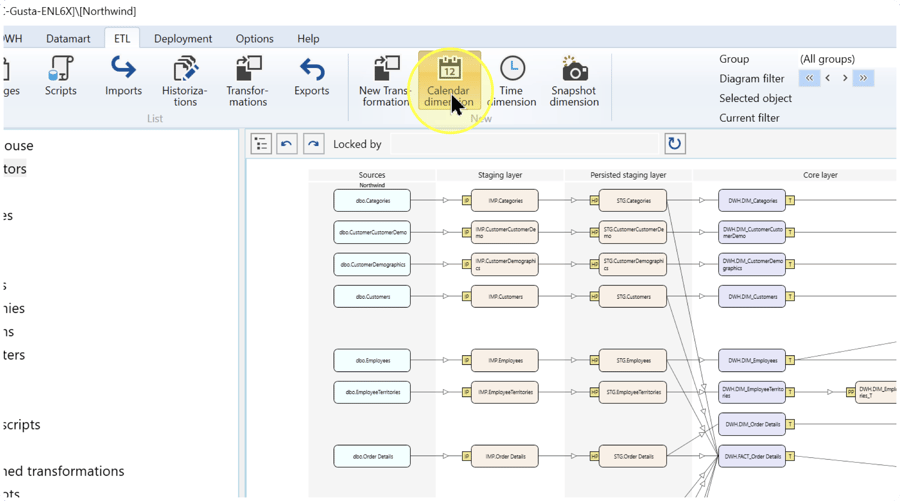
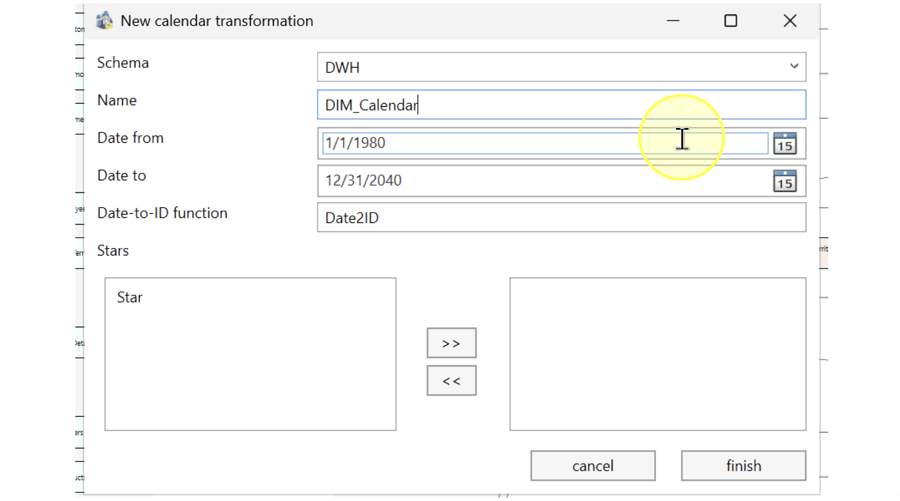
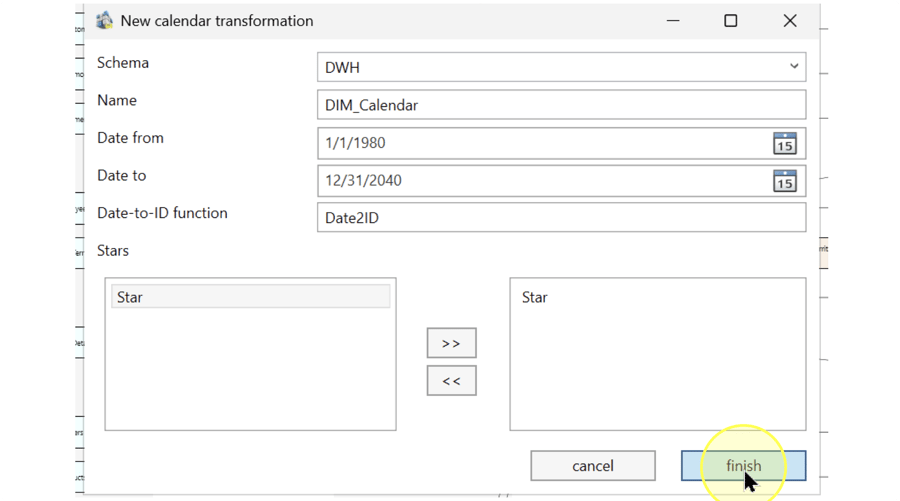
Click Calendar dimension in the ribbon’s New group. The New calendar transformation dialog opens.
Select the target schema
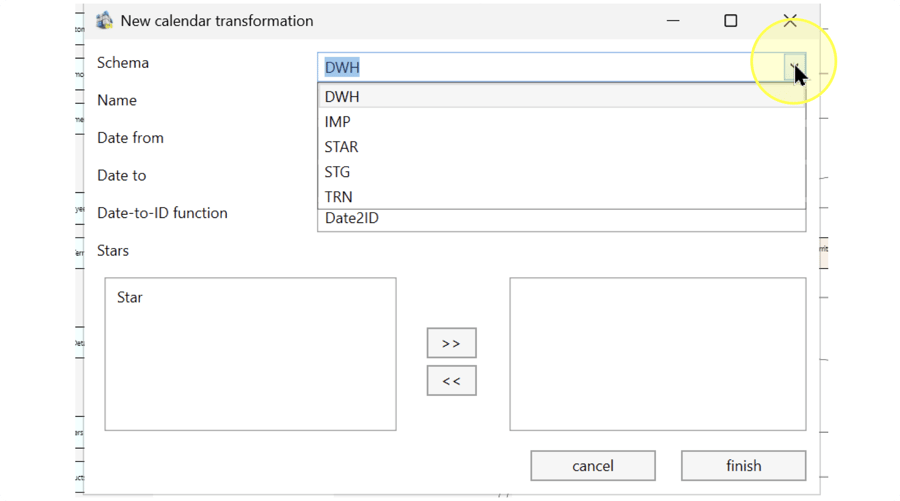
In New calendar transformation, select the database schema for the calendar in Schema. A schema is the namespace that groups database objects. Choose the schema designated for this calendar in your project’s design.
The wizard creates a Manual transformation: its output is defined through view text. Selecting a schema determines where the calendar belongs; it does not select a Transformation type. The pictured DWH value is an example schema identifier.
Name the calendar
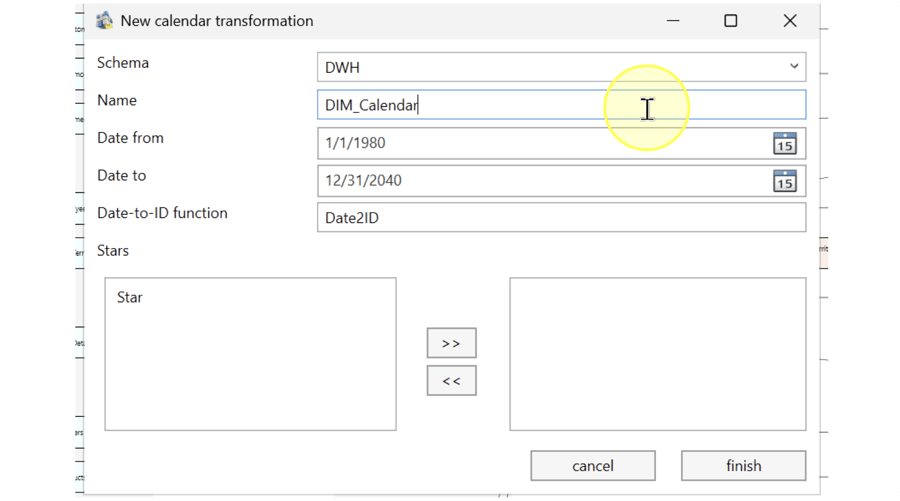
In Name, enter the name for the new calendar Transformation. Use a name that identifies its role in your project.
Naming example: DIM_Calendar identifies the calendar in the screenshots. DIM_ is a literal prefix in that example, not a placeholder or a required naming rule.
Set the date period
Enter the required start date in Date from and the end date in Date to, or select them using the calendar buttons beside the fields. Choose a period that covers the dates needed by the reports using this calendar.
Check the displayed day, month, and year after entering each date. For a period spanning several days, the start date must precede the end date.
Date example: the capture shows January 1, 1980 through December 31, 2040. Those dates illustrate a calendar period; they are not required values or a recommendation for your project.
Name the generated date-to-ID Macro
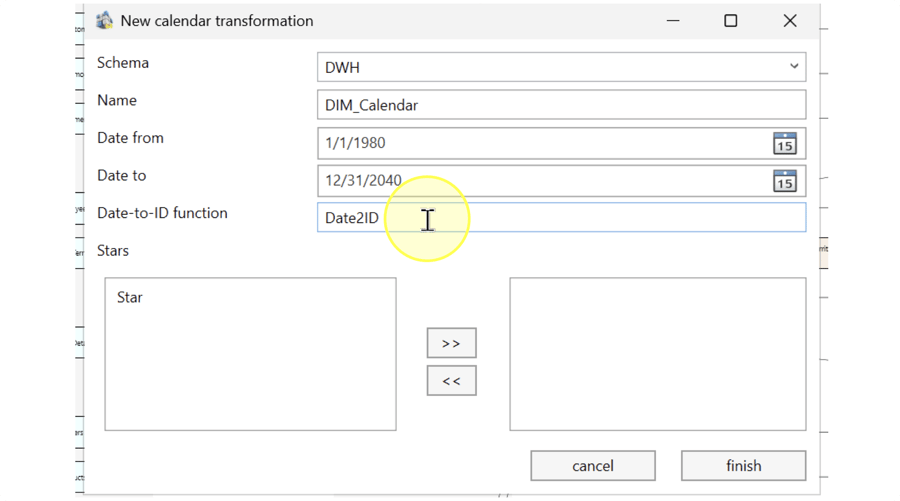
In Date-to-ID function, enter the name of the Macro that the wizard will generate. A Macro is a reusable parameterized statement. This generated Macro converts a date into the corresponding calendar identifier.
This field takes the Macro’s name, not a date expression. Naming example: Date2ID is the Macro name in the capture; use the name intended for your project.
Select the Stars that need the calendar
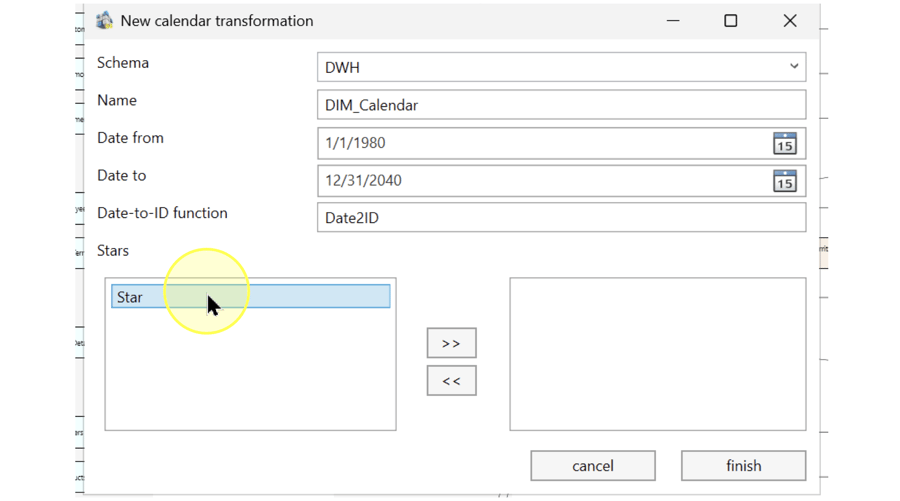
If the calendar should be used as a datamart dimension, select an intended existing Star in the left-hand list under Stars. A Star groups a fact with its related dimensions for reporting. Select it by the reporting model it serves, rather than by its position in the list.
If no Star assignment is needed, leave the right-hand list empty and continue to Review the settings and create the calendar. The item named Star in the capture is an example project object.
Move and check the selected Stars
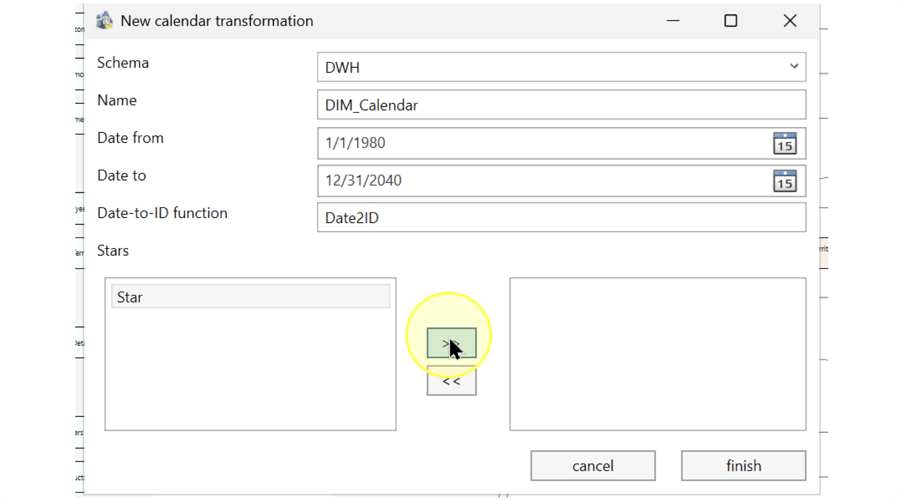
Click >> to move the selected Star into the right-hand list. Repeat the selection and move for each additional Star that needs this calendar. Check that the right-hand list contains all intended Stars.
If a Star should not receive the calendar, select it in the right-hand list and click << to remove it from the assignment list.
Review the settings and create the calendar
Before creating the calendar, review these settings:
- Schema and Name — Identify the intended new calendar Transformation.
- Date from and Date to — Cover the required reporting period and display the intended dates.
- Date-to-ID function — Contains the intended name for the generated Macro.
- Stars — The right-hand list contains only the Stars that should use this calendar, or is empty when no assignment is needed.
Click finish to create the configured calendar and its date-to-ID Macro. Continue with the checks in Check the calendar Transformation and assignments and Check the generated Macro.
Check the calendar Transformation and assignments
Click ETL, then Transformations. Locate the calendar by the schema and name entered in Select the target schema and Name the calendar, and double-click its row to open it.
On Definition, check that TransType, the Transformation type setting, shows Manual. If you assigned Stars, check the calendar’s Stars assignments against the right-hand list reviewed in Review the settings and create the calendar. If you created an unassigned calendar, confirm that it has no Star assignments.
Click the VIEW tab next to Definition to inspect the generated view text. Check that its date boundaries match the period entered in Set the date period.
Check the generated Macro
Click DWH, then Macros. Locate the Macro with the name entered in Date-to-ID function in Name the generated date-to-ID Macro.
To inspect its definition, expand Macros in the navigation tree, right-click that Macro, and select Edit macro. Review its Statement to confirm that the date boundaries agree with the calendar period. These checks verify the generated definitions; testing the returned calendar rows requires execution in the project’s database workflow.
Expected Results
5.1. The calendar exists under the chosen schema and name as a Manual transformation. Its view definition covers the intended date period. Check this in Check the calendar Transformation and assignments.
5.2. The generated date-to-ID Macro exists under the name you entered, with a Statement consistent with that period. Check this in Check the generated Macro.
5.3. The calendar’s Star assignments match the reporting design, including no assignments when none were requested. Check this in Check the calendar Transformation and assignments.
The calendar view is intended to return one row per day for the configured period. Before relying on it for reports, verify the date boundaries and returned rows through your project’s database testing workflow. The existence of the project definitions does not establish that database execution or data loading has succeeded.
Decisions and variations
6.1. Calendar period. Choose the reporting coverage at Set the date period. The 1980–2040 period is an example; the required period depends on your historical and future reporting dates.
6.2. Star assignments. Use Select the Stars that need the calendar when existing Stars should use the calendar as a datamart dimension. Otherwise, leave the right-hand list empty and continue to Review the settings and create the calendar.
6.3. Reuse of an existing calendar. Several datamart calendar dimensions can be based on one core calendar. If an existing calendar already provides the required period, see Assign an existing Transformation to a datamart star for the assignment workflow.
Troubleshooting
- Object not found — Check the current Data Warehouse (DWH) project, the calendar’s schema and name, and the separately entered Macro name. Use the Transformations and Macros lists described in Check the calendar Transformation and assignments and Check the generated Macro to locate the generated objects.
- Configuration differs after reopening — Compare the calendar’s generated date period, Macro Statement, and Star assignments with the settings you intended. For an assignment mismatch, check whether the Star was moved to the right-hand list before clicking finish. For a date mismatch, check the entered day, month, and year. Correct the affected definition through your project’s editing workflow and repeat the checks in Expected Results.
- Runtime result differs — Compare the date being converted with the calendar period and inspect the generated Macro Statement. Review the calendar’s view definition and test the relevant dates through your project’s database workflow. A saved definition alone does not verify returned rows.
