
Create and save a Regular transformation
Introduction
Create a Regular transformation that takes the intended input data, applies the configured column mappings and rules, and exposes the required output through a generated view. This guide takes you through the wizard, review in the editor, and saving the definition in your Data Warehouse (DWH) project.
The intended result is a saved transformation whose inputs, columns, history behavior, and generated SQL can be checked. Saving the definition is separate from running persistence or validating data values.
Screenshot examples: names, schemas, fields, selected rows, and checkbox states illustrate the interface. Use the objects and settings required by your own project; no pictured calendar object is required.
Applicability
Use these steps to create a Regular transformation through Transformation Wizard and the transformation editor in the AnalyticsCreator desktop application. The workflow covers input selection, history, related tables, fields, Stars, rules, and configuration for persistence when needed.
The interface version is not identified in the captures. The three intermediate wizard screenshots come from the Manual-transformation walkthrough and illustrate shared settings. The editor type for this task must remain Regular.
Prerequisites
3.1. An open, editable development Data Warehouse (DWH) project, a known target database, and the target schema for the new transformation.
3.2. Existing input objects with known column names, data types, keys, and history behavior, plus the required output columns and a technical name for the transformation.
3.3. Existing relationships for any additional input tables. For historical inputs, the key and validity fields needed by the intended history strategy. For snapshot-based output, an existing snapshot or Snapshot group whose dates match the requirement.
3.4. The required unknown-member behavior and, when persistence is needed, a destination table name and an existing persistence package. Any Stars and Predefined transformation rules to use must already be identified in the project.
Steps
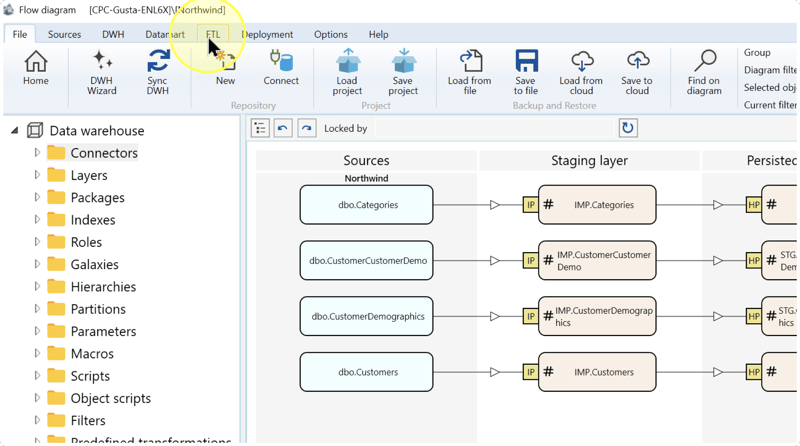
Open the ETL ribbon
Click ETL on the toolbar to open the ribbon for data-processing workflows.
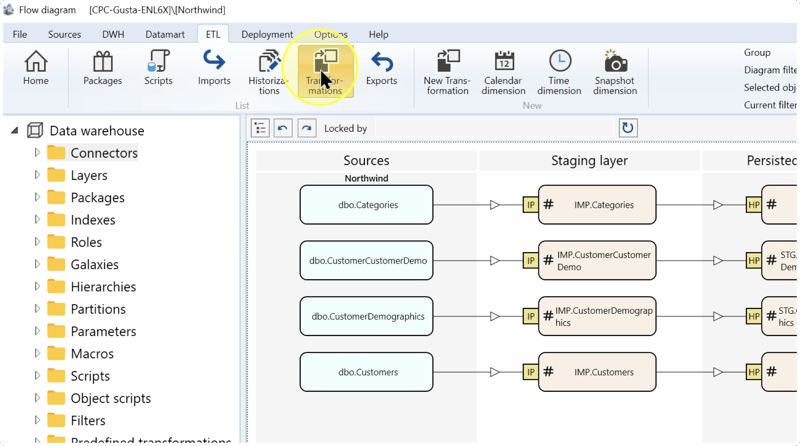
Open the Transformations list
On the ETL ribbon, click Transformations in the List group. The list displays existing transformations.
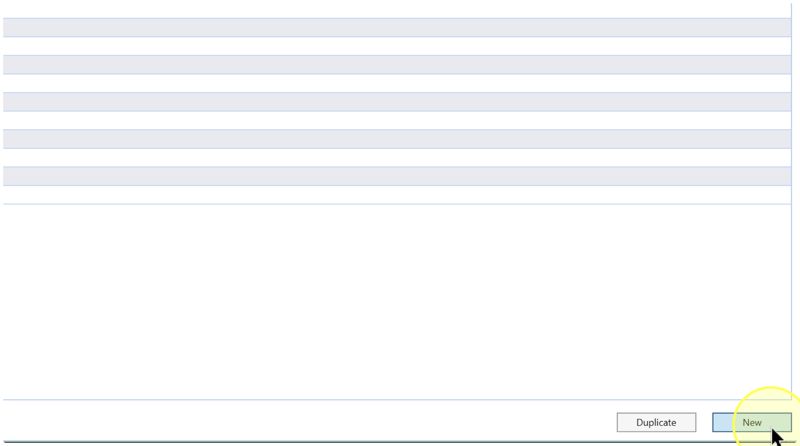
Start a new transformation
In the transformations list, click New.
Expected Results: the Transformation Wizard opens.
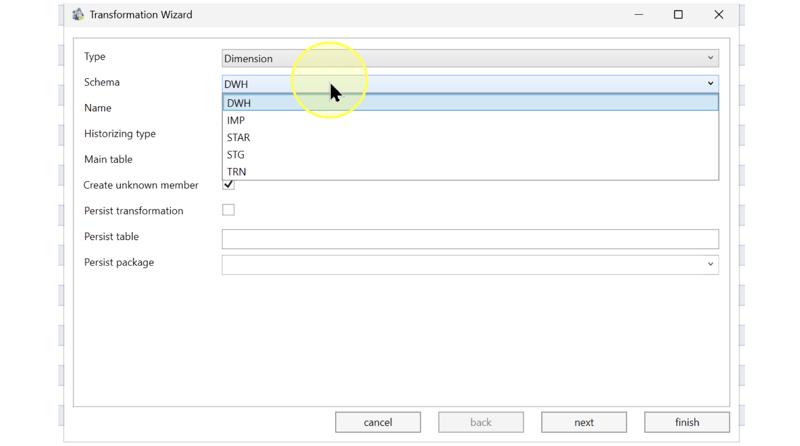
Select the type and schema
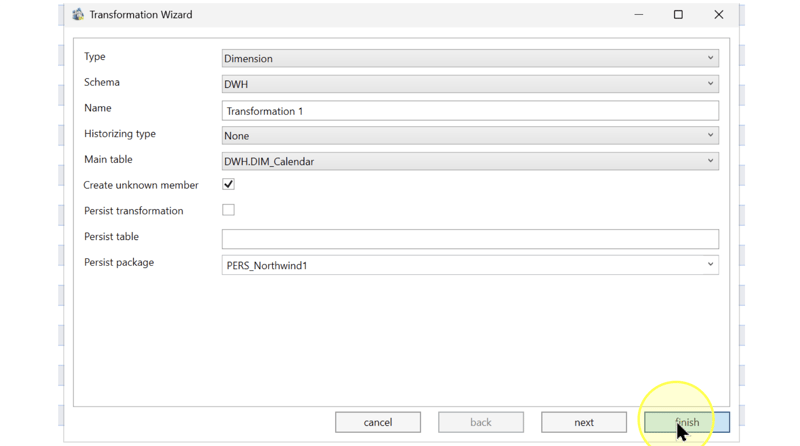
On the first page of Transformation Wizard, select Type and Schema for the intended output. Use Dimension, Fact, or Other for this Regular-transformation workflow.
- Type — Select Dimension for descriptive business data, Fact for measurable events or transactions, or Other for another output. All three choices create a Regular transformation. The editor’s TransType setting is checked later.
- Schema — The namespace for the new transformation. Select the target schema required by your Data Warehouse (DWH) project. The pictured
DWHis an example schema identifier, not a required value.
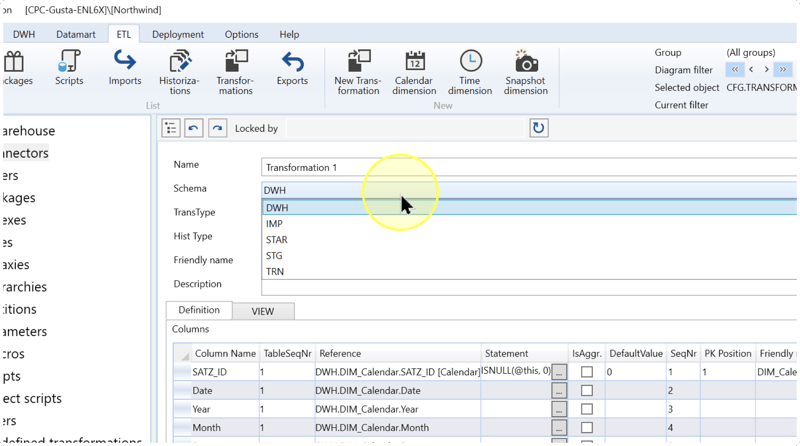
Schema examples: IMP, STG, and TRN appear in the selection list. The corresponding layer terms are Staging Layer (IMP), Persisted Staging Layer (STG), and Transformation Layer (TRN), but each schema’s actual assignment depends on your project. STAR is another pictured schema identifier. Select the intended target schema rather than matching the image.
Name the transformation and select its input
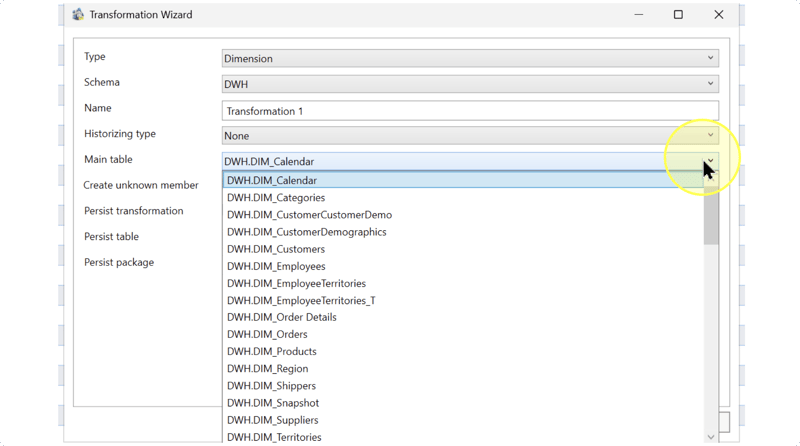
Enter Name, select the intended Main table, and select Historizing type for that input’s history and the required output.
- Name — The transformation’s technical name. Enter the name required by your project’s naming convention and check that it is not already used in the target schema.
Transformation 1is an example. - Historizing type — Controls how the transformation represents historical versions of the main input. Select None for non-historized data. For historized data, select FullHist for the full available history, SnapshotHist for historical data restricted to specified snapshots, Snapshot to combine historical data at predefined snapshot dates, or CurrentOnly for current records. The same current-records strategy is also named ActualOnly; select the label available in your interface. A snapshot is a named definition of the dates to use. FullHist and SnapshotHist require historical key and validity-field mappings; SnapshotHist and Snapshot also require an existing snapshot or group. Complete these checks in Confirm the editor settings and Review column mappings and generated SQL.
- Main table — The primary input that supplies the transformation’s starting data. Select it by its schema and object name, using the input whose columns and history match your intended output.
DWH.DIM_Calendaris a calendar example;DIM_is a literal prefix in that example name.
Check: the selected input has the fields required for the output. For a history-based result, identify its historical key and validity dates now. For a snapshot-based result, identify the existing snapshot or group to assign after the wizard.
Configure unknown-member and persistence settings
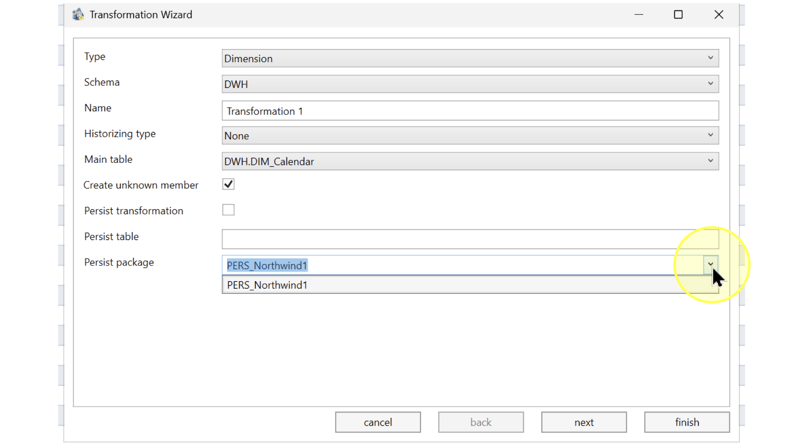
Set Create unknown member and Persist transformation for the required output. If persistence is required, enter Persist table and select Persist package before continuing.
- Create unknown member — Select this checkbox when the output needs a special row with surrogate key
0to represent an unknown or unmatched member; otherwise clear it. A surrogate key is a system-assigned identifier. This setting applies to Regular transformations. - Persist transformation — Select this checkbox when the transformation result must be stored in a table, then configure its destination and package. If a stored result is not required, clear the checkbox. Saving this definition does not run the persistence package.
- Persist table / Persist package — For persistence, enter the destination table name in Persist table and select the intended SQL Server Integration Services (SSIS) package in Persist package. Use the destination and existing package specified for your project. These settings identify where and how to persist the output; Main table identifies the input.
Select related tables and join behavior
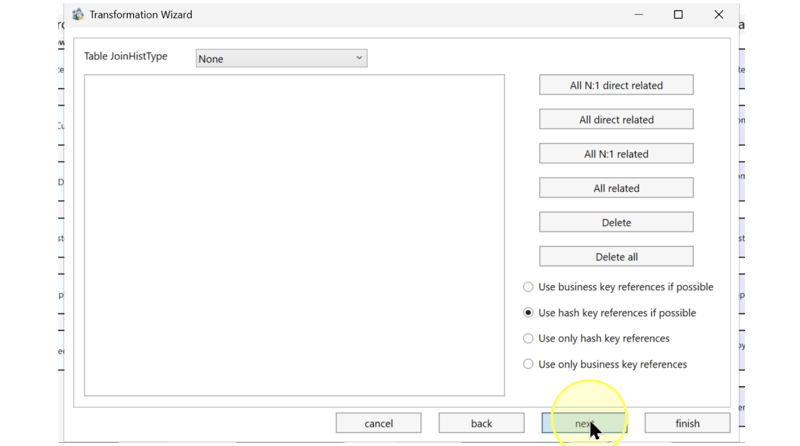
Click next to open the related-table page. If the output needs additional inputs, select Table JoinHistType and the reference choice for those relationships, then click the related-table button whose scope matches your design. Inspect every table added to the list. If the main input is sufficient, leave the related-table list empty.
- Table JoinHistType — Controls how historical versions are matched when joining tables. Select None for an input without historical data. For a historical input, select Actual to use current records, Historical_from for records valid at the linked record’s validity start, Historical_to for records valid at its validity end, or Full to retain full historical interval matching. Choose the behavior required by the relationship. This setting is separate from the transformation’s Historizing type.
- All N:1 direct related — Click this button to include all tables directly related to the main input by a many-to-one relationship. N:1 means that many records relate to one record, such as many orders to one customer.
- All direct related — Click this button to include all directly related tables, regardless of cardinality. Cardinality describes how many records can relate on each side.
- All N:1 related / All related — These buttons also include indirect relationships through other tables. All N:1 related limits the selection to many-to-one relationships; All related includes relationships regardless of cardinality. Review the whole resulting list.
- Delete / Delete all — To remove an unwanted table from the wizard selection, select its entry and click Delete. Click Delete all to clear the related-table selection. These actions remove wizard entries, not database tables.
- Business-key and hash-key references — A business key identifies an entity in business data; a hash key is derived from values by a hash function. Select the reference choice that matches your existing relationships. Use hash key references if possible prefers available hash-key relationships over business-key relationships. The other choices are Use business key references if possible, Use only hash key references, and Use only business key references. Use an “only” choice when the design requires that key type and the required references exist. Check the resulting joins in the editor before saving.
Relationship example: All N:1 direct related can include a Customers table when Orders has a many-to-one relationship to it. The button includes every qualifying direct relationship, so remove any unwanted entries. When the list matches the intended inputs, click next.
Select fields and set their names
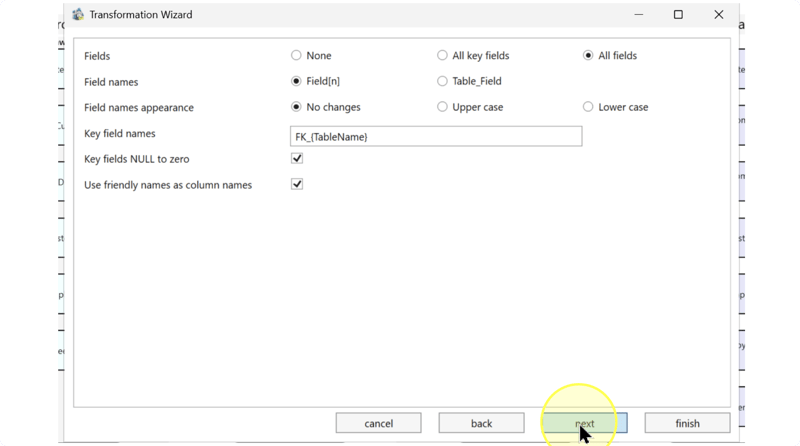
On the field-settings page, select the required field scope and naming choices. Enter the key-field naming template and set the two checkboxes according to the required output.
- Fields — Select All fields when the initial output needs descriptive fields as well as keys. Select All key fields when the output needs only key fields. None includes no input fields and requires a separate column-definition workflow. For the wizard-generated mappings reviewed in this guide, select All fields or All key fields according to the output you need.
- Field names — For duplicated field names, select Field[n] to add a sequential number or Table_Field to add the table name as a prefix. Use the naming pattern required by the consumers of this output.
- Field names appearance — Select No changes to preserve field-name casing, Upper case for uppercase names, or Lower case for lowercase names.
- Key field names — The naming template for key fields. The pictured
FK_{TableName}combines the literal prefixFK_with the placeholder{TableName}. Retain the placeholder’s spelling, capitalization, and braces when using this template, and check the generated names in the editor. - Key fields NULL to zero — Select this checkbox when missing key values, represented by SQL
NULL, should become0; otherwise clear it. Zero does not establish that a matching row exists. Check any unknown-member requirement separately. - Use friendly names as column names — Select this checkbox to use defined friendly names instead of technical field names. A friendly name is a readable display name. Clear the checkbox when the output must retain technical names.
Naming example: Upper case changes CalendarDate to CALENDARDATE. Use that choice only when uppercase output names are required. Review all field settings, then click next.
Assign Stars and select predefined rules
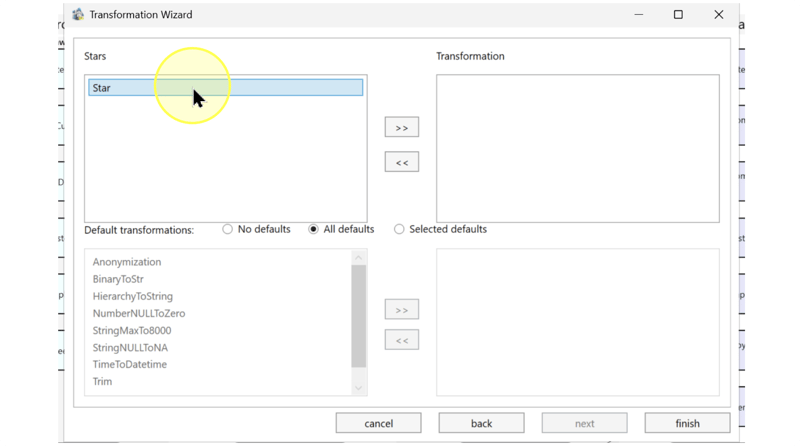
On the final wizard page, select each required entry in Stars and click the upper >> button to move it to the right-hand Transformation list. To remove an assignment, select it on the right and click the upper << button. Leave that list empty when no Star assignment is needed.
Under Default transformations, choose whether to apply reusable Predefined transformation rules. These rules apply expressions to fields according to their configured criteria.
- Stars — A Star groups a Fact with related Dimensions. Assigning a Star in this wizard requests a datamart Dimension or Fact for that Star. Select only the Stars that should use this transformation.
- No defaults — Select this choice when no Predefined transformation rules should be applied.
- All defaults — Select this choice when all configured Predefined transformation rules are required. Review the project’s rules before using it.
- Selected defaults — Select this choice when only particular Predefined transformation rules are required, then move those rules into the lower right-hand list. Check every selected rule against the intended output.
For Selected defaults, select a required rule in the lower left-hand list and click the lower >> button. Repeat for the required rules. Select an unwanted rule on the right and click the lower << button to remove it.
Rule example: a Trim rule can apply LTRIM(RTRIM(FieldName)) to varchar and nvarchar text fields to remove leading and trailing spaces. Check the actual project rule, because existing rules can be redefined. To inspect a rule before using it, follow Apply a Predefined transformation rule.
Review the wizard and finish
Use back to review earlier pages, and next to return to the final page. Confirm the name, schema, main input, history behavior, unknown-member and persistence settings, related inputs, fields, Stars, and rules. Click finish when they match the intended output.
Expected Results: the transformation editor opens with the starting definition.
Confirm the editor settings
In the transformation editor, check Name and Schema. Correct either value if it does not identify the intended output.
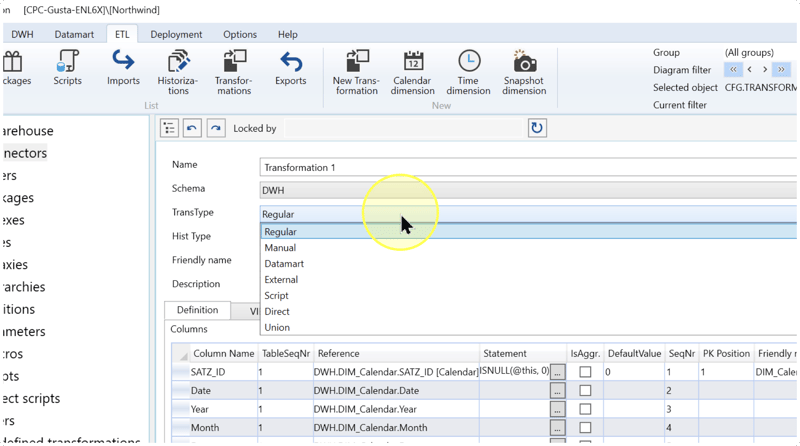
Select or retain Regular in TransType, the transformation-type setting. A Regular transformation uses AnalyticsCreator-managed inputs, joins, columns, filters, and references to generate a view: a named database query. The Definition tab holds these settings, and VIEW shows the generated SQL.
Check Hist Type against the history behavior selected in Name the transformation and select its input. When a readable display name is needed, enter Friendly name. Enter a Description explaining the intended output. A friendly name and description do not replace the technical Name. Example: Calendar attributes can describe a transformation that actually produces calendar attributes.
For SnapshotHist or Snapshot, use the editor’s right-hand Snapshot group / Snapshot grid to select the intended existing snapshot or group. Check its dates or member snapshots against the reporting requirement. Follow Choose a Transformation historization type and assign snapshots for the assignment workflow. This selects existing definitions; creating a snapshot dimension is a separate task.
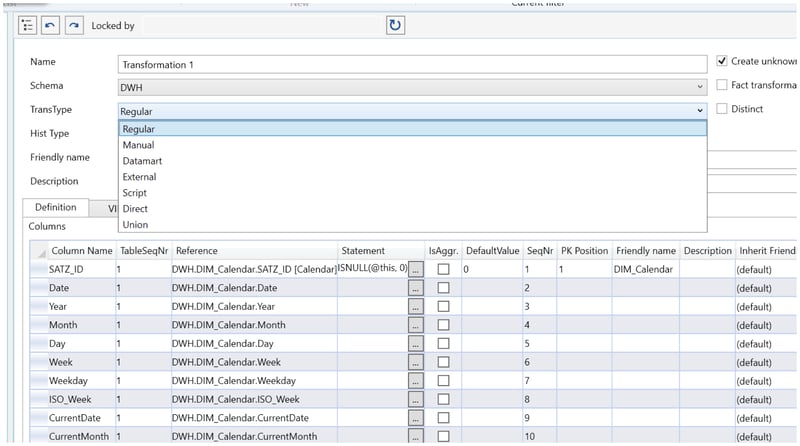
Review column mappings and generated SQL
On Definition, inspect the Columns grid. For each output column, check its name, open its Reference cell, and select the intended input field when the mapping needs correction. Compare the input’s meaning and data type with the required output.
- Column Name — The output column’s name. Check it against the required output and naming convention. The calendar names shown in the screenshot are examples.
- Reference — The input field that supplies the output column. Open this cell’s selection list and select the field with the required meaning and data type. Mapping example: a calendar Date output can reference
DWH.DIM_Calendar.Datewhen that is the intended input. - Statement — The expression applied to the field. For a direct field mapping, review the Reference and the generated SQL together; the calendar example shows blank Statement cells for several direct references. Retain an existing expression when it already produces the required calculation.
- ISNULL(@this, 0) — The key-field expression shown in the screenshot replaces a
NULLvalue with0. The placeholder@thisrefers to the current field by default; the project’s Trans Field Alias setting can change that placeholder. Retain or enter this expression only when zero is the intended replacement and the configured alias is@this. - Other grid headings — The grid also shows TableSeqNr, SeqNr, PK Position, IsAggr., DefaultValue, and Friendly name. Keep the generated values unless your transformation design calls for a specific change. The displayed key and sequence values are examples, not values to reproduce.
History check: for FullHist or SnapshotHist, the output must expose the historical surrogate key, validity start, and validity end, each mapped to the corresponding input field. The sample identifiers SATZ_ID, DAT_VON_HIST, and DAT_BIS_HIST represent those roles; use your input’s actual names. A calendar key in the screenshot is not evidence of complete history mappings.
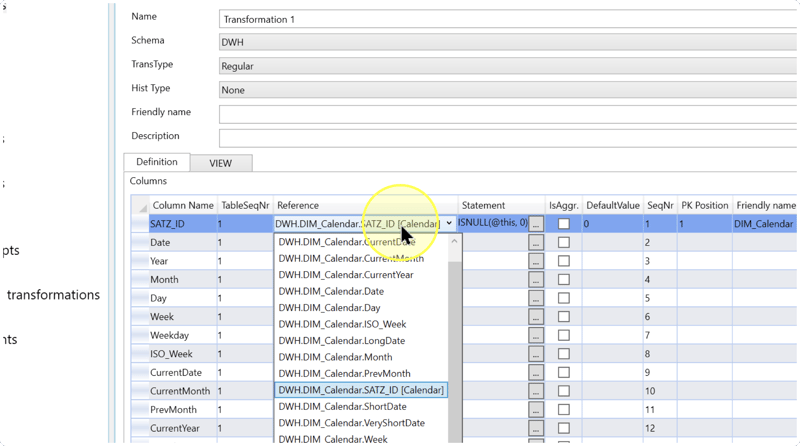
Click VIEW to inspect the generated SQL. Check that it uses the intended inputs, joins, output names, expressions, and history behavior. For each join, compare the key fields and any history conditions with the relationship selected in Select related tables and join behavior. Return to Definition for changes. If a required column or relationship is missing, correct the definition before saving.
Save and reopen the definition
Before saving, confirm that the definition has the intended name, schema, TransType = Regular, inputs, columns, and history behavior. Check any configured persistence and Star assignments.
Confirm the target database and the Data Warehouse (DWH) project’s Transformations Createviews setting with the project owner: 0 = No, 1 = Compile only, and 2 = Yes. This determines whether saving also compiles or creates the database view. Saving does not run a persistence package.
Click Save. If an error appears, use the message to identify the affected object or expression and resolve it before treating the save as successful.
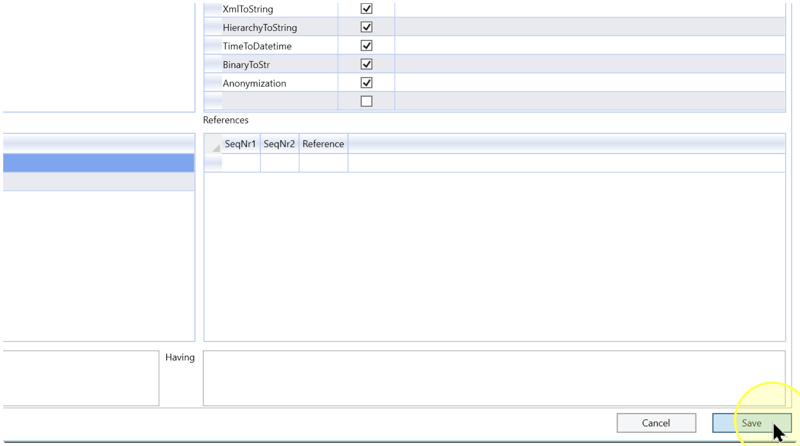
Return to ETL → Transformations and double-click the saved entry, identified by its name and schema. Compare the reopened settings with Expected Results.
Expected Results
The transformation is saved and can be reopened from the Transformations list. Verify the definition against your intended output:
5.1. Name and Schema identify the intended transformation, and TransType is Regular.
5.2. Hist Type, input-field references, expressions, and output column names match the design. For historical or snapshot-based output, the required field mappings and snapshot or group assignments are present.
5.3. The generated SQL on VIEW uses the intended inputs and joins. Any persistence settings and Star assignments match the choices made in the wizard.
5.4. Saving and reopening establish that the configuration is stored. Database view creation depends on Transformations Createviews. Confirming data values or a persisted result requires a separate query or processing test in the development environment.
Decisions and variations
6.1 Regular or Manual: use this workflow when AnalyticsCreator should generate the view from configured settings. If the task requires maintaining the view text directly, use Create and save a Manual transformation.
6.2 Historical or non-historical output: choose the main history strategy in Name the transformation and select its input. A history strategy for the transformation and a history strategy for joining an input are separate decisions; select the latter in Select related tables and join behavior.
6.3 Stored output or view-based output: configure persistence in Configure unknown-member and persistence settings when a table must store the result. For view-based output without persistence, clear Persist transformation. Package execution is separate from saving the definition.
6.4 Additional inputs and rules: include only the relationships needed for the output, select the field scope in Select fields and set their names, and review Stars and reusable rules in Assign Stars and select predefined rules. A rule can change values even when the field reference remains the same.
Troubleshooting
- Expected object or setting is missing — Check the current project and identify the object by schema and name. For a missing input field, check Main table and the related-table selection. For a missing snapshot or rule, check that its definition exists in this project. If an interface label differs, compare its function with the relevant step; CurrentOnly and ActualOnly identify the current-records history choice.
- Result differs from the design — For unexpected column names, review the field scope, duplicate-name handling, casing, and friendly-name choice in Select fields and set their names. For unexpected zero values, review Key fields NULL to zero, the column Statement, and any applied rules. For incorrect history or joins, check Hist Type, input keys, validity fields, and snapshot assignments. Inspect the generated SQL, correct the definition, save, and reopen it. If Save reports an error, follow the reported cause; do not assume the new configuration was stored.
