
Introduction
Use a calendar macro in a transformation column to apply a reusable expression to that column's input. This guide shows how to enter the macro call, save the definition and inspect the resulting SQL. The worked example uses Date2ID with OrderDate; any column compatible with the selected macro can be used.
Applicability
This workflow uses the transformation editor's Definition and VIEW tabs. Use the Statement dialog to enter the expression directly, or use Add calendar macro when the default-macro command is enabled.
Prerequisites
- An existing transformation containing the input table and a column compatible with the calendar macro.
- The calendar macro name, the input column and its table alias. Check the alias in the transformation's Tables grid.
- For the Add calendar macro alternative, a non-empty DEFAULT_CALENDAR_MACRO parameter. The direct Statement-editor route uses the macro name you enter.
Steps
Open the transformation column
In the intended Data Warehouse (DWH) project, open ETL.
The ETL ribbon provides access to transformations. 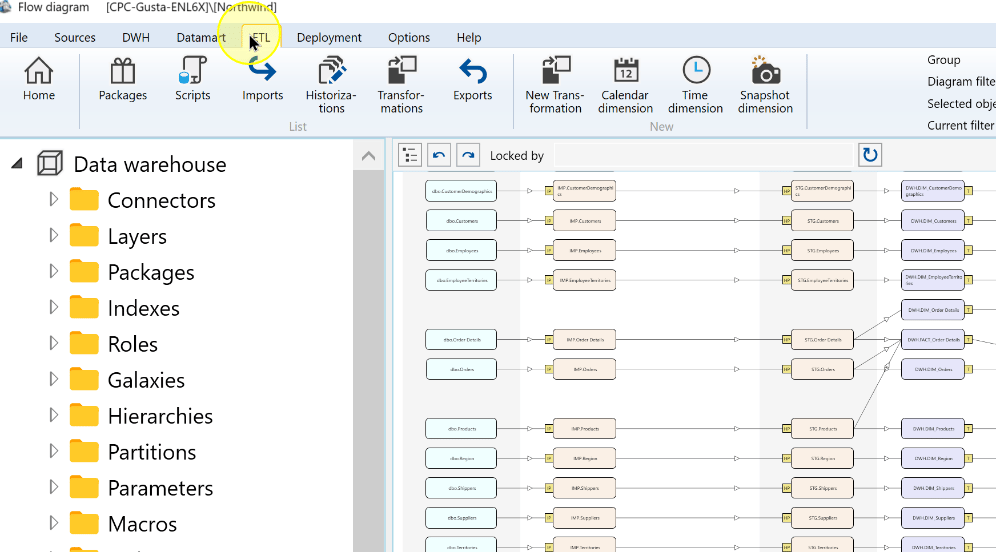
Click Transformations to open the transformation list.
The Transformations command on the ETL ribbon. 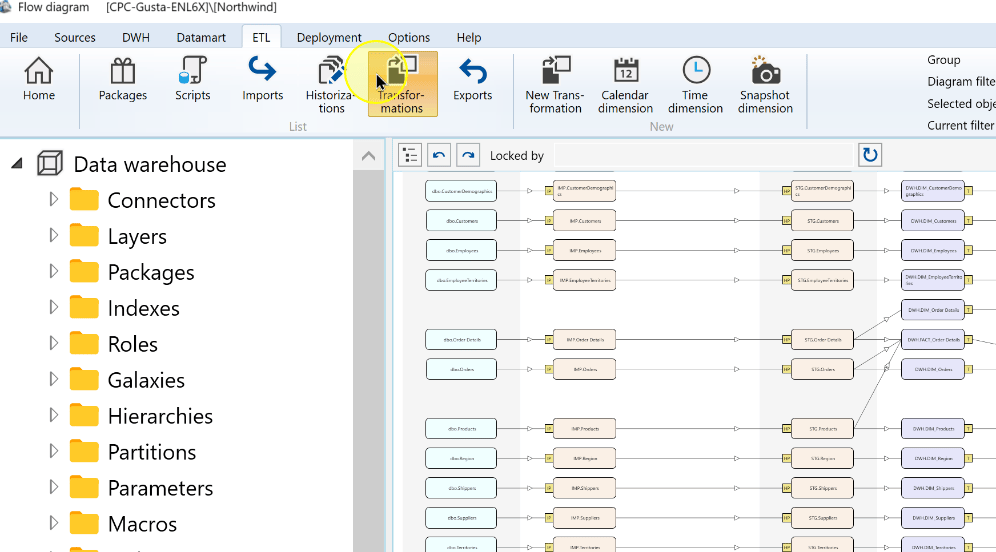
Open the transformation containing the input column. The example uses DIM_Orders.
The DIM_Orders transformation selected in the list. 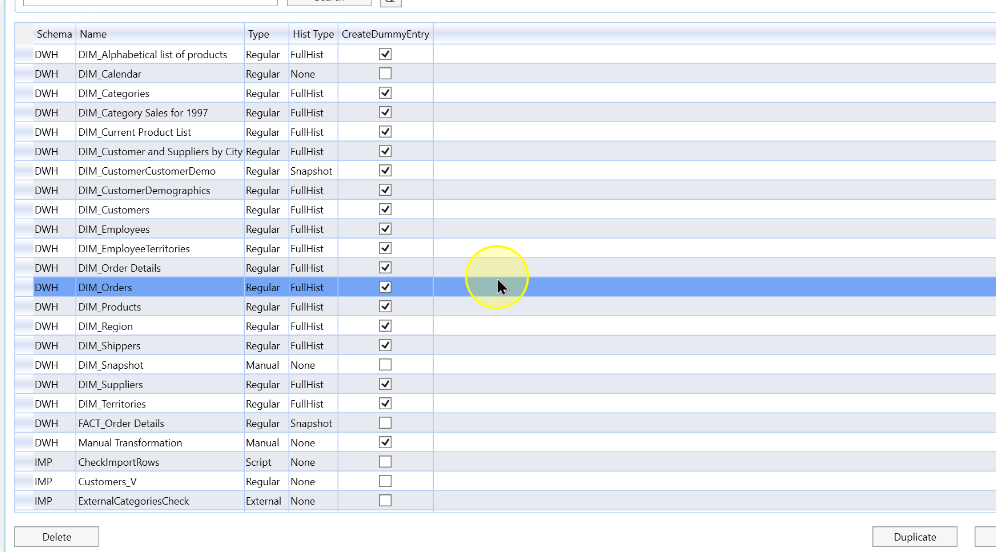
On Definition, select the column to edit and click its Statement ellipsis control. In the example, the selected column is OrderDate. The Tables grid below identifies its input table and the T1 table alias.
The OrderDate column selected in the transformation Definition grid. 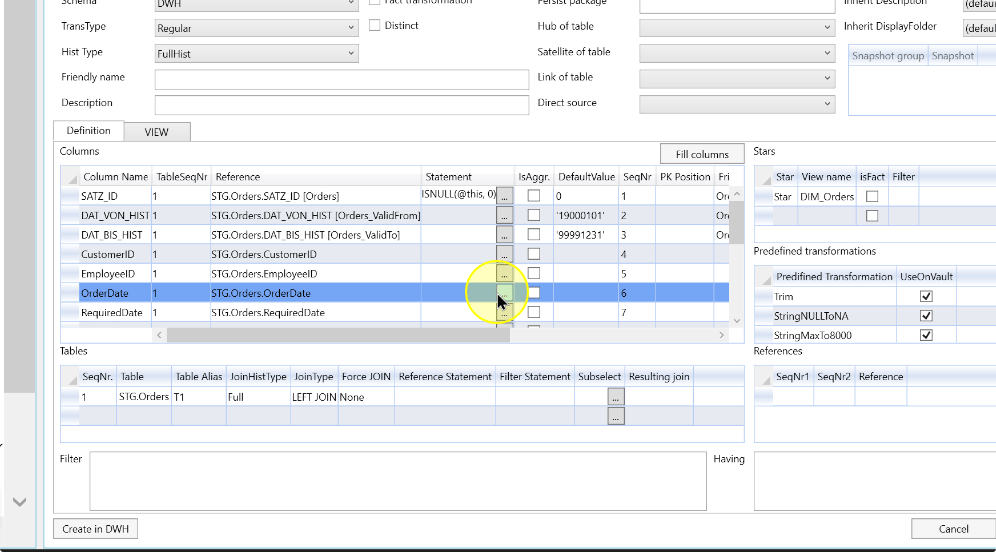
Enter and save the calendar expression
In the Statement dialog, enter or update the macro call using the actual input reference. The complete expression shown for this example is:
@Date2ID([T1].[OrderDate])Date2IDis the macro name after@.T1is the table alias shown in the transformation's Tables grid.OrderDateis the input column passed to the macro.
Replace these example identifiers with the macro, alias and compatible column used by your transformation. Preserve the call's parentheses and the qualified column reference.
The Statement dialog containing a calendar macro around the OrderDate reference. 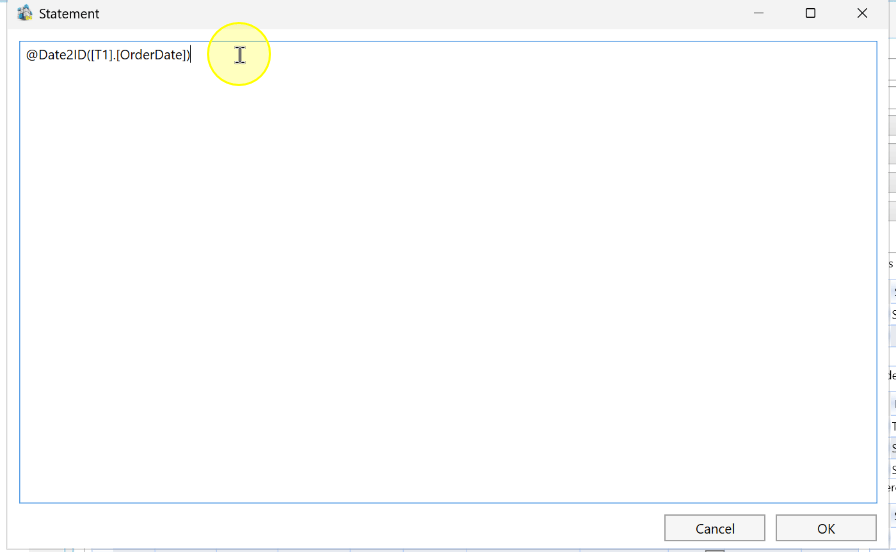
Check the macro name and the complete table-alias/column reference, then click OK to return to the transformation definition.
The calendar expression in the Statement dialog with its OK control. 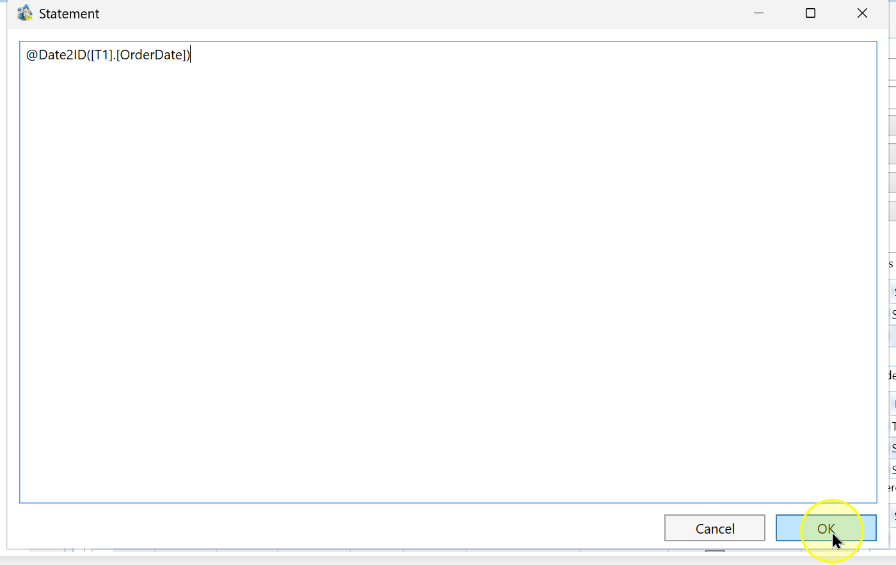
Confirm that the expression appears in Statement on the intended column, then click Save.
The column expression in the transformation definition and its Save control. 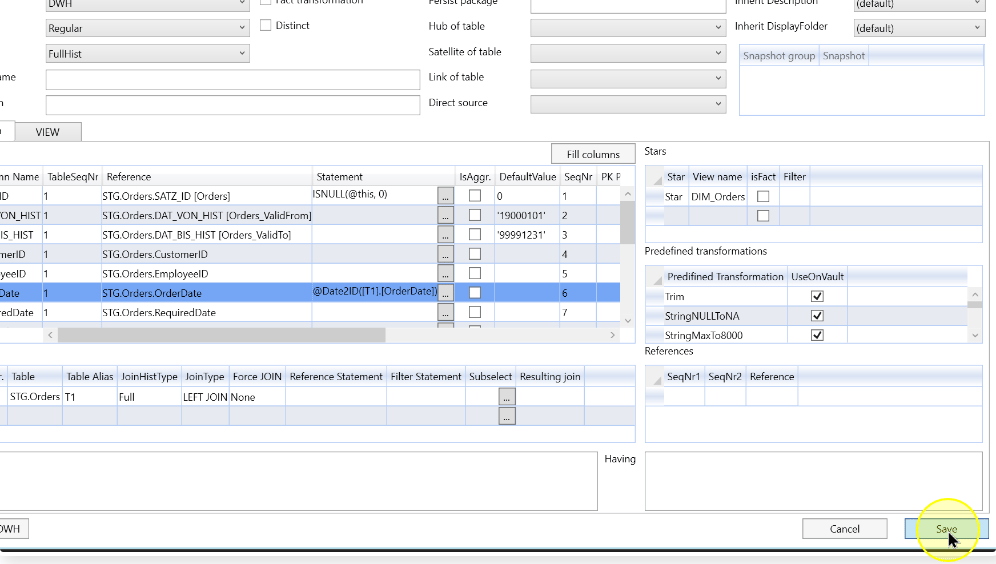
Inspect the transformation SQL
Open VIEW and check that the calendar call has expanded into the intended SQL expression. If an unresolved macro name, table alias, or column placeholder remains, correct the transformation definition and inspect VIEW again before creating or executing the transformation. Do not copy
@ActualMacroName([TableAlias].[Column])from the example SQL.VIEW tab showing transformation SQL; the displayed macro placeholder requires review. 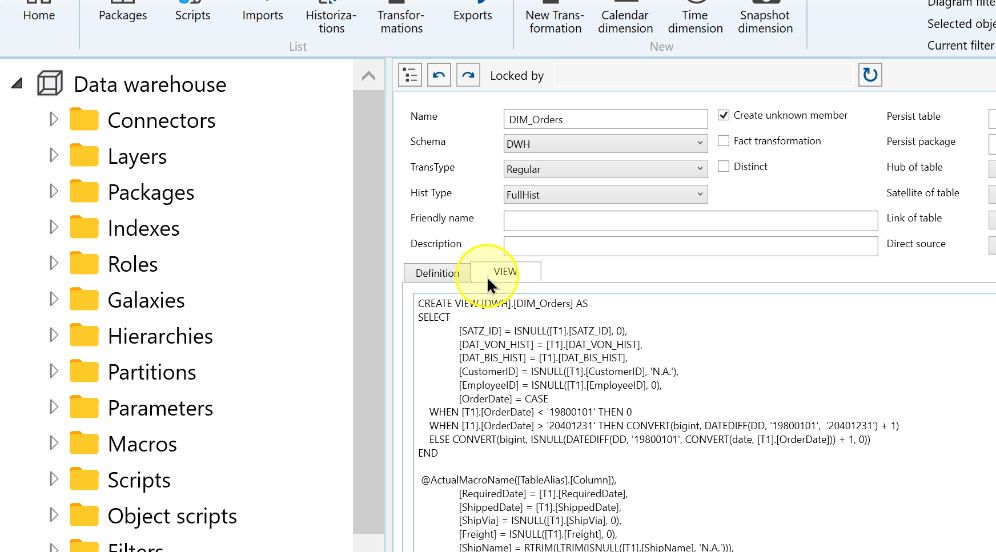
Review the lower part of the SQL as well as the macro expression. Check the input table, aliases and referenced columns against the transformation definition before creating or executing the transformation.
The lower portion of example transformation SQL in the VIEW tab. 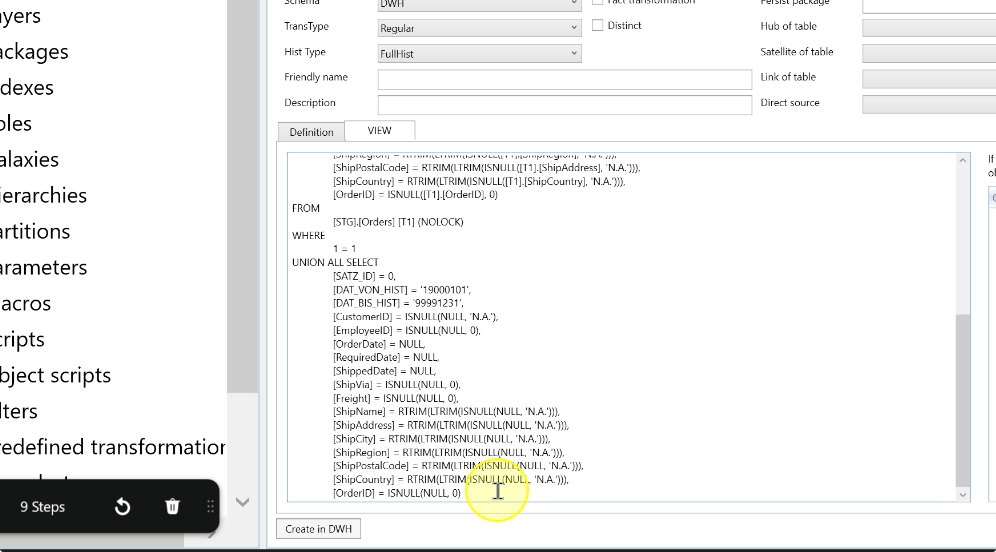
Choose Save after reviewing any intended edits.
The VIEW tab and Save control during review of the example transformation SQL. 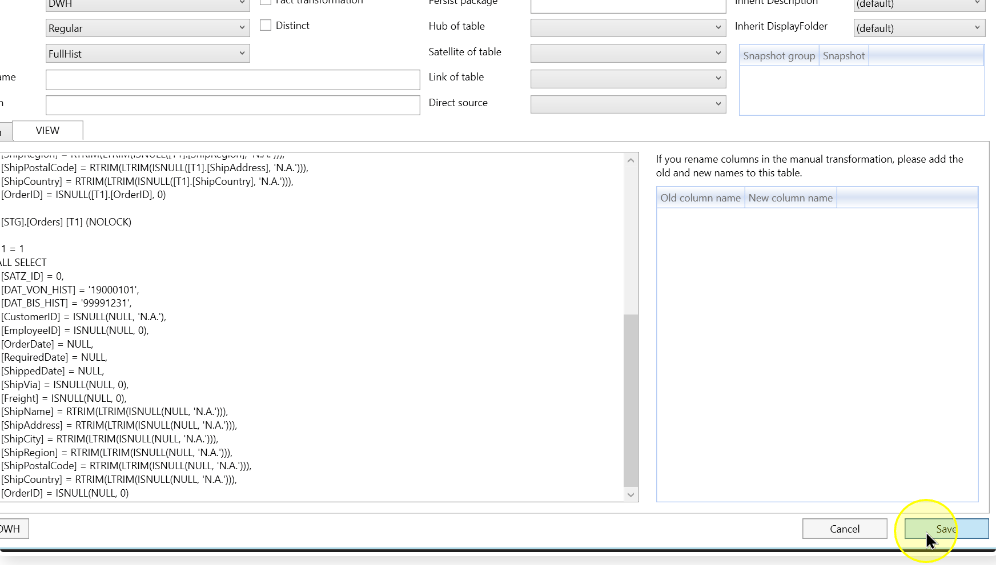
Alternative: use Add calendar macro
The command requires a non-empty DEFAULT_CALENDAR_MACRO parameter. Use this route when you want to apply the configured default macro instead of typing the call directly.
On Definition, select the compatible column to edit. Open that column's context menu and choose Add calendar macro.
Open the selected column's Statement dialog and inspect the resulting expression. Compare its macro name, table alias and column reference with the intended input before accepting it.
Click OK, confirm the expression on the intended column and click Save. Inspect VIEW using the SQL checks above.
Expected Results
- Reopen the intended transformation and inspect the selected column on Definition. Its Statement contains the intended macro call, in the form
@MacroName([TableAlias].[Column]), with actual identifiers. - For the worked example, the saved expression is
@Date2ID([T1].[OrderDate]). Compare it with the T1 input and OrderDate column in the definition. - On VIEW, review the expanded expression and the rest of the SQL. Resolve any remaining macro placeholder or incorrect input reference before creating or executing the transformation.
These checks establish the saved expression and the SQL you inspected. They do not establish that the transformation has executed or produced correct data.
Decisions and variations
- Direct entry or default command: the Statement dialog lets you enter the specific macro call. Add calendar macro uses the configured default and requires a non-empty DEFAULT_CALENDAR_MACRO.
- Choosing the input: use a column compatible with the macro. OrderDate is the example, not a restriction on which column can be used.
Troubleshooting
- Add calendar macro is unavailable: check that DEFAULT_CALENDAR_MACRO has a non-empty value, then return to the intended column.
- The saved statement uses the wrong input: compare the table alias in the Tables grid and the column reference with the expression in Statement. Correct it, click OK and save the definition.
- VIEW still contains an unresolved macro or placeholder: check the macro name and input reference in the transformation definition, correct them and inspect VIEW again. Do not use
@ActualMacroName([TableAlias].[Column])as a real call.
