
Introduction
Create an import definition for one existing Source with Import Wizard. Choose its target schema, target table name and package, then review the source-to-target column mappings. This procedure prepares and saves the import configuration for later execution.
Applicability
Use this procedure when a source already exists and you need AnalyticsCreator to create its import table, source-to-target column references, and import package association.
Prerequisites
- Create or identify the AnalyticsCreator source to import.
- Ensure that at least one import schema is defined.
- Choose an existing import package or prepare a new package name.
- Determine the target table name.
- Confirm that the target table name is not already used in the selected schema.
Steps
Create the import
Locate the required source in the diagram and open its context menu. The illustrated source is Customers$.
Open the context menu for the Customers$ source. 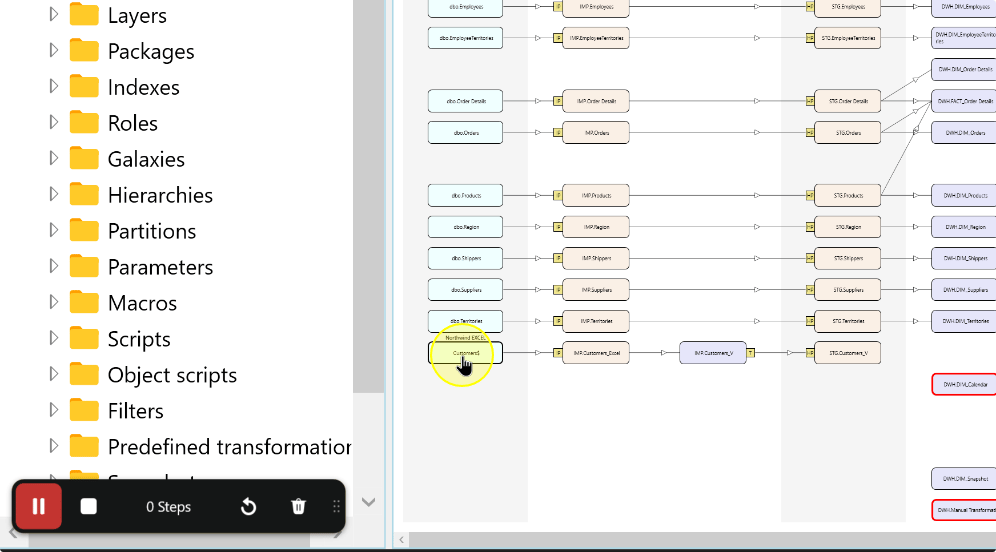
Open Add.
Add in the source context menu. 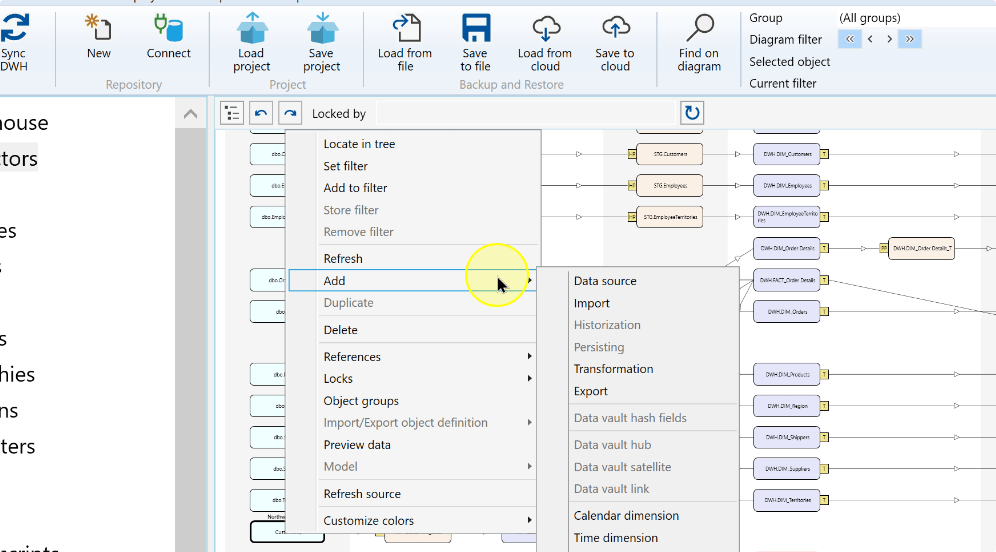
Choose Import. The navigation-tree alternative uses Add import; a supported package context offers Add import package.
Import in the Add submenu. 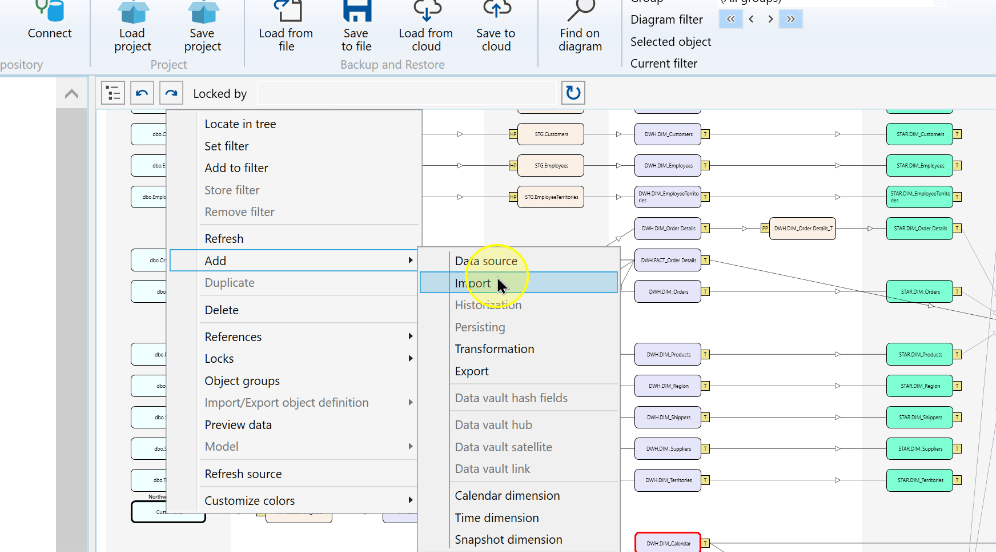
In Import Wizard, confirm Source, then select Target schema.
Setting Explanation Source The existing source object supplying the import. Target schema The schema in which the import table is defined. Target table name The import-table name; it must be unique within the selected schema. Package The existing import package that will contain the import, or the name of a new package. Select the target schema in Import Wizard. 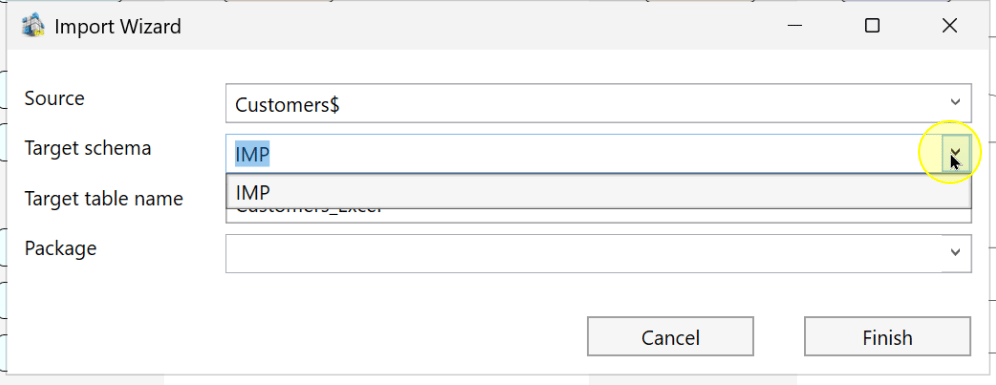
Enter the intended Target table name.
Enter the target table name. 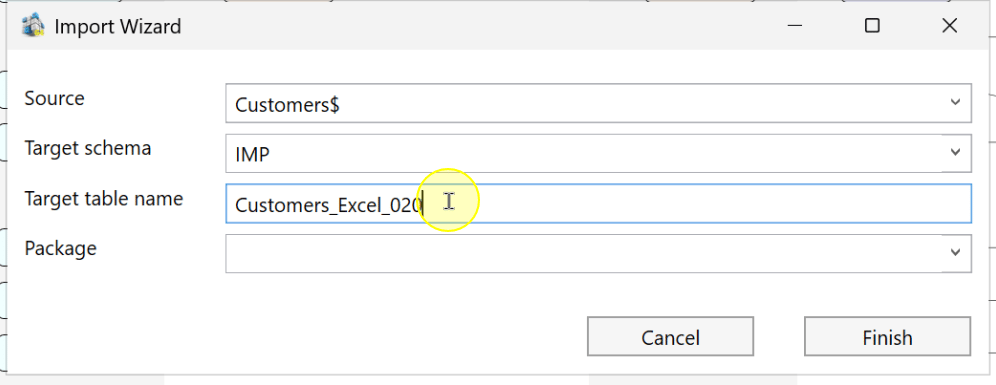
In Package, select an existing import package or enter the new package name.
A new package name must be no longer than 50 characters and must not conflict with a package of another type. The example uses Import_Customers_Excel_020.
Choose or enter the import package. 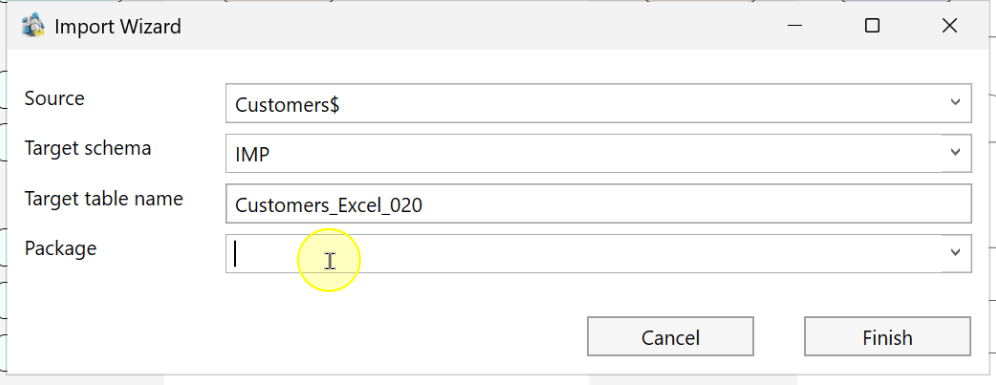
Review the source, target, and package, then choose Finish.
Finish the Import Wizard configuration. 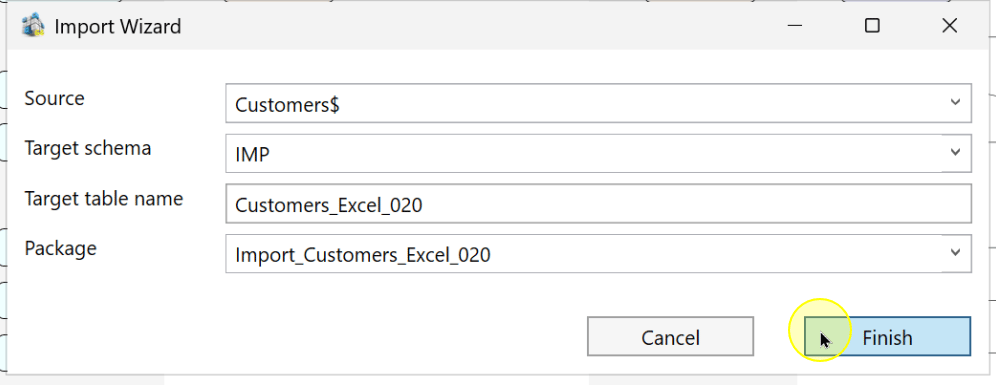
Review and save the import definition
Open the ETL ribbon.
The ETL ribbon for locating the created import. 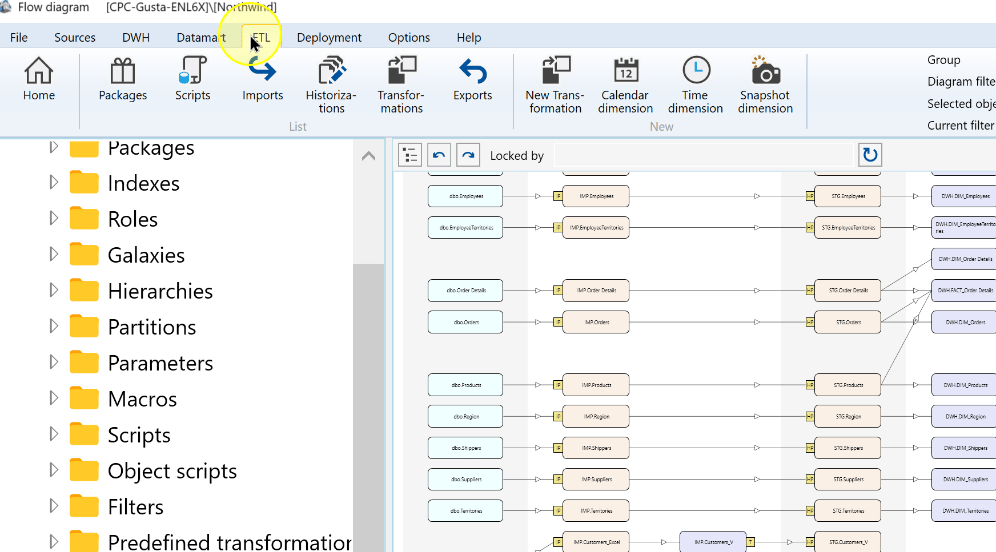
Choose Imports.
Open the Imports list from the ETL ribbon. 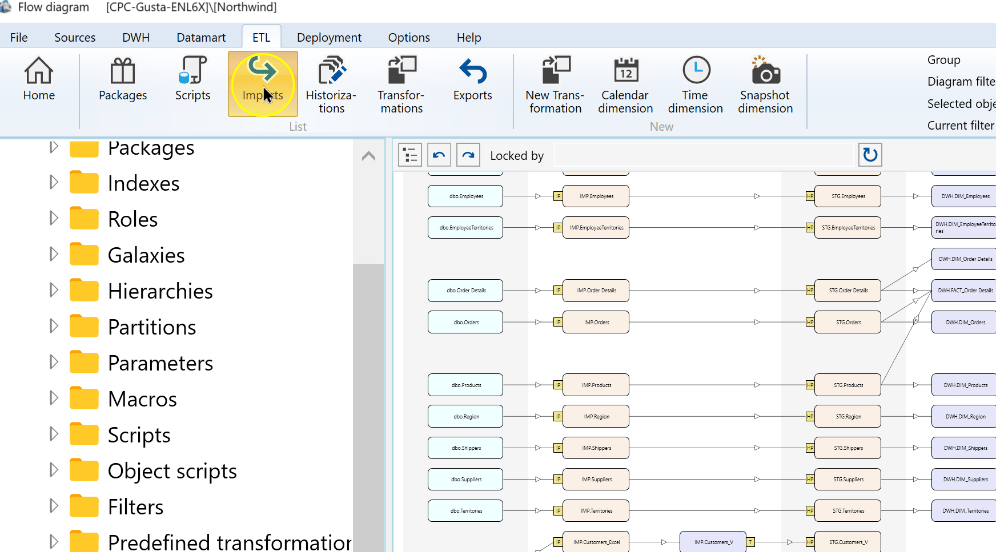
Locate and open the created import in the list.
Locate the created import in the Imports list. 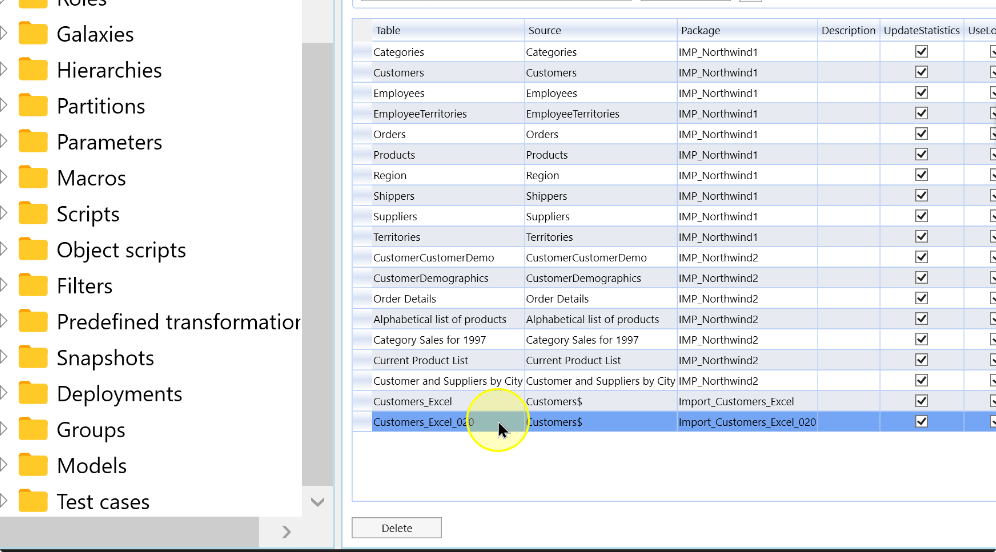
In the import definition, review the Source Name and Target Name field mappings. Correct mappings and any required import settings before saving.
Source Name identifies the incoming column; Target Name identifies the import-table column receiving its value. Check each pair, including columns with different names, before saving.
Review the source-to-target field mappings. 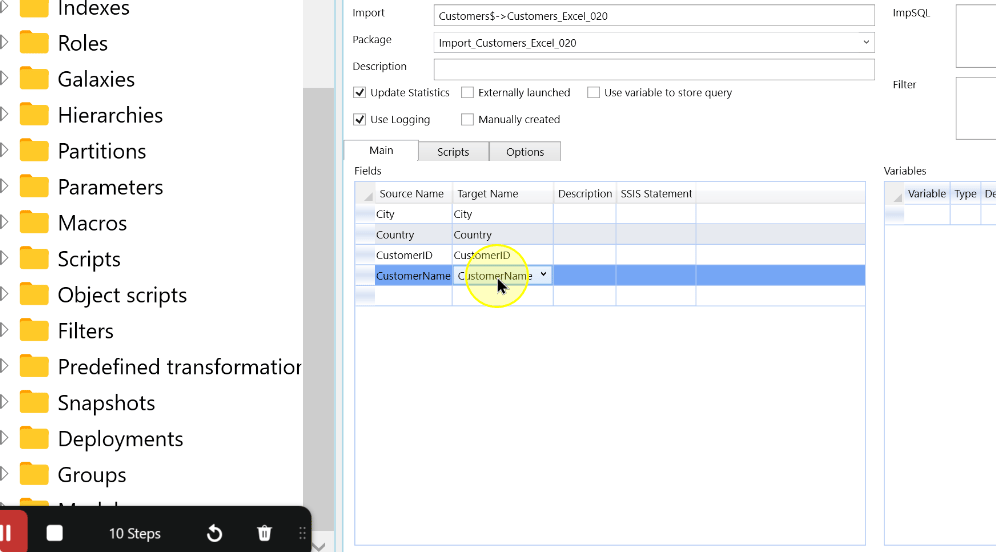
Choose Save. Check the saved definition before executing its package.
Save the import definition. 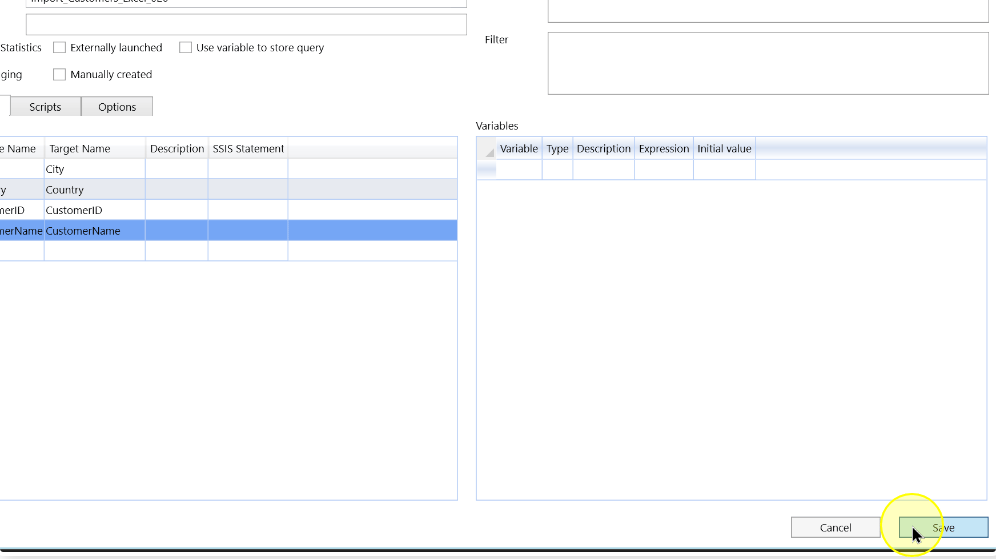
Expected Results
- Find the created import in ETL → Imports. Check Source, target schema, target table and Package against the values entered in Import Wizard.
- Reopen the import and confirm the saved Source Name/Target Name mappings before the separate package-execution workflow.
Decisions and variations
- Use an existing import package when this import belongs in that package; enter a new name when it needs its own package.
- Use DWH Wizard for a workflow that configures several Sources and additional DWH objects together.
- Creating and saving the import definition does not prove that its package has executed.
Troubleshooting
- No Target schema: an import schema must exist before the wizard can continue.
- Name validation: check target-table uniqueness within the schema and new-package length/type restrictions.
- Wrong target column: reopen the import, review Source Name/Target Name mappings and save the intended correction.
