
Create an export definition with Export Wizard
Introduction
Use Export Wizard to create an export definition that connects the output of an AnalyticsCreator table or Transformation to an external destination. Choose the source object, the Connector used to access the destination, the target object, and the package that will contain the export.
The outcome is an export definition that you can reopen and check before reviewing field mappings and export settings. Creating the definition does not verify that data has been transferred to the target.
Applicability
This how-to covers creating an export definition in the AnalyticsCreator desktop interface when the source object, target Connector, and target object are already available. You can select an existing Export package or enter a new package name. The workflow ends with checking the created definition.
Field mapping, target-clearing settings, and scripts are covered in Review export mappings, target clearing, filters, and scripts.
Prerequisites
3.1. An open Data Warehouse (DWH) project that you can edit, containing the table or Transformation whose output you intend to export.
3.2. A configured Connector for the destination and an existing target object available through that Connector. You need to know which target fields will receive the source output and whether their meaning and data types are compatible.
3.3. The existing Export package you intend to use, or a name for a new package. Export packages group export definitions in the navigation tree.
Steps
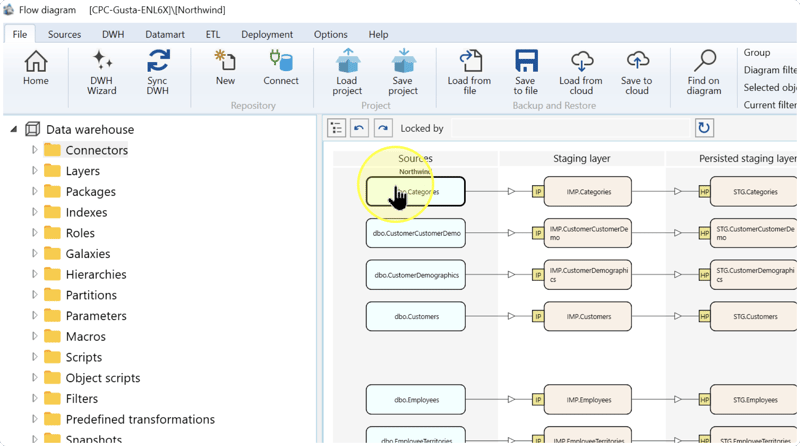
Open an object's context menu
In the dataflow diagram, locate the object relevant to your export and right-click it to open its context menu. You will explicitly select the object supplying the export data in Select the source object.
Screenshot example: the context menu is opened on dbo.Categories, while the later wizard captures select DWH.DIM_Categories as the source. Opening this menu and choosing the export source are separate actions. Use the objects required by your own Data Warehouse (DWH) project.
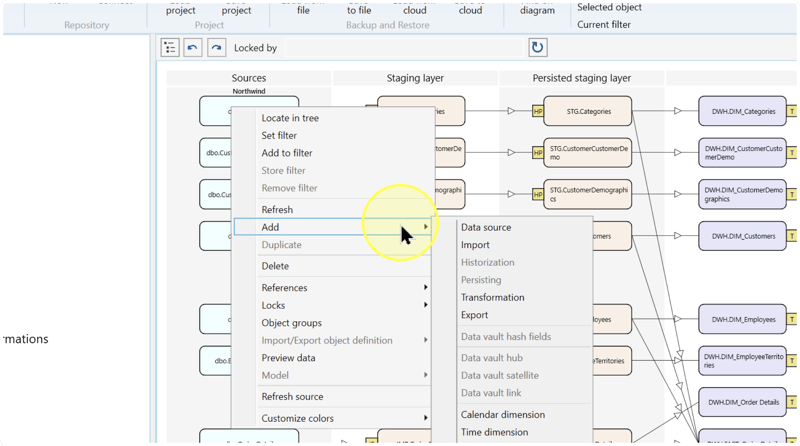
Expand the Add menu
Point to Add in the object's context menu to expand the submenu.
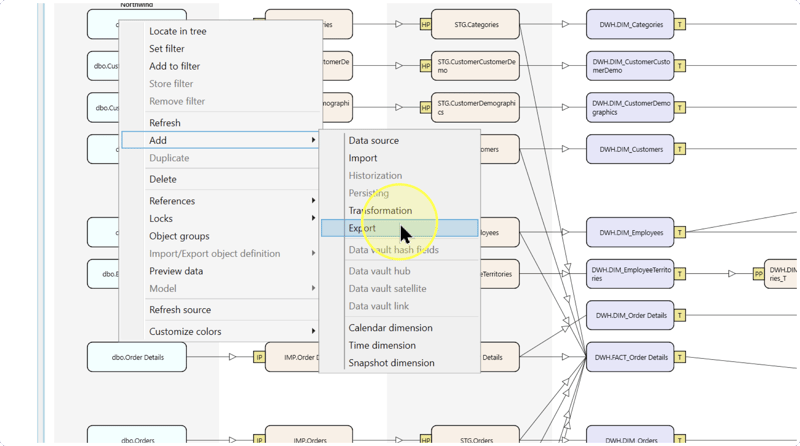
Open Export Wizard
Click Export in the Add submenu.
Expected Results: the Export Wizard dialog opens.
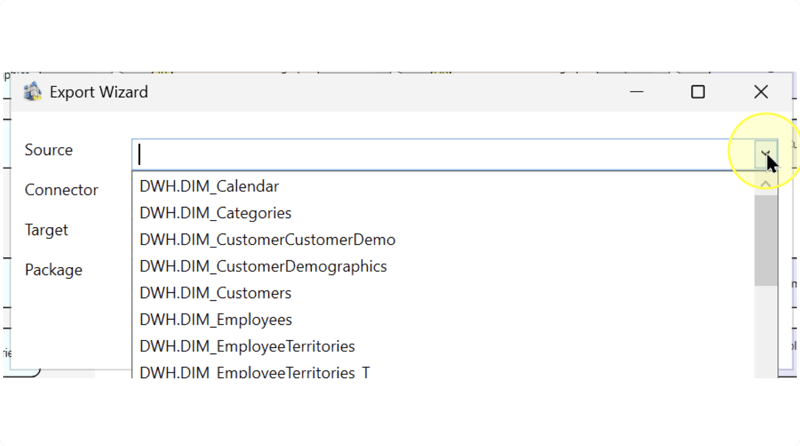
Select the source object
In Export Wizard, use the four settings in order: Source, Connector, Target, and Package. Open the Source list and select the AnalyticsCreator table or Transformation whose output you intend to export. Check its schema and object name.
A Transformation applies processing logic to input objects and produces a reusable result. Select a Transformation when that processed result is the data you need; select a table when that table supplies the required data.
Screenshot example: the list includes DWH.DIM_Calendar and DWH.DIM_Categories. These are example object names, not required selections.
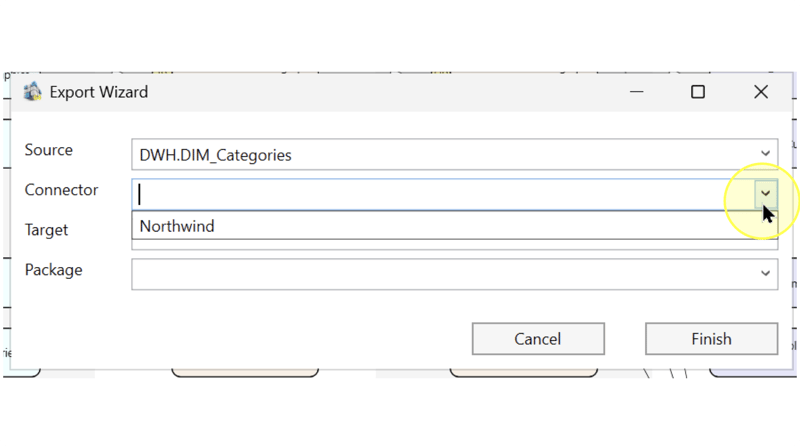
Select the target Connector
Open the Connector list and select the configured connection to the external system that should receive the data. Here, the Connector provides access to the export destination. Confirm that it points to the intended system before choosing the target object.
Screenshot example: Northwind is the available Connector in this project. Use the Connector configured for your destination.
Select the target object
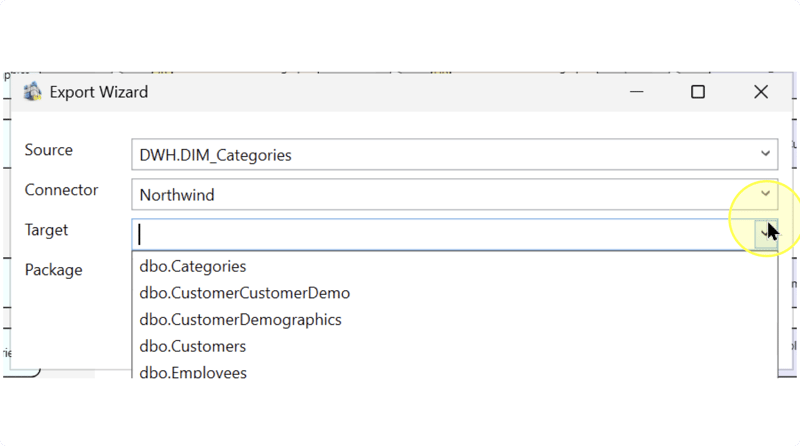
Open the Target list and select the destination object that should receive the source output through the selected Connector. Check the target's schema, name, intended use, and field structure. Its fields must be suitable for the values you intend to export; matching object names alone do not establish compatibility.
Screenshot example: the wizard pairs DWH.DIM_Categories with dbo.Categories. This illustrates source and target selection. Review the field mapping for your own pair before executing an export.
Select or name the Export package
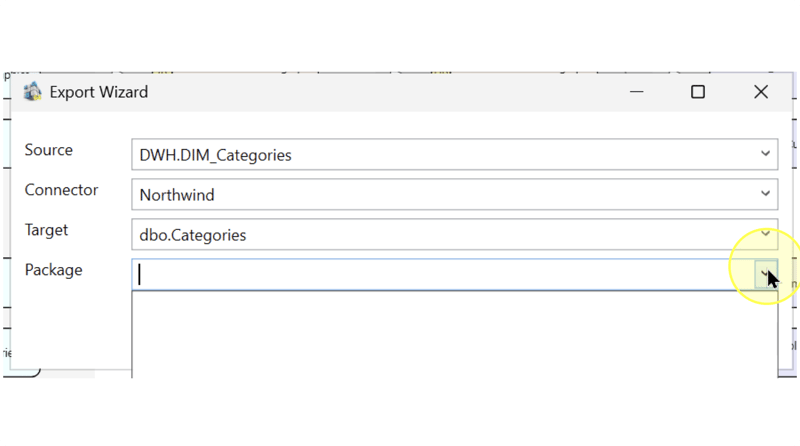
In Package, select the existing Export package intended to contain the definition. If you need a new package, or the list is empty, enter the new package name in Package.
An Export package groups export definitions under Packages → Export in the navigation tree. Use a name that identifies the intended export work in your Data Warehouse (DWH) project. Check that Package contains the selected or entered name before continuing.
Review the selections and finish
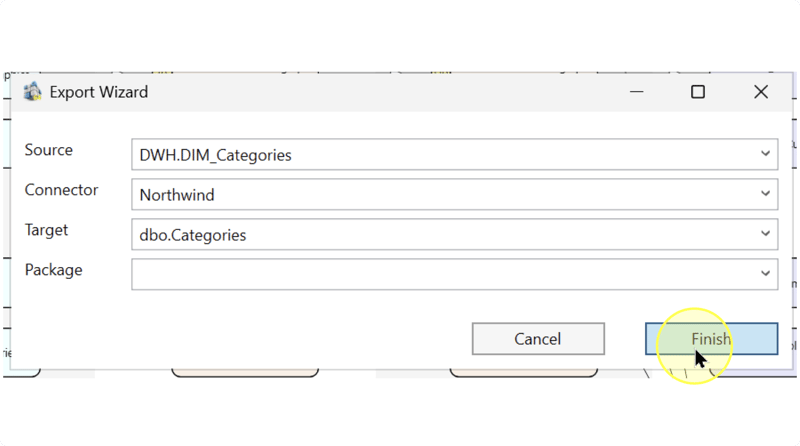
Check all four settings against your intended export before clicking Finish:
4.8.1. Source identifies the table or Transformation that supplies the required output.
4.8.2. Connector identifies the connection to the intended destination system.
4.8.3. Target identifies the destination object whose fields can receive that output.
4.8.4. Package contains the existing package selection or new package name from Select or name the Export package.
Click Finish to create the export definition, then check the resulting item in Reopen and check the export definition.
Reopen and check the export definition
4.9.1. In the left navigation tree, expand Packages, then Export, then the package selected or named in Select or name the Export package. Locate the export item for your source and target.
4.9.2. Right-click the export item and click Edit export.
4.9.3. In the editor, check the source-to-target text displayed in Export and the selected Package against your intended definition.
Expected Results: the item is present in the intended package, and the editor identifies the intended source, target, and package. Before running the export, continue with Review export mappings, target clearing, filters, and scripts. Field mappings associate source fields with destination fields; target-clearing settings determine whether existing target rows are removed.
Expected Results
5.1. The export definition can be found under Packages → Export in the intended package.
5.2. Opening Edit export shows the intended source-to-target identity and package, as checked in Reopen and check the export definition.
5.3. The definition is available for field mapping and export-setting review. This result does not establish execution, data transfer, or the contents of the external target.
Decisions and variations
- Source selection — Use a table or Transformation according to which output the destination needs. Confirm Source in Select the source object, even when the wizard was opened from a different diagram object.
- Destination selection — Select the Connector for the destination system and the Target for the receiving object. Check compatibility at Select the target object; the screenshot values do not determine your target.
- Package assignment — Select an existing Export package to group the definition with that package's exports. Enter a new package name when a new grouping is needed or the list is empty, as described in Select or name the Export package.
Troubleshooting
- Object not found — Check the current Data Warehouse (DWH) project and the object's schema and name. If a destination object is missing from Target, check that Connector identifies the destination system intended in Select the target Connector. If the Package list is empty, enter a new package name as described in Select or name the Export package.
- Configuration differs after reopening — Compare the Export text and Package with your selections, and check that you opened the intended item under Packages → Export. Do not accept the definition as complete while its source, target, or package differs from the intended configuration.
- Runtime result differs — Creating a definition does not test data transfer. Review the field mappings and export settings using Review export mappings, target clearing, filters, and scripts before investigating a transfer result.
