
Create a Macro and use it in a Transformation statement
Introduction
A Macro is a reusable statement whose placeholders are replaced by the arguments supplied in a call. Use a Macro to maintain repeated calculation logic in one place and reuse it in Transformation statements.
This how-to creates and saves a Macro, inserts a call into a prepared Manual transformation, and checks the saved definition. A Manual transformation contains view SQL that you maintain yourself. The date-key example demonstrates how to pass a date to a Macro and return an integer key; use it when that calculation matches your task.
Names, tables, schemas, dates, and selected values in the screenshots are examples. Use the objects and settings required by your Data Warehouse (DWH) project.
Applicability
These steps apply to a T-SQL Macro used in a SQL Server view through a Manual transformation. They cover creating the reusable expression and saving its call in the Transformation. Other Macro languages, global calendar settings, and deployment or data-loading workflows are outside this task.
The screenshots show the AnalyticsCreator desktop interface. They do not identify a product version. If your interface differs, check the matching controls for your installed version before continuing.
Prerequisites
3.1. An open development Data Warehouse (DWH) project that you can edit, with known input objects and column types for the intended calculation.
3.2. An unused Macro name and a defined calculation, including the required arguments, their order and types, and the expected output. For the date-key example, the input must be date-compatible and the calculation must match your required key scheme.
3.3. A prepared Manual transformation with the intended schema, name, and complete view definition. Use Create and save a Manual transformation if you need to prepare one first.
3.4. The schema and name of the existing table the Macro will use as a reference, where the calculation uses a table reference. Enough SQL Server knowledge to review the expression, its arguments, and the view's input objects.
3.5. A known target database and Transformations Createviews setting for the project. This setting controls view creation when a Transformation is saved: 0 = No, 1 = Compile only, and 2 = Yes. Confirm the configured value with your project owner before starting; the save step can affect the database.
Steps
Open the DWH ribbon
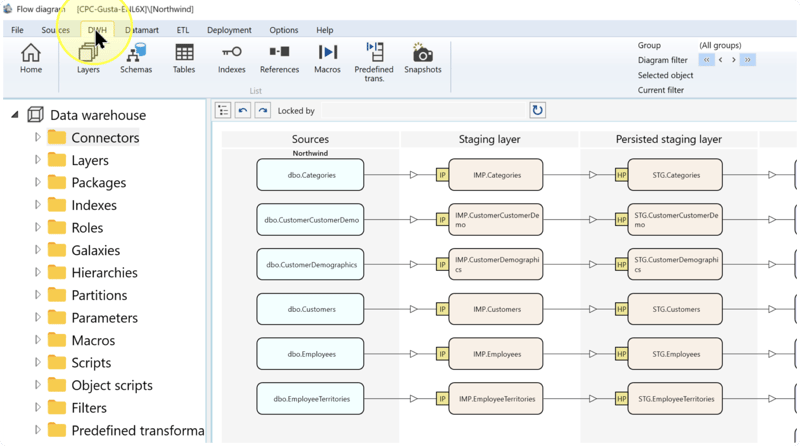
Confirm that the intended Data Warehouse (DWH) project is open. Click the DWH toolbar tab to display the commands for maintaining its objects.
Open a new Macro
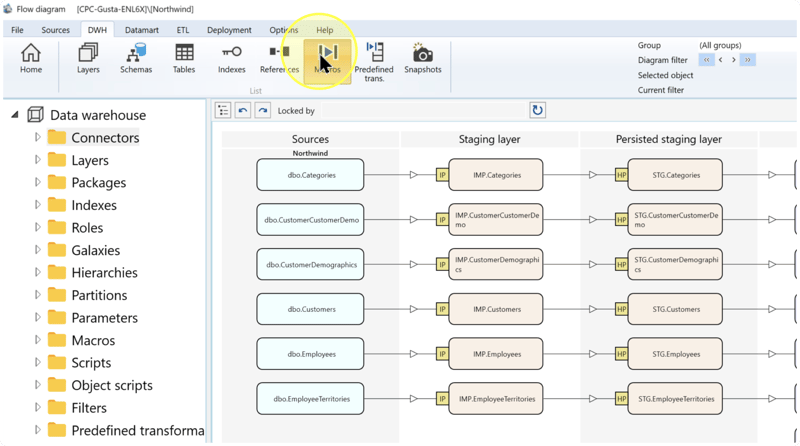
Click Macros to open the list of reusable Macro definitions.
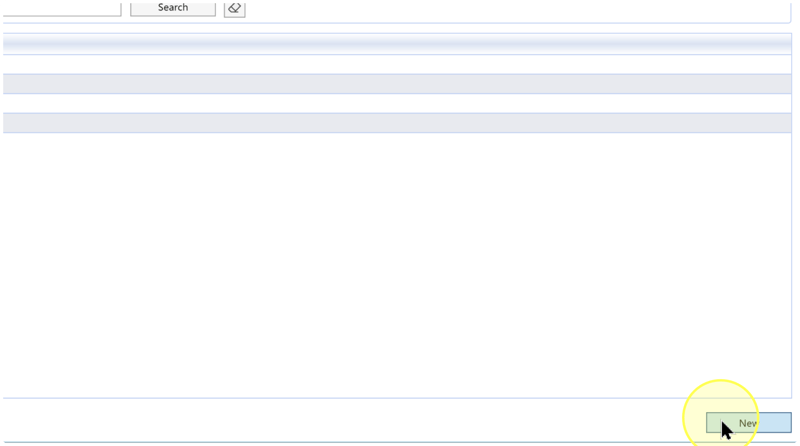
In the Macro list, click New to open the Macro editor.
Name and describe the Macro
In the Macro editor, enter an unused Macro name. Enter a Description explaining the calculation, its arguments, and its result. Use this same Macro name in the call you add later.
- Macro — A reusable statement expanded where it is called. Changing a shared definition can affect other statements that call it.
- Macro name — The saved name used after
@in a call. The date-key example usesCalendarDateKey;Macro 1is the name pictured in the editor. - Description — A purpose note identifying the Macro's arguments and result. For the date-key example, describe its date input and 1980–2040 calculation boundaries.
Select T-SQL as the language
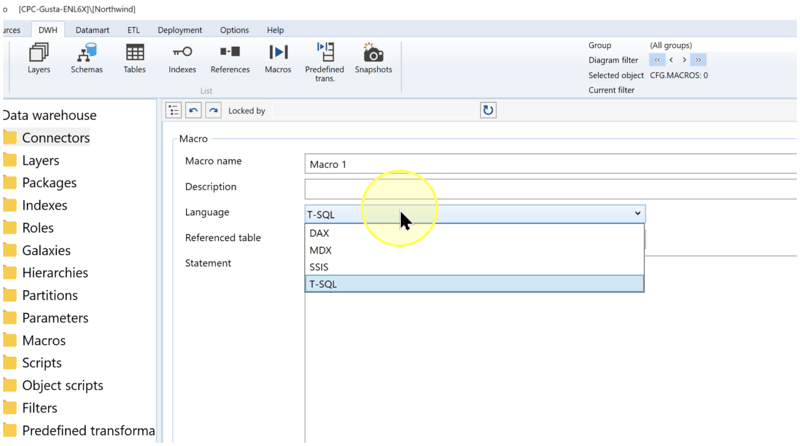
In Language, select T-SQL for the SQL Server view expression used in this workflow.
- Language — The language of the Macro statement. The list also includes DAX, MDX, and SSIS. SSIS refers to SQL Server Integration Services (SSIS). Those choices are outside this T-SQL workflow.
Set the Macro's table reference
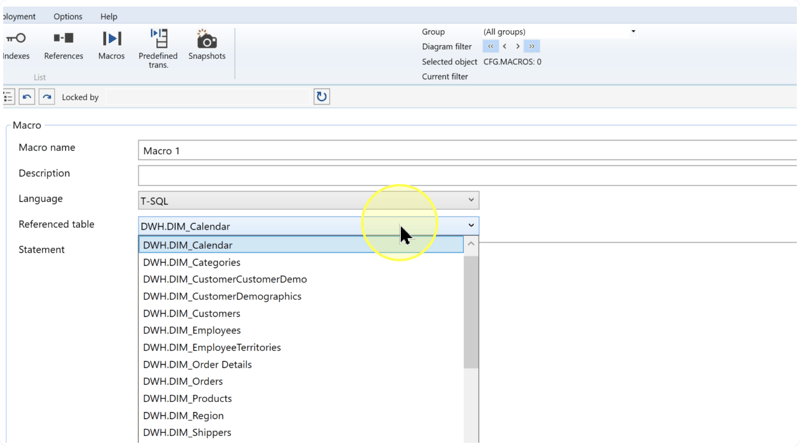
If the Macro uses a table as a reference, select that table in Referenced table. Identify it by its schema and table name according to the calculation you are defining. A schema groups database objects under a common namespace. Do not add a table reference solely to match the screenshot.
- Referenced table — Identifies which table the Macro uses as a reference. The pictured value
DWH.DIM_Calendaridentifies theDIM_Calendartable in schemaDWH. Select it when that is your Macro's reference table; use your own table for a different reference.
Enter the Macro statement
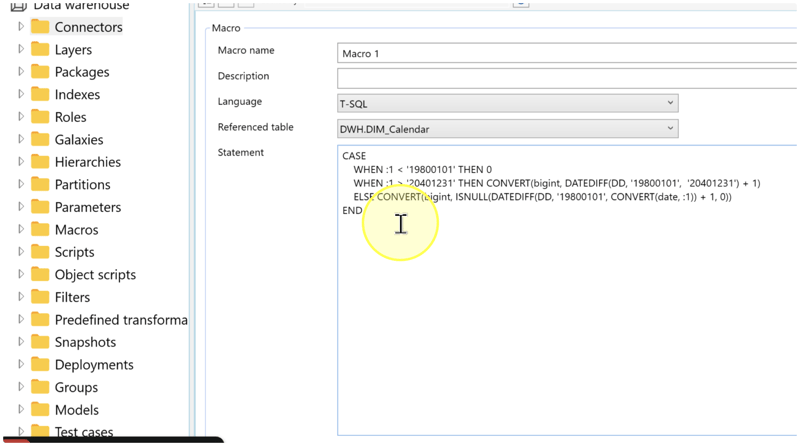
In Statement, enter the reusable expression. Where a value must come from the caller, use its positional placeholder. This lets different calls supply different columns or values to the same calculation.
- Statement — The reusable expression. For this workflow, enter the calculation here; the complete
CREATE VIEWstatement belongs in the Transformation. - :1, :2, :3 — Positional placeholders for the first, second, and third call arguments. The date-key expression below uses only
:1.
Date-key example: use the following expression when you need a date converted to a day-based integer key with these boundaries. Its dates are part of this example's calculation, not required Macro settings.
CASE
    WHEN :1 < '19800101' THEN 0
    WHEN :1 > '20401231' THEN
        CONVERT(bigint, DATEDIFF(DD, '19800101', '20401231') + 1)
    ELSE CONVERT(bigint,
        ISNULL(DATEDIFF(DD, '19800101', CONVERT(date, :1)) + 1, 0))
END- CASE / WHEN / ELSE / END — Chooses the result. A date before 1980-01-01 returns 0; a date after 2040-12-31 returns the final key in the example's range.
- DATEDIFF(DD, ...) — Calculates a difference in days.
DDis the day date-part in this expression. Adding 1 makes 1980-01-01 map to 1. - CONVERT(date, ...) / CONVERT(bigint, ...) — Converts the input to a date and the result to a large integer.
- ISNULL(..., 0) — Replaces a NULL result with 0. Invalid date text can still cause a conversion error.
To calculate a key for a different date, change the argument in the call, leaving :1 in the definition. Change the boundary dates only when the key scheme itself must change; that change affects every caller using the definition.
Save and check the Macro
Check Macro name, Language, Referenced table, and the complete Statement against your intended definition. Click Save.
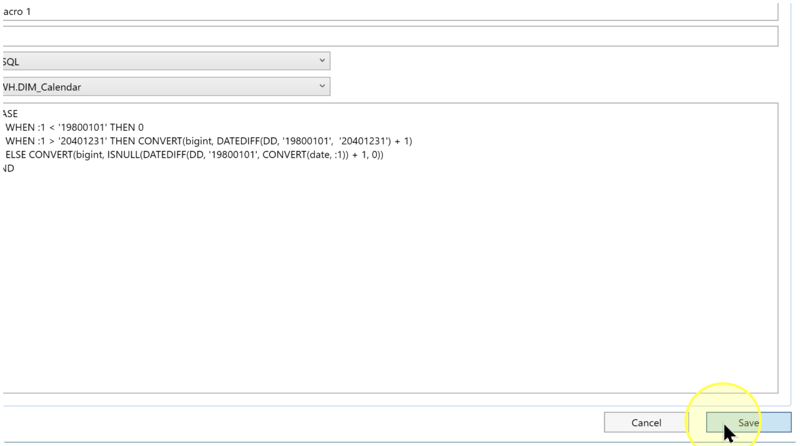
In the navigation tree, expand Macros, right-click your saved Macro, and click Edit macro. Confirm that its name, language, reference table, and complete statement have been retained before using it in a Transformation.
Open the prepared Manual transformation
In the dataflow diagram, double-click the prepared Transformation. Confirm that its Name and Schema identify the object you intend to edit and that TransType is Manual. Select the VIEW tab to open its manually maintained SQL.
A view is a named database query. In this editor, Name and Schema identify that view, while VIEW contains its definition. Confirm that the SQL header uses the same name and schema. If the Transformation has not yet been prepared as Manual, complete Create and save a Manual transformation first.
Insert the Macro call in the VIEW statement
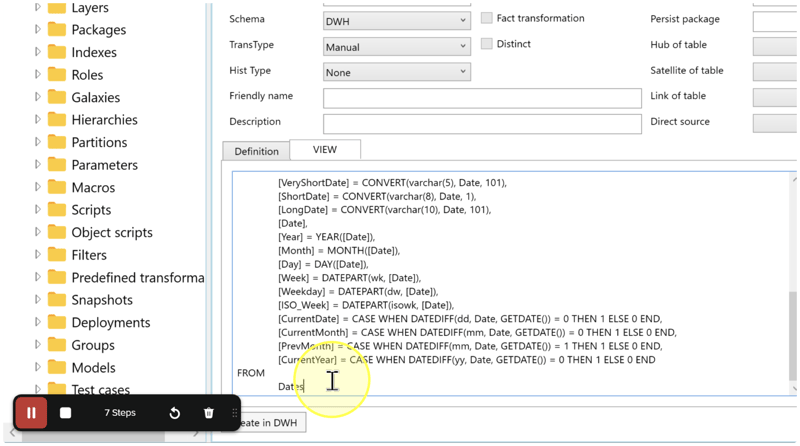
In the VIEW statement, insert @MacroName(argument) where the calculation is needed. Replace MacroName with the saved Macro name and supply the expressions required by its placeholders, in positional order. For several arguments, separate them with commas, as in @MacroName(argument1, argument2).
- @MacroName(argument) — The Macro call is replaced by the saved statement with the supplied arguments substituted. For example,
@CalendarDateKey([T1].[Date])substitutes[T1].[Date]for each:1in the date-key definition. - Missing arguments — Omitted arguments become
NULL. Supply every argument needed for the intended calculation rather than relying on that fallback. - T1 / DWH / DIM — In the SQL example,
T1is a table alias,DWHis a schema identifier, andDIM_is an object-name prefix. Use your actual database identifiers.
Complete-view example: when the prepared view is [DWH].[Macro_Calendar] and its input is [DWH].[DIM_Calendar] with a date-compatible Date column, the following statement returns the date as CalendarDate and the calculated key as CalendarKey. Use it for those intended inputs and outputs. Otherwise, insert the call into your own complete view definition.
CREATE VIEW [DWH].[Macro_Calendar] AS
SELECT
    [T1].[Date] AS [CalendarDate],
    @CalendarDateKey([T1].[Date]) AS [CalendarKey]
FROM [DWH].[DIM_Calendar] AS [T1];
Check that each argument has a compatible type and that every referenced column belongs to an input named in the view's FROM or JOIN clauses. In the example, T1 is declared in FROM. If you rename an existing view output column, enter its previous and new names in the editor's Old column name and New column name columns.
Fixed-date check: @CalendarDateKey(CONVERT(date, '19800101')) illustrates a call whose date-key result is 1. The fixed date is a test value; use the caller's required date expression in the actual calculation.
Review and save the Transformation
Before saving, review the definition and the project's save behavior:
4.10.1. Confirm the Transformation's Name, Schema, and TransType = Manual. Check that the SQL header names the same view.
4.10.2. Confirm that the Macro name matches the saved definition, each required argument is present, and its type and position match the statement. Keep a complete view definition with the required inputs and output columns.
4.10.3. Confirm the target database and Transformations Createviews value: 0 = No does not create the view on save; 1 = Compile only requests compilation; 2 = Yes requests view creation. Proceed with the configured value only when that behavior is intended for this development project.
Click Save. If AnalyticsCreator reports an error, correct the reported problem and save again before continuing.
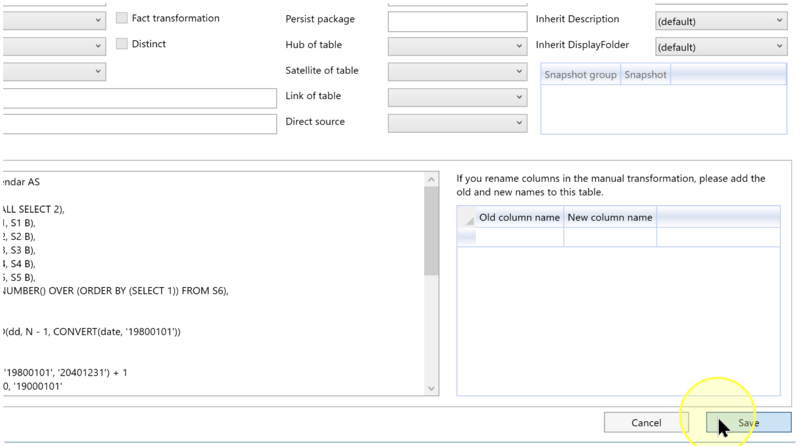
Check the saved call
Reopen the Transformation by double-clicking it in the dataflow diagram. Select VIEW and confirm that the saved definition contains the call to your Macro with the intended arguments. Compare the Macro's saved statement and the Transformation's call with the checks in Expected Results.
If the view has been created in the development database, query its output using your project's database query tool and compare representative inputs with the intended calculation. For the complete-view example in Insert the Macro call in the VIEW statement, query the example's output columns:
SELECT [CalendarDate], [CalendarKey]
FROM [DWH].[Macro_Calendar]
ORDER BY [CalendarDate];
For your own view, use its actual schema, name, and output columns. If saving did not create the view, saved-definition checks do not establish its database output; complete the project's view-creation and validation workflow before relying on calculated results.
Expected Results
5.1 Saved Macro. The Macro can be reopened with its intended name, T-SQL language, reference table, statement, and positional placeholders.
5.2 Saved Transformation. The intended Manual transformation can be reopened with a complete view definition containing the correct Macro name and arguments.
5.3 Calculation checks. When database output is available, the Macro's result matches its defined calculation for representative inputs. For the date-key expression in Enter the Macro statement, use the following checks; they do not require your existing input table to contain these dates.
| Example input | Expected Results |
|---|---|
| A valid date before 1980-01-01 | 0. |
| 1980-01-01 | 1. |
| A date within the calculation's range | The number of days since 1980-01-01, plus 1. |
| 2040-12-31 or a later valid date | The final key: the number of days from 1980-01-01 to 2040-12-31, plus 1. |
| NULL | 0. |
Use test cases derived from your own definition for a different Macro. Saving alone does not prove successful database execution, compatibility with another calendar key, data loading, or production readiness.
Decisions and variations
6.1 Different calculations. Keep the Macro language compatible with its caller. For this SQL Server view workflow, use T-SQL. Define the calculation and its arguments in Name and describe the Macro–Enter the Macro statement, then pass matching arguments in Insert the Macro call in the VIEW statement.
6.2 Different dates or key schemes. Change a call's date argument to calculate another date. Change the Macro's boundary dates only when the key scheme must change for its callers. The 1980–2040 example does not establish compatibility with any existing calendar table.
6.3 Shared and nested Macros. Reusing a saved Macro means callers share its definition. A Macro can also call another Macro; see Call a Macro from another Macro for that separate workflow.
6.4 Save behavior. Follow the configured Transformations Createviews value and target database reviewed in Review and save the Transformation. A saved call and a successfully queried database view are separate checks.
Troubleshooting
- Expected object or control is missing — Confirm the current project and the object's schema and name. For a missing Macro, check that it was saved as described in Save and check the Macro. For a different editor layout, check the controls for your installed version before proceeding.
- Result differs from the design — Compare the saved Macro statement with the call in VIEW. Check argument order, missing arguments that become NULL, and input types. For the date-key example, check the boundary dates; invalid date text can fail conversion even though NULL returns 0. Correct the definition or call as needed, save it, and repeat the calculation checks. If the database view is absent or its output has not changed, check Transformations Createviews and the target database before assuming that saving created or updated it.
