
Add a calculated column to a table
Introduction
A table calculated column derives a value from an expression, such as a calculation using other columns in the same row. Use this how-to to add the column through Calculated columns, define its expression and settings, save the table definition, and reopen it to check the result.
The outcome is a saved calculated-column definition in your Data Warehouse (DWH) project. Creating or updating the physical database table is a separate operation.
Object names, schema names, values, and checkbox states in the screenshots are examples. Use the table and calculation required by your project.
Applicability
These steps apply to table calculations in the AnalyticsCreator desktop Calculated columns tab. The database behavior described here is for SQL Server computed columns. The illustrated table has Table Type set to Import table; that example does not establish support for every table type.
For a calculated column in a tabular analytical model, use Tabular OLAP DAX columns and follow Define a Tabular OLAP DAX calculated column.
Prerequisites
3.1. An open Data Warehouse (DWH) project with an existing table whose definition you can edit.
3.2. The intended table's schema, name, and type, and the input columns and data types needed by your calculation.
3.3. A meaningful new column name and a complete expression suitable for a SQL Server computed column. If the expression calls a Macro, that Macro must already exist with the required calculation and arguments.
3.4. The intended storage choice and, if the calculated column participates in a key or relationship, the corresponding database design. The criteria in Enter the expression and calculated-column settings explain these choices.
Steps
Open the DWH toolbar tab
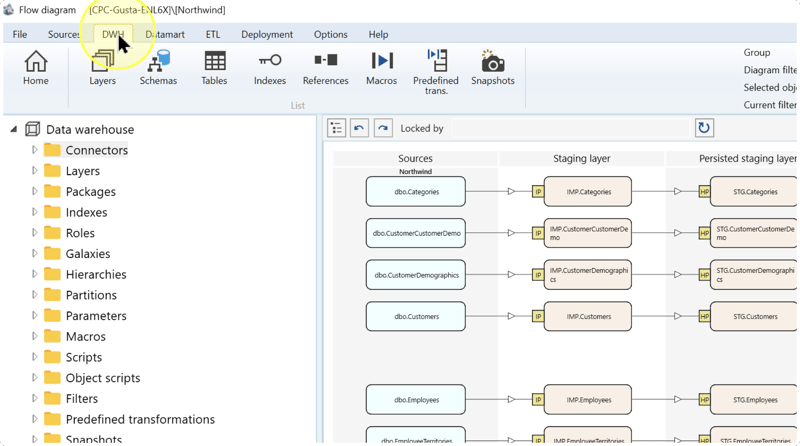
Confirm that the intended Data Warehouse (DWH) project is open, then click DWH on the toolbar.
Open the Tables list
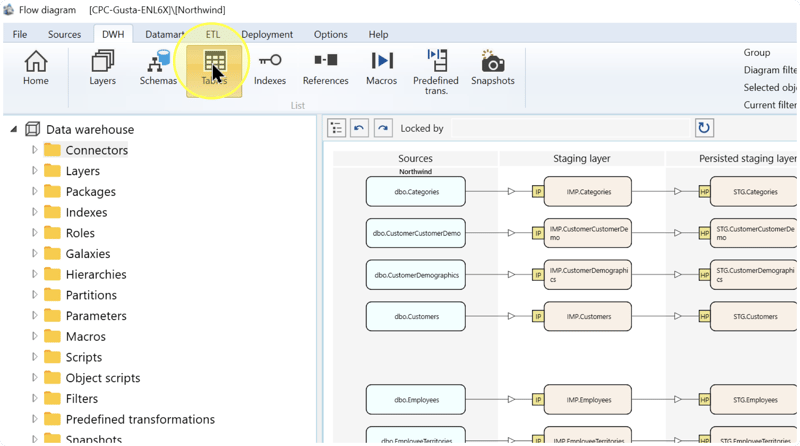
On the DWH toolbar tab, click Tables to display the table definitions in the project.
Find and open the intended table
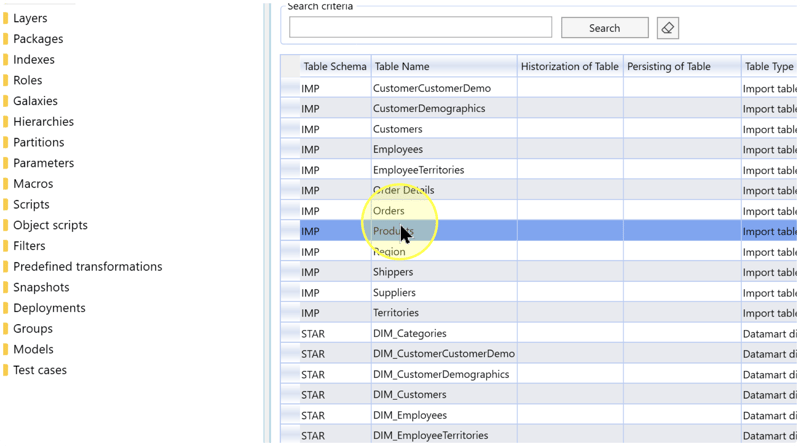
In the Tables list, identify your table using the following displayed columns. If you need to narrow the list, enter its name in Search criteria and click Search.
- Table Schema — The namespace containing the table. Use it to distinguish same-named tables in different schemas.
- Table Name — The table's name. Match it to the table containing the inputs for your calculation.
- Table Type — The table's role, such as Import table. Confirm that it matches the object you intend to change.
Double-click the matching row to open the table editor. The screenshot selects Products in schema IMP; use that row only if it is the table required for your calculation.
Open Calculated columns
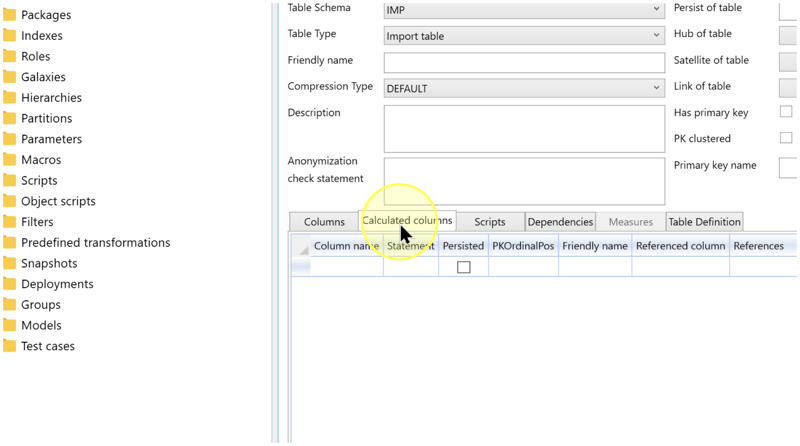
In the table editor, confirm Table Name, Table Schema, and Table Type, then click Calculated columns. This tab holds the table calculations covered by this how-to. If you need an analytical DAX column, use the separate workflow linked in Applicability.
Enter the expression and calculated-column settings
In an empty row of the Calculated columns grid, enter the new Column name and complete Statement. Review the settings below for that row:
- Column name — Enter the technical name of the calculated output. Choose a name that identifies the calculation and does not duplicate an existing column in this table.
- Statement — Enter an expression that produces the calculated value. A Macro is a reusable parameterized statement; its call can be used here when the calculation requires shared logic. Use the saved Macro's name and supply its required arguments in the correct order. For a direct expression, enter the calculation itself.
- Persisted — Select this checkbox when your physical-table design requires stored computed values. SQL Server maintains those values when their inputs change. Persistence requires a deterministic expression: the same inputs must produce the same result. For a calculation that should remain unstored, leave the checkbox clear. See the SQL Server persistence requirements.
- PKOrdinalPos — The column's position in the primary key, which identifies rows uniquely. If this column belongs to the intended key, enter its position, such as
1for the first key column or2for the second. SQL Server requires a deterministic expression and an indexable result type for a computed key. Check the planned key against the computed-column index requirements. If it is not part of the key, leave this setting blank. - Friendly name / Description — Enter a Friendly name when the column needs a readable label for use in Transformations or generated analytical models. In the calculated-column row's Description, explain the calculation when explanatory metadata is needed. These values can be inherited by child objects; leave them blank when no label or description is required.
- Referenced column / References — If your design requires a relationship, select the primary-key column in the other table under Referenced column. Check the list of referenced tables under References against that design. If no relationship is required, leave the new row without a reference. These entries describe relationship metadata; saving them is not a check that a physical database constraint exists.
Calculation example: for a table that already has numeric columns named Quantity and UnitPrice, enter LineValue as Column name and the following Statement when you need their product:
[Quantity] * [UnitPrice]For inputs 4 and 12.50, the intended value is 50.00. These names and values are illustrative; they are not claimed to exist in the pictured table. Use your actual input names and numeric types, and decide how missing values should affect your calculation.
SQL Server determines a computed column's data type from its expression. Check that your input types produce the intended output type and precision; use an explicit CAST or CONVERT in the expression when needed. See SQL Server computed-column expressions and data types.
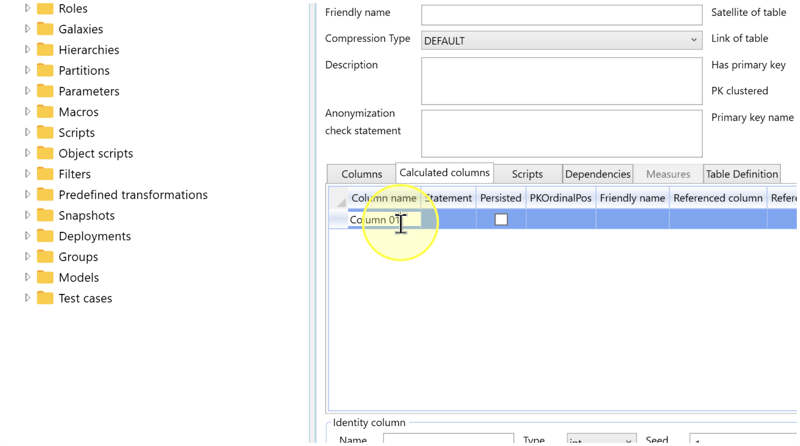
Expected Results: the new row contains your intended name, complete expression, persistence choice, and any required key or relationship settings. Review the entire expression before saving.
Save the table definition
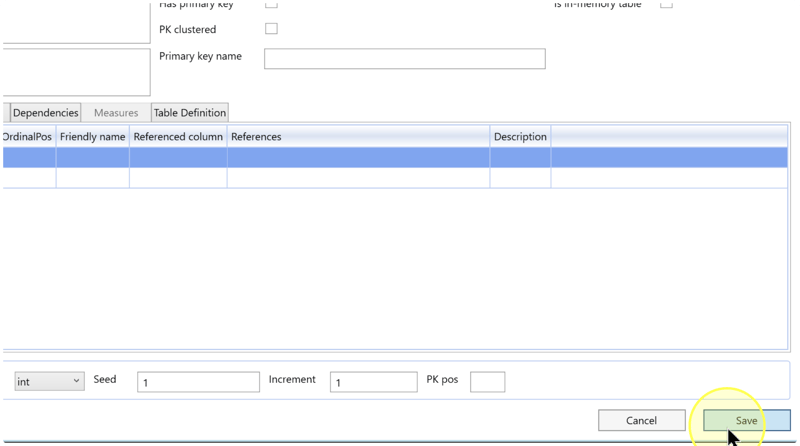
Check the new row against your intended calculation, then click Save at the bottom of the table editor. If a message prevents saving, resolve the reported problem before continuing.
Reopen and check the saved calculation
Return to DWH → Tables, find the same table by its schema and name, and double-click it. Click Calculated columns and compare the saved row with the definition you entered in Enter the expression and calculated-column settings.
Check the complete Statement, not only the column name. Confirm Persisted, PKOrdinalPos, and any friendly name, description, or relationship entries. If a value differs, correct it, click Save, and repeat this check.
If you need another calculated column, repeat Enter the expression and calculated-column settings–Reopen and check the saved calculation for a new row. Close the table editor when all required definitions have been saved and checked.
Expected Results
5.1. The calculated column appears under Calculated columns when you reopen the intended table in your Data Warehouse (DWH) project.
5.2. Its name, complete expression, persistence choice, and applicable metadata match your intended definition. For the calculation example, the saved Statement is [Quantity] * [UnitPrice].
5.3. Saving and reopening verifies the stored definition. To verify database behavior after your project's separate database-update workflow, inspect the generated table definition for the intended expression and persistence choice, confirm the resulting data type, and compare representative input rows with their calculated values. The example inputs 4 and 12.50 should produce the numeric value 50.00.
Decisions and variations
- Direct expression or Macro — Enter a direct calculation for logic specific to this column. When the same logic must be reused, call an existing Macro as described in Enter the expression and calculated-column settings; see Create a reusable Macro if one must first be defined.
- Stored or unstored computed values — Choose Persisted according to the physical-table design and expression requirements in Enter the expression and calculated-column settings. A Persisting operation instead stores a Transformation result in a managed table; it is a separate workflow.
- Table or analytical calculation — Use Calculated columns for this task. Use Tabular OLAP DAX columns for a calculation in a tabular analytical model, as explained in Applicability.
Troubleshooting
- Required object is missing — Confirm the Data Warehouse (DWH) project, Table Schema, Table Name, and Table Type. If the list is filtered, remove unintended text from Search criteria, click Search, and check the list again.
- Save is unavailable or fails — Read any displayed message. Check that the new row has a name and complete expression. Correct the reported problem and retry Save. If the message identifies a conflicting object lock, ask its owner to release it before editing.
- Saved definition differs from the intended result — Reopen the correct table and compare the row with Enter the expression and calculated-column settings. Correct differences, save, and repeat Reopen and check the saved calculation. If the definition matches but a later database result differs, check whether the database has received the change, then compare input values, input types, the expression, and any Macro arguments.
