
Manage schemas and their layer assignments
Introduction
Use the Schemas list to update an existing schema's name, architectural type, layer assignment, and description in your Data Warehouse (DWH) project. A schema groups database objects under a common name. Its type describes its architectural purpose, while its layer assignment organizes it within the project.
This how-to takes you through finding the intended schema, editing its settings, saving the definition, and checking the saved values.
Screenshot examples: schema names, selected rows, and layer assignments illustrate one project. Use the schema and settings required by your own Data Warehouse (DWH) project.
Applicability
Follow these steps when you need to maintain an existing schema definition in the AnalyticsCreator desktop interface. The workflow saves the definition in the repository; it does not cover moving or renaming physical database objects, deploying changes, or loading data.
Prerequisites
3.1. A Data Warehouse (DWH) project that you can edit, containing the schema you need to update.
3.2. The schema's current name and intended purpose, together with the name, schema type, layer assignment, and description required by your project design.
3.3. An existing project layer for the intended assignment. Creating or configuring layers is a separate task.
Steps
Open the DWH ribbon
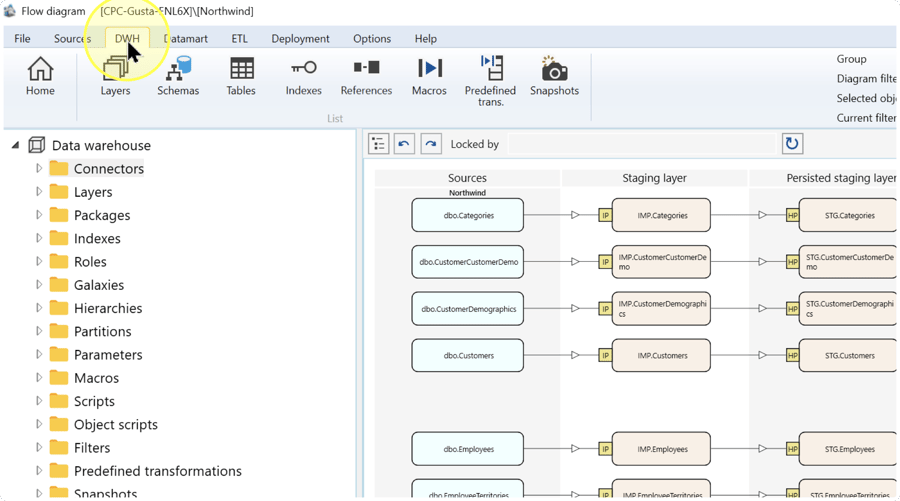
In the intended Data Warehouse (DWH) project, click the DWH tab on the toolbar.
Open the Schemas list
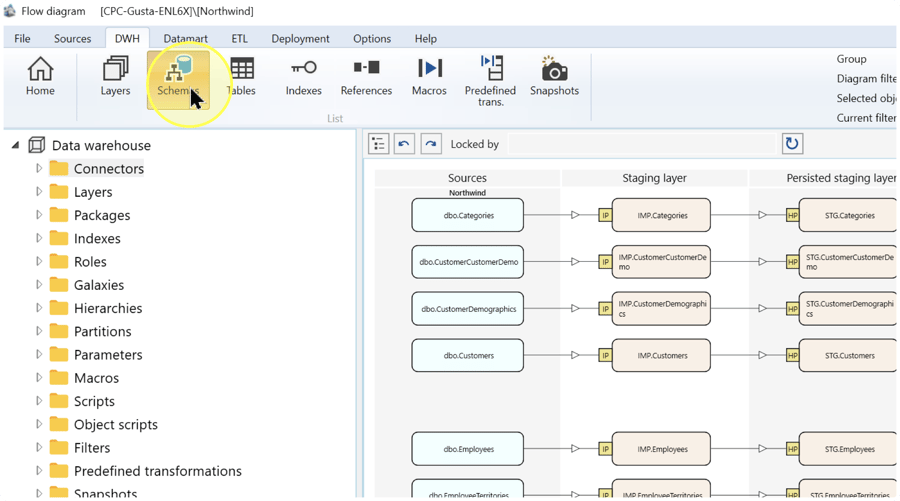
Click Schemas in the DWH ribbon to open the schema list.
Search for the intended schema
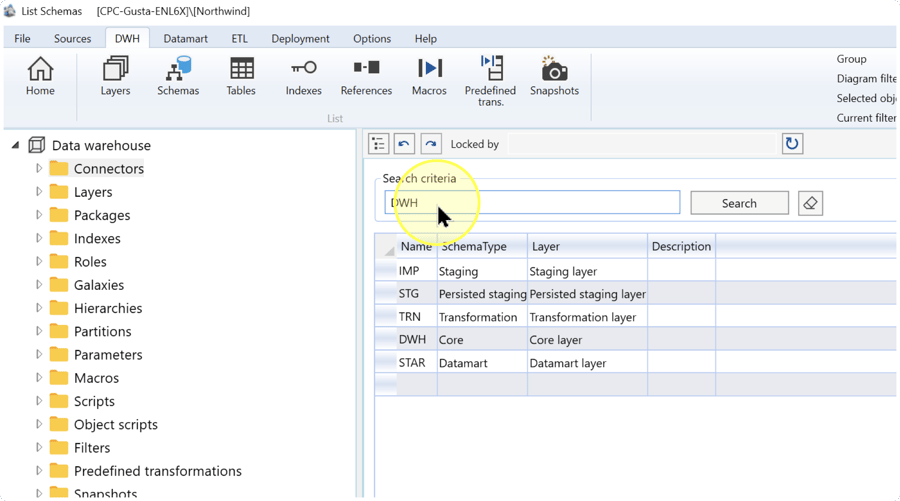
In the Search criteria text box above the list, enter the schema's current name, then click Search. Check the returned row's Name, SchemaType, Layer, and Description to confirm that it is the schema you intend to edit.
Screenshot example: DWH is a literal schema name in this project. The image shows the search text entered while all five rows are still visible. Clicking Search applies the search; the filtered row is shown in Edit the schema settings.
Edit the schema settings
Select the intended row and edit the cells that need to change. Use the following explanations to review all four settings together.
Name — The database schema name, which identifies the namespace that groups its objects. If you are renaming the schema, enter the intended name and review definitions that refer to its current name before saving. If you are only changing its type, layer assignment, or description, leave Name unchanged.
SchemaType — The schema's architectural role. Select the value that describes the objects the schema is intended to contain:
SchemaType value Explanation Staging A landing area for imported source data. Select this for a schema serving the Staging Layer (IMP). Persisted staging A durable staging area retained beyond a transient import step. Select this for a schema serving the Persisted Staging Layer (STG). Transformation Contains transformation objects and their generated outputs. Select this for a schema serving the Transformation Layer (TRN). Core Contains integrated, business-oriented Data Warehouse (DWH) structures. Select this when that is the schema's role in your architecture. Datamart Contains analytical dimensions, facts, and related semantic structures. Select this for a schema used for those analytical structures. Changing the type records the intended role; this step does not execute the processing associated with that role.
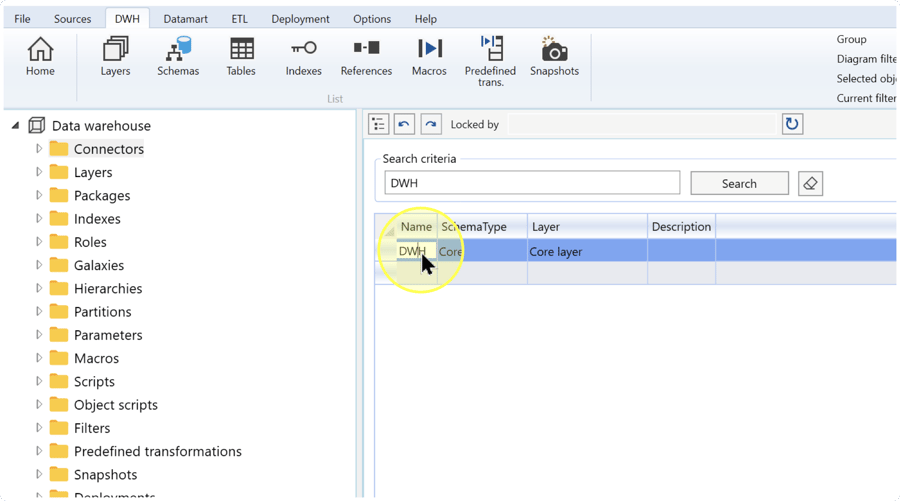
Layer — The project layer to which the schema is assigned. Layers organize the Dataflow Diagram into architectural bands. Select the existing layer intended to contain this schema and check that the assignment matches its role. For example, the pictured
DWHschema has SchemaType set to Core and Layer set to Core layer. These are the pictured project's choices, not required values for every schema.Description — Text explaining the schema's purpose. Enter or update it when the purpose needs to be documented or clarified; otherwise retain the existing description. The blank description in the capture is an example state.
Check before saving: confirm that the edited row still represents the intended schema and that its name, role, layer assignment, and description match your design.
Save and check the schema definition
Click Save at the bottom of the Schemas list. Then open DWH → Schemas again, enter the saved schema name in Search criteria, and click Search. If you renamed the schema, use the new name for this check.
Compare the saved row with the checks in section Expected Results. Saving the definition does not verify physical database changes or loaded data.
Expected Results
The intended schema definition is saved in the repository and can be found in the Schemas list.
5.1. The returned row's Name matches the name you saved.
5.2. Its SchemaType and Layer match the intended architectural role and layer assignment.
5.3. Its Description contains the text you entered or retained. Settings you did not intend to change still have their previous values.
These checks verify the saved definition. Any subsequent database generation, deployment, or data processing requires its own validation.
Decisions and variations
Renaming a schema: change Name only when the schema's identifier needs to change. Review dependent definitions before saving and search for the new name afterward, as described in Edit the schema settings and Save and check the schema definition.
Changing a role or layer assignment: review SchemaType and Layer together using the explanations in Edit the schema settings. A description-only update does not require a name, type, or layer change.
Schema name examples: IMP, STG, TRN, DWH, and STAR are literal names in the captured project. Their appearance does not require you to rename your schemas or copy the pictured assignments.
Troubleshooting
- Required schema is missing — Confirm the Data Warehouse (DWH) project and the schema's current name. Remove unintended text from Search criteria, enter the correct name, and click Search again. After a rename, search for the new name.
- Save is unavailable or fails — Check any displayed message and the Locked by field. Use the message's stated cause to determine the next action; include the message and displayed lock information when requesting help. Reopen the list and check which values were saved before retrying.
- Saved definition differs from the intended result — Compare the row's Name, SchemaType, Layer, and Description with your design. Correct the affected settings in Edit the schema settings, click Save, and repeat the checks in section Expected Results.
