
Create a historization with Historization Wizard
Introduction
Historization manages changes to source records over time. Use Historization Wizard to create a historization definition for an existing table or Transformation in your Data Warehouse (DWH) project. You will select the source, name the target table, assign a package, and decide how changes and missing records should be handled.
The outcome is a definition that you can reopen and compare with your intended configuration. Retaining earlier versions depends on the change-handling settings you select. Running the package and checking the resulting data are separate tasks.
Applicability
Use this how-to to create a new historization from a table or Transformation that already exists in the project. To change individual column policies, filters, variables, or scripts in an existing historization, use Configure historization columns, filters, variables, and scripts.
The steps use the AnalyticsCreator desktop interface illustrated below. Object names, schema names, package names, and selected settings in the screenshots are examples. Use the objects and settings required by your project.
Prerequisites
3.1. An open Data Warehouse (DWH) project that you can edit, with the source table or Transformation already defined.
3.2. A confirmed primary key for identifying records whose values change. Without a primary key, historization can insert new rows but cannot detect changes to existing records.
3.3. An existing target schema, a name for the new target table, and an existing package or a name for a new package.
3.4. A history policy: whether to retain earlier values, update current values, or ignore changes. You also need to know whether the source supplies all records on each load or only a partial set, such as new and changed records.
Steps
Open the ETL ribbon
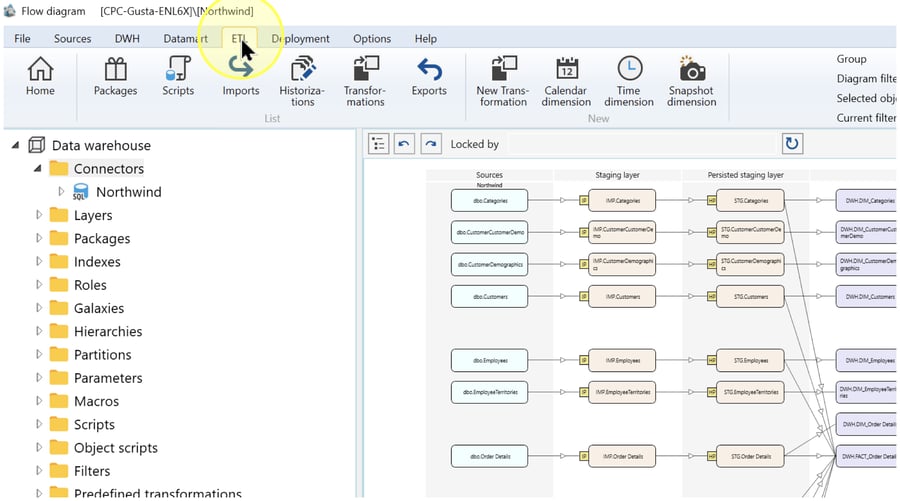
In the intended Data Warehouse (DWH) project, click the ETL toolbar tab. It provides commands for packages and data-processing workflows, including historization.
Open the historizations list
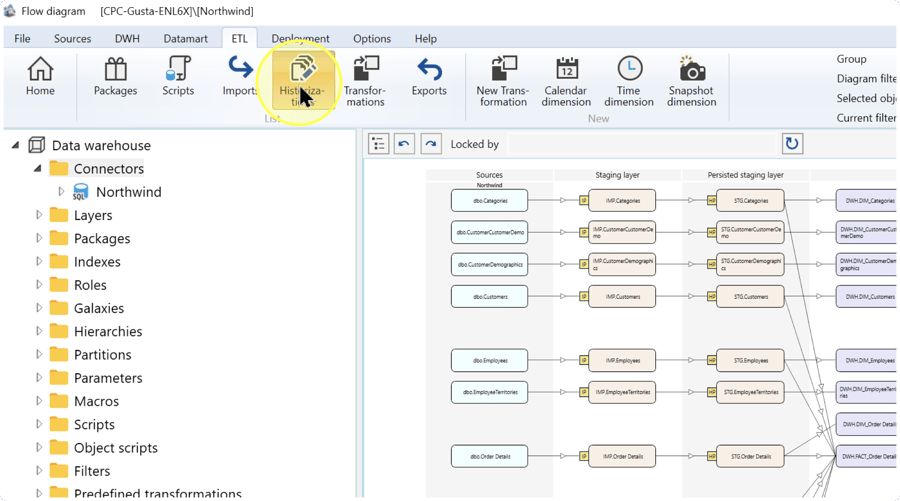
In the List group of the ETL ribbon, click Historizations.
Start the wizard
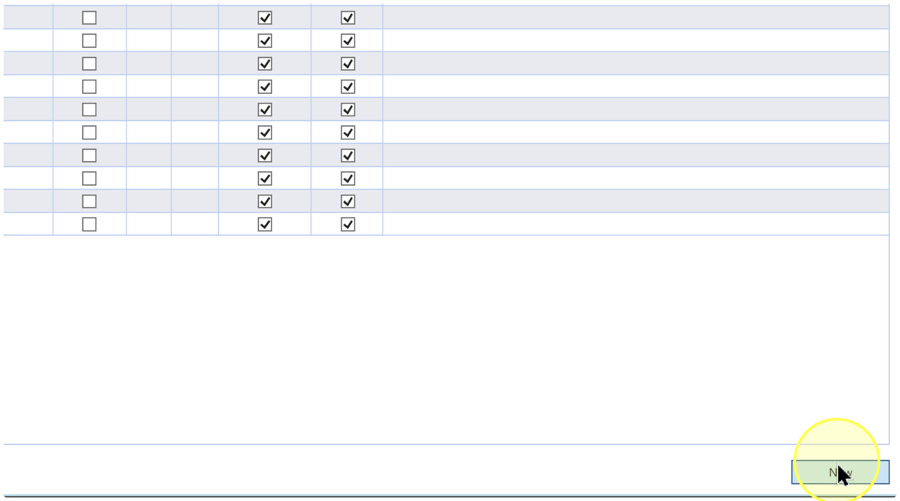
The Historizations list shows existing historization package items and their load behavior. Click New at the bottom right to open Historization Wizard.
Select the source
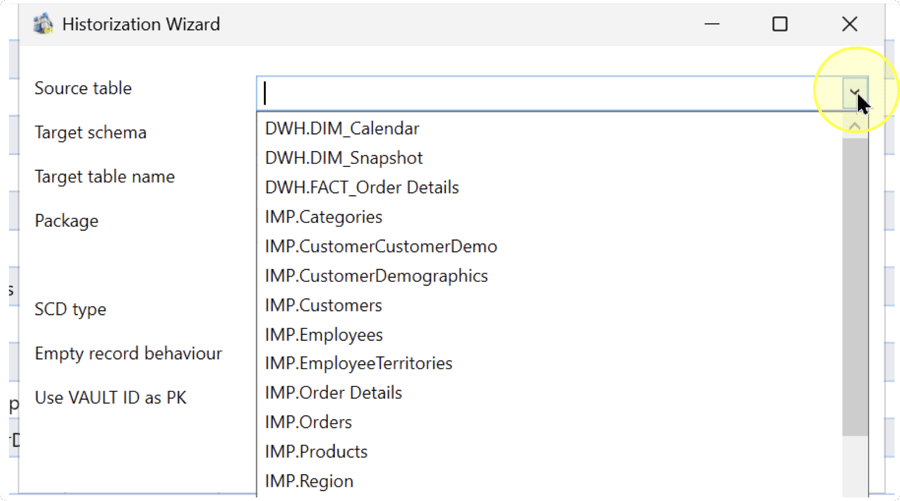
In Historization Wizard, open the Source table list and select the table or Transformation whose records you want to historize. A Transformation supplies data derived from its source objects; use a prepared Transformation when the input needs different columns or column definitions.
Check the schema and object name against your intended source. Its primary key identifies the same record across loads so that changed values can be detected. If that key has not been defined, complete the source definition before creating a historization that must detect changes.
The remaining settings on this dialog define the target, package, change policy, missing-record policy, and key choice. Complete them in Select the target schema–Review the key choice and finish. Later screenshots leave some fields blank to demonstrate individual settings; keep your own source and target values filled in.
Select the target schema
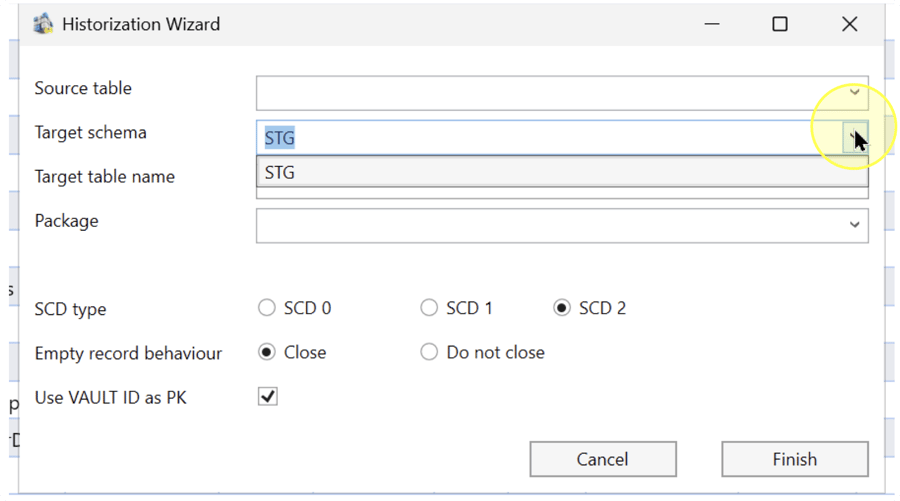
In Target schema, select the schema assigned to the historized result in your project. A schema groups database objects under a shared namespace.
Historization represents the flow from the Staging Layer (IMP), which holds imported source data, to the Persisted Staging Layer (STG), which retains staging data over time. The schema name STG in the screenshot is an example identifier; use your project’s schema for that role.
Name the target table
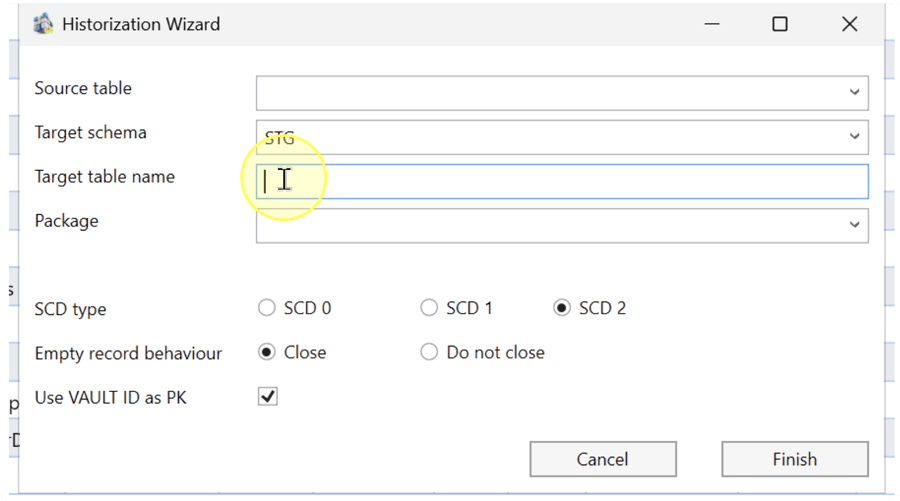
In Target table name, enter the name for the new historized table using your project’s naming convention. Check the target schema and table name together to identify the intended result and avoid unintentionally reusing an existing object name.
Assign a package
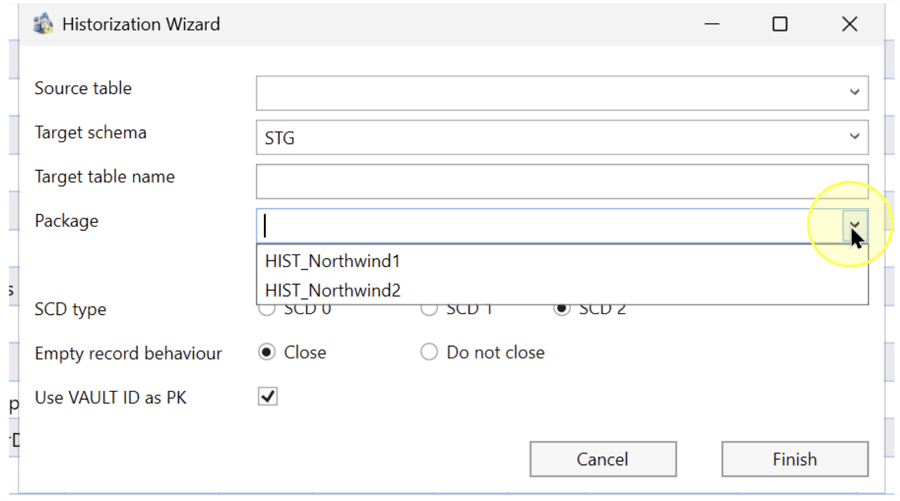
In Package, select the existing package that should contain this historization. If the historization needs a new package, enter its new name in the same field.
Example: selecting HIST_Northwind1 assigns the historization to that package. The pictured names identify example packages; they do not prescribe a naming pattern for your project.
Select how changes are handled
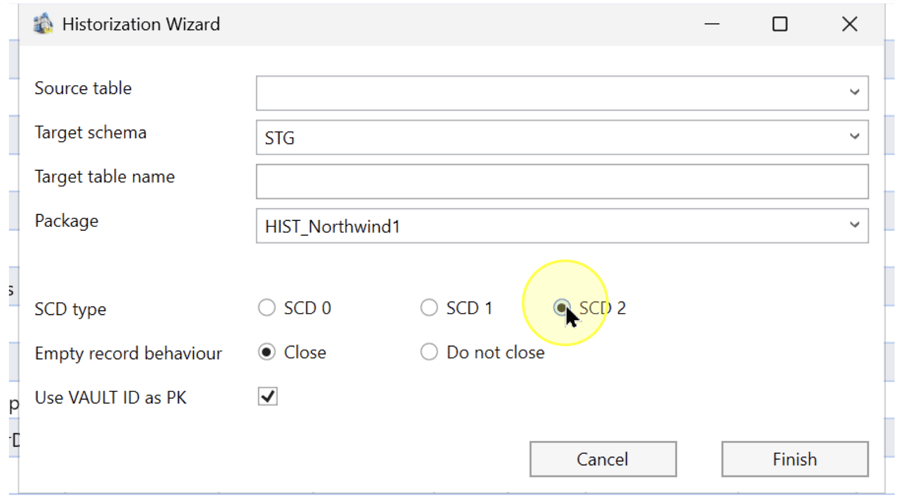
Under SCD type, select the change policy required for this historization. Slowly Changing Dimension (SCD) types describe how changed source values affect existing historized records:
- SCD 2 — Preserves versions. When a tracked source value changes, the current row’s validity period ends and a new current row is added. Select this when earlier values must remain available for historical reporting.
- SCD 1 — Updates the corresponding value in the current row without creating a separate version for that change. Select this when the current value should be corrected without retaining its previous value as another version.
- SCD 0 — Leaves the corresponding historized value unchanged when its source value changes. Select this when later changes to that value must be ignored.
Examples: retaining a customer’s previous address calls for SCD 2; correcting the current spelling without a separate version calls for SCD 1; retaining an originally recorded value despite later source changes calls for SCD 0. If columns need different policies, review them in the editor after finishing, as described in Reopen and check the definition.
Select how missing records are handled
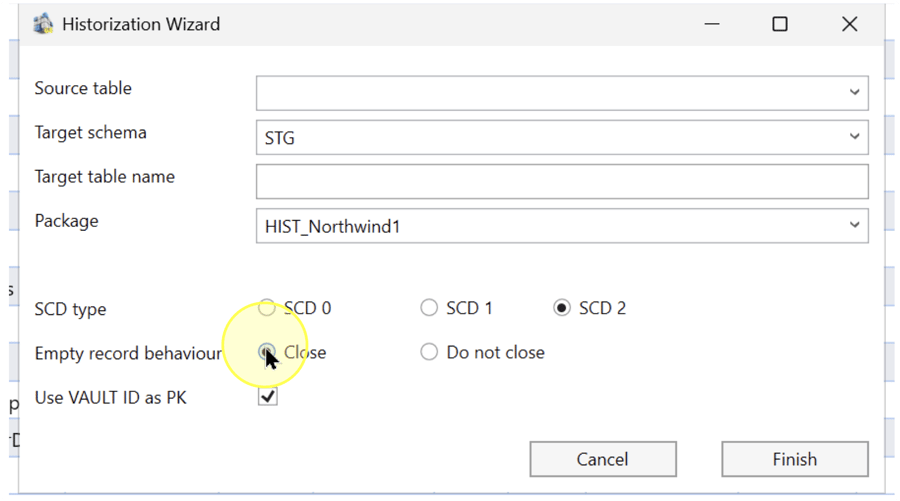
Under Empty record behaviour, select what should happen when a key already present in the historized table is absent from the source input:
- Close — Ends the validity of the current historical row for a missing key. Select this when the source supplies a complete set of records and missing keys should cease to be current.
- Do not close — Leaves the historical row current when its key is absent. Select this for a partial or delta load, where unchanged records can be omitted, or when missing records must retain their current status. This choice does not detect deletions from absence alone.
Example: a load containing only today’s changed customers omits unchanged customers. Use Do not close when those omitted customers must remain current. The editor’s separate Empty source setting handles an input containing no records at all; review it in Reopen and check the definition.
Review the key choice and finish
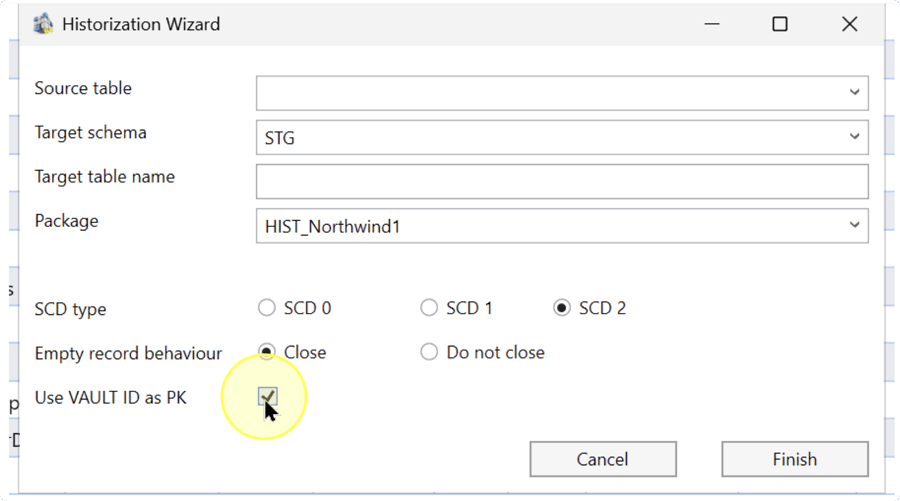
4.10.1. Set Use VAULT ID as PK according to the intended primary key (PK). Select the checkbox if the source has a hash key and that key should identify records instead of the business primary key. Otherwise, clear the checkbox to use the business primary key. A hash key is a key calculated using a hash function; selecting this setting requires that key to exist in the source.
4.10.2. Review Source table, Target schema, Target table name, Package, SCD type, and Empty record behaviour. Confirm that the source key, history policy, and missing-record policy match your intended input.
4.10.3. Click Finish to create the historization definition. Then perform the saved-definition checks in Reopen and check the definition.
Reopen and check the definition
4.11.1. Click ETL, then Historizations. Locate the new item by its source, target, and package, and double-click its row to open the historization editor.
4.11.2. Compare the source, target schema and table, Package, and Use VAULT ID as PK with the choices you made. The key choice must match the primary-key basis selected in Review the key choice and finish.
4.11.3. Select Definition and review the SCD Type column for each source column. Compare these policies with the history you need, using the explanations in Select how changes are handled.
4.11.4. Review Missing sources behaviour for the treatment of absent keys. Also review Empty source: Continue allows processing to continue with an empty input; Stop with error stops with an error; Stop without error stops without an error. Check this separate choice against your project’s handling of an entirely empty load.
If the definition needs changes to column policies or other editor settings, follow Configure historization columns, filters, variables, and scripts to edit, save, and recheck it before execution.
Expected Results
5.1. The new historization appears in Historizations and can be reopened. Its source, target, and package match the objects you intended to configure.
5.2. The key choice, column change policies, and missing-source settings pass the checks in Reopen and check the definition. Success depends on your required configuration, not on reproducing the screenshot values.
5.3. You have verified a saved definition. Package execution, deployment, loaded historical rows, and production readiness require separate validation; finishing the wizard does not establish those outcomes.
Decisions and variations
Use a table or a Transformation
Use the table directly when its columns and key already match the required input. Use a prepared Transformation when you need to exclude, rename, or add columns, or change their definitions before historization. Select that input in Select the source; preparing it is a separate task.
Retain versions or update current values
The policies in Select how changes are handled serve different reporting needs. When individual columns need different policies, continue in the historization editor after the wizard and review each column before execution.
Handle full and partial loads
Use the decision in Select how missing records are handled to distinguish a missing record from one omitted by a partial load. If you later add filters, reassess this choice because filtering can change which keys are present for comparison.
Use the business primary key or a hash key
Follow Review the key choice and finish for the key choice. The selected checkbox in the screenshot does not establish that your source has a suitable hash key. The source must already support the primary-key basis you intend to use.
Troubleshooting
- Object not found — Check the current Data Warehouse (DWH) project, schema, and object name against the intended source or target. The source must already exist in the project. When checking a saved historization, return to the Historizations list and identify it by its source, target, and package.
- Configuration differs after reopening — First confirm that you opened the intended item. Compare its settings with the choices in Select the source through Review the key choice and finish. For corrections, use Configure historization columns, filters, variables, and scripts to edit and save the definition, then reopen it and repeat Reopen and check the definition.
- Runtime result differs — If a later execution does not detect changes, check that the source has a primary key and review the column policies. If omitted records unexpectedly cease to be current, review source completeness, filters, and the missing-record choice in Select how missing records are handled. Validate the corrected configuration in your development workflow before accepting the loaded data.
