
Configure an Oracle Connector
Introduction
Configure an Oracle Connector so AnalyticsCreator can connect to the intended Oracle database from your Data Warehouse (DWH) project. A Connector stores the connection settings for a source system. This workflow takes you through naming the Connector, entering the Oracle connection settings, testing the connection, and saving and checking the definition.
The intended outcome is a saved Oracle Connector whose settings match your database and whose connection test succeeds. Reading source metadata and loading data are separate tasks.
Applicability
Use this how-to to create a new Connector with Connector type set to ORACLE in the AnalyticsCreator desktop interface. It covers a live Oracle connection using an existing database account and Oracle provider. Provider installation, database administration, and Azure deployment configuration are outside this workflow.
The screenshots illustrate the interface and example values; use the settings required by your own project. They do not identify a product version or establish compatibility with a particular Oracle release.
Prerequisites
3.1. An open Data Warehouse (DWH) project that you can edit, and a name that identifies the intended Oracle connection.
3.2. The Oracle host, listener port, database service name, and account credentials supplied for your connection. The account must have access to the intended database.
3.3. Network access to the Oracle endpoint and a compatible Oracle provider installed and available to the connecting environment. The example connection string uses OraOLEDB.Oracle.
3.4. A connection configuration confirmed for your installed Oracle provider, including the required connection-string syntax and your project's policy for storing connection strings. If the policy requires a protected password, have the corresponding encrypted-string entry and its configured alias available.
Steps
Open the Connector editor
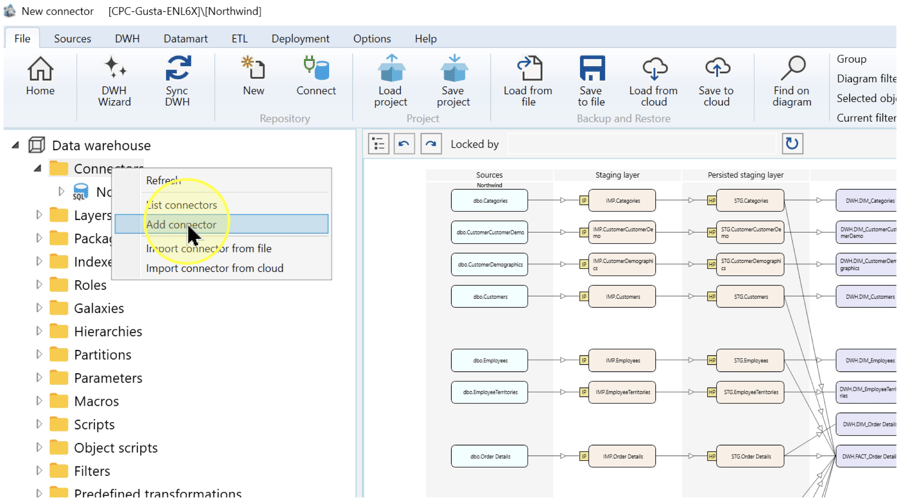
In the navigation tree, right-click Connectors and select Add connector. The Connector editor opens.
Name the Connector and select ORACLE
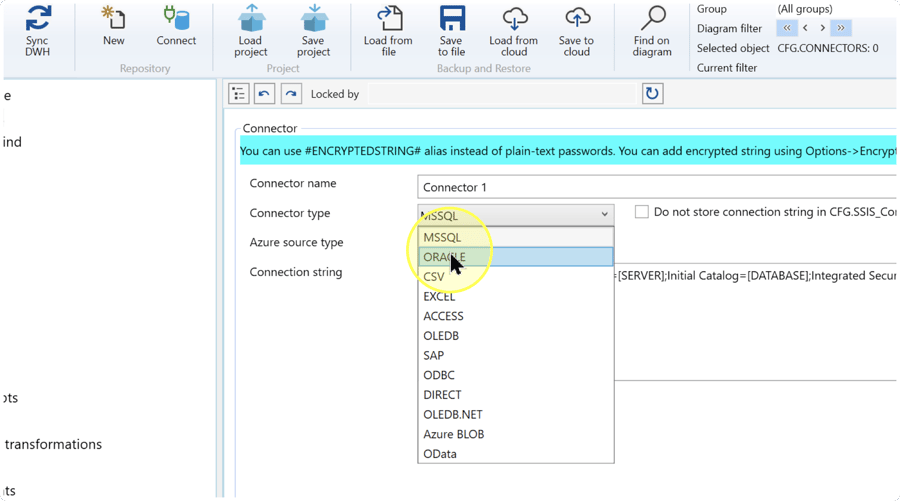
In the editor, Connector name identifies the connection in your project. Connector type selects the source technology, and Connection string contains the endpoint, credentials, and provider settings used to connect.
Enter your intended name in Connector name. Select ORACLE in Connector type and confirm that it is the selected value before completing the connection string. Connector 1 is an example name, not a required value.
Enter the Oracle connection string
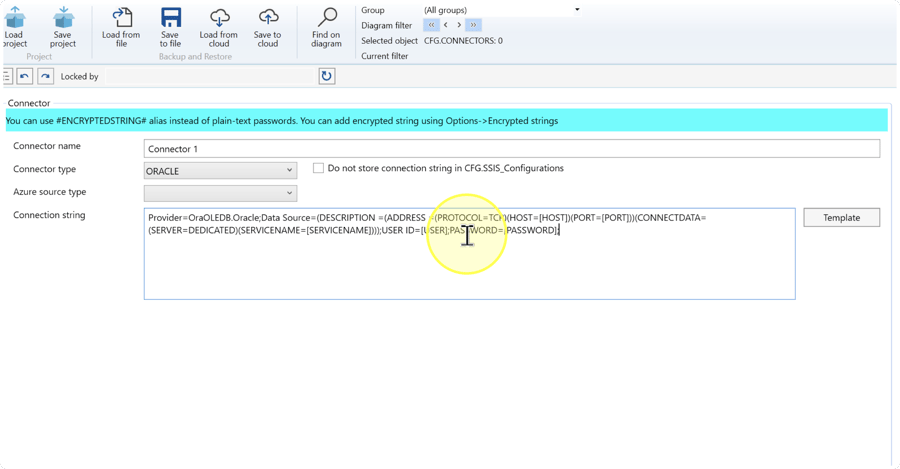
If your administrator supplied a complete connection string for this environment, enter it in Connection string. Otherwise, click Template to obtain a starting point and complete it using your confirmed Oracle configuration. The endpoint and authentication values are entered within this text; they are not separate fields in the illustrated Oracle editor.
Correct the generated template: in Connection string, change the keyword CONNECTDATA to CONNECT_DATA and the keyword SERVICENAME immediately before = to SERVICE_NAME. These are Oracle connection-descriptor keywords. Keep the value placeholder [SERVICENAME] until you replace it with your service name below. The template's original spellings are visible in the screenshot.
Review the following parts of the connection string:
- HOST / PORT — The host identifies the Oracle server, and the listener port identifies the network endpoint accepting the connection. Replace
[HOST]and[PORT]with the values supplied for the intended database. - SERVICENAME — The database service name identifies the service to connect to at that endpoint. Replace the captured placeholder
[SERVICENAME]with the service name supplied by your administrator. The resulting setting must use the Oracle keywordSERVICE_NAME; the placeholder and the keyword have different spellings. - USER ID / PASSWORD — Replace
[USER]and[PASSWORD]with the credentials for the intended account. If your project requires a protected password, use that account's configured encrypted-string alias instead of the password text. The editor shows the alias form#ENCRYPTEDSTRING#; use the alias for your existing entry. Options → Encrypted strings opens the list that maintains these protected values. - Provider — Identifies the provider used to establish the connection. The capture shows
OraOLEDB.Oracle. Check that the value matches the provider confirmed and installed for your environment; do not change it solely to match an image.
Compare the completed string with the configuration confirmed for your provider, including its keywords, parentheses, and separators. Replace every remaining template placeholder. If the generated syntax differs from your confirmed configuration, use the administrator-approved connection string before testing. Do not copy the screenshot's template as a working connection string.
Connection example: changing the user credentials changes the account used for the connection; it does not replace the host, port, or service name. Check all of these values together when connecting to a different Oracle database.
Review connection-string storage
Set Do not store connection string in CFG.SSIS_Configurations according to the project's configuration-storage policy. Select the checkbox when the connection string must be excluded from that configuration table; clear it when the project requires the string to be stored there. This setting concerns the named table and does not replace the password-alias choice in Enter the Oracle connection string.
Azure source type is a separate setting visible in the editor. Leave it unchanged for the Oracle connection workflow described here. If your project requires Azure deployment settings, follow its confirmed Azure configuration before proceeding. The blank field and cleared checkbox pictured in Enter the Oracle connection string are examples, not universal defaults.
Test the Oracle connection
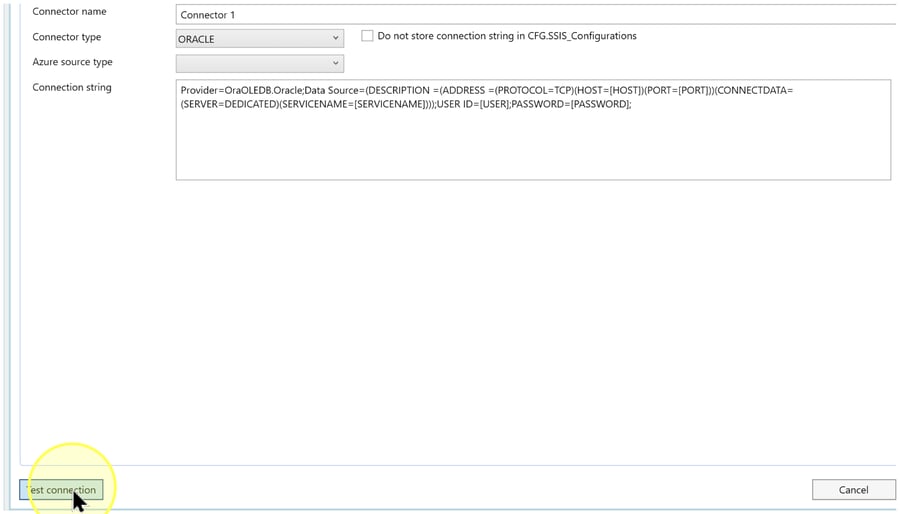
Click Test connection at the bottom of the Connector editor and read the reported result. If the test fails, use the error to identify which endpoint, provider, connection-string syntax, or credentials need correction. Follow the relevant check in Troubleshooting, correct the configuration, and click Test connection again.
Continue to Save only after the reported result confirms a successful connection using your intended settings. Clicking the button alone does not confirm success.
Save and check the Connector
Review Connector name, Connector type, the completed Connection string, and the storage setting. If you changed a connection value after the successful test, repeat Test the Oracle connection. Click Save at the bottom of the editor to store the Connector definition.
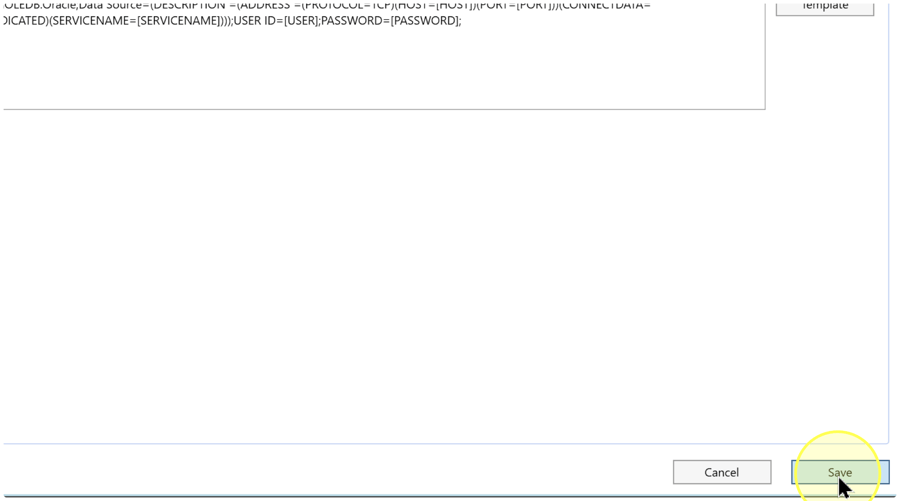
Expand Connectors in the navigation tree and locate the name you saved. To locate it in a list, right-click Connectors and select List connectors. Open the saved Connector for editing and compare its name, type, endpoint, provider, and storage setting with your intended configuration. Click Test connection to check the saved connection settings, then use Expected Results to confirm the outcome.
Expected Results
The saved Connector can be found
The Connector appears under Connectors in the intended Data Warehouse (DWH) project with the name you entered.
The saved settings match the intended database
The reopened definition has Connector type set to ORACLE. Its connection string identifies the intended Oracle endpoint, account or configured password alias, and provider, and the storage setting matches the project's policy.
The saved connection passes its test
Test connection reports success for the saved settings. Saving the definition and passing this test do not establish that source metadata has been read, data has been loaded, or a deployment is ready for production.
Decisions and variations
A supplied connection string or a template
Use a complete administrator-approved connection string when one is available for your environment. When using Template, correct the two Oracle keywords, replace the placeholders, and check the syntax as described in Enter the Oracle connection string. A pictured template is not a tested configuration.
Password handling and configuration storage
Use an existing encrypted-string alias when required by the project, as described in Enter the Oracle connection string. Independently, select or clear Do not store connection string in CFG.SSIS_Configurations according to Review connection-string storage.
Read metadata or reuse existing definitions
After configuring the connection, follow Read metadata from a Connector with DWH Wizard to read metadata: the descriptions of source objects and their structure. A Source is an input object supplied by a Connector. If your task instead uses Source definitions already stored in the Data Warehouse (DWH) project, follow Use existing Source metadata with DWH Wizard. Both pages are linked in Related Guides.
Troubleshooting
- Provider or driver error — Check the provider named in the connection string against the Oracle provider installed in the connecting environment. Have the environment administrator resolve a missing or incompatible provider, then repeat Test the Oracle connection.
- Connection or authentication failure — Read the reported error. Recheck the host, listener port, service name, and complete connection-string syntax against the confirmed configuration. If you used Template, check that the descriptor uses
CONNECT_DATAandSERVICE_NAME, as described in Enter the Oracle connection string. Verify that no template placeholders remain and that the intended credentials or configured encrypted-string alias are used. If the endpoint or account cannot be confirmed, ask the database administrator to verify it before testing again. - Saved item not found — Confirm that you clicked Save in the intended Data Warehouse (DWH) project. Right-click Connectors, select List connectors, and look for the actual name you entered. Check any reported save error before creating another definition.
