
Historization wizard
Historization wizard collects the input, target, package, and history settings for a new historization definition.
Use this overview before creating a historization. Follow the detailed guide for the wizard procedure and subsequent editor checks.
Create and review historization
Create a historization with Historization Wizard
Select the source and target, choose history behavior, and create a historization definition for review in the editor.
Configure historization columns, filters, variables, and scripts
Review and save an existing historization’s column rules, filters, variables, and script configuration.
Overview and configuration
The Historization Wizard is used to historize a table or transformation.
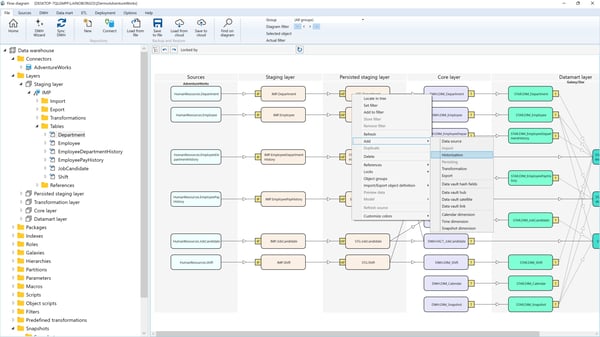
To start the Historization Wizard, use the object context menu: "Add" → "Historization" in the diagram, as shown in the image below:
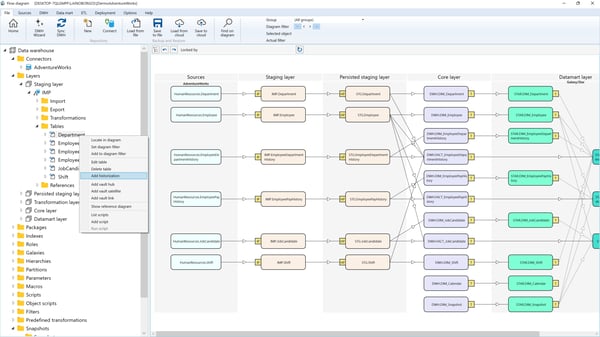
Alternatively, the object context menu in the navigation tree can be used, as shown in the image below:
Parameters
There is a typical Historization Wizard window, as shown in the image below:
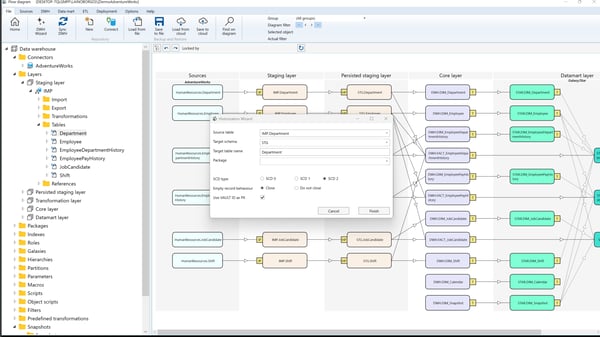
- Source Table: The table that should be historized.
- Target Schema: The schema of the historized table.
- Target Name: The name of the historized table.
- Package: The name of the SSIS package where the historization will be done. You can select an existing historization package or add a new package name.
- Historizing Type: You can select between SSIS package and stored procedure.
- SCD Type: The user can select between different historization types: SCD 0, SCD 1, and SCD 2.
- Empty Record Behavior: Defines what should happen in case of a missing source record.
- Use VAULT ID as PK: If you are using DataVault or mixed architecture, the user can use HashKeys instead of business keys to perform historization.
After clicking "Finish", the historization will be generated, and the diagram will be updated automatically. Then, the user can select the generated historization package and optionally change some package properties (see "Historizing Package").
