

English
Step 3: Verify Database
AnalyticsCreator offers pre-configured demos for testing within your environment. This guide outlines the steps to transition from the Northwind OLTP database to the Northwind Data Warehouse model.
Once completed, you will have a fully generated DWH project ready to run locally.
From the File menu, select Load From Cloud.
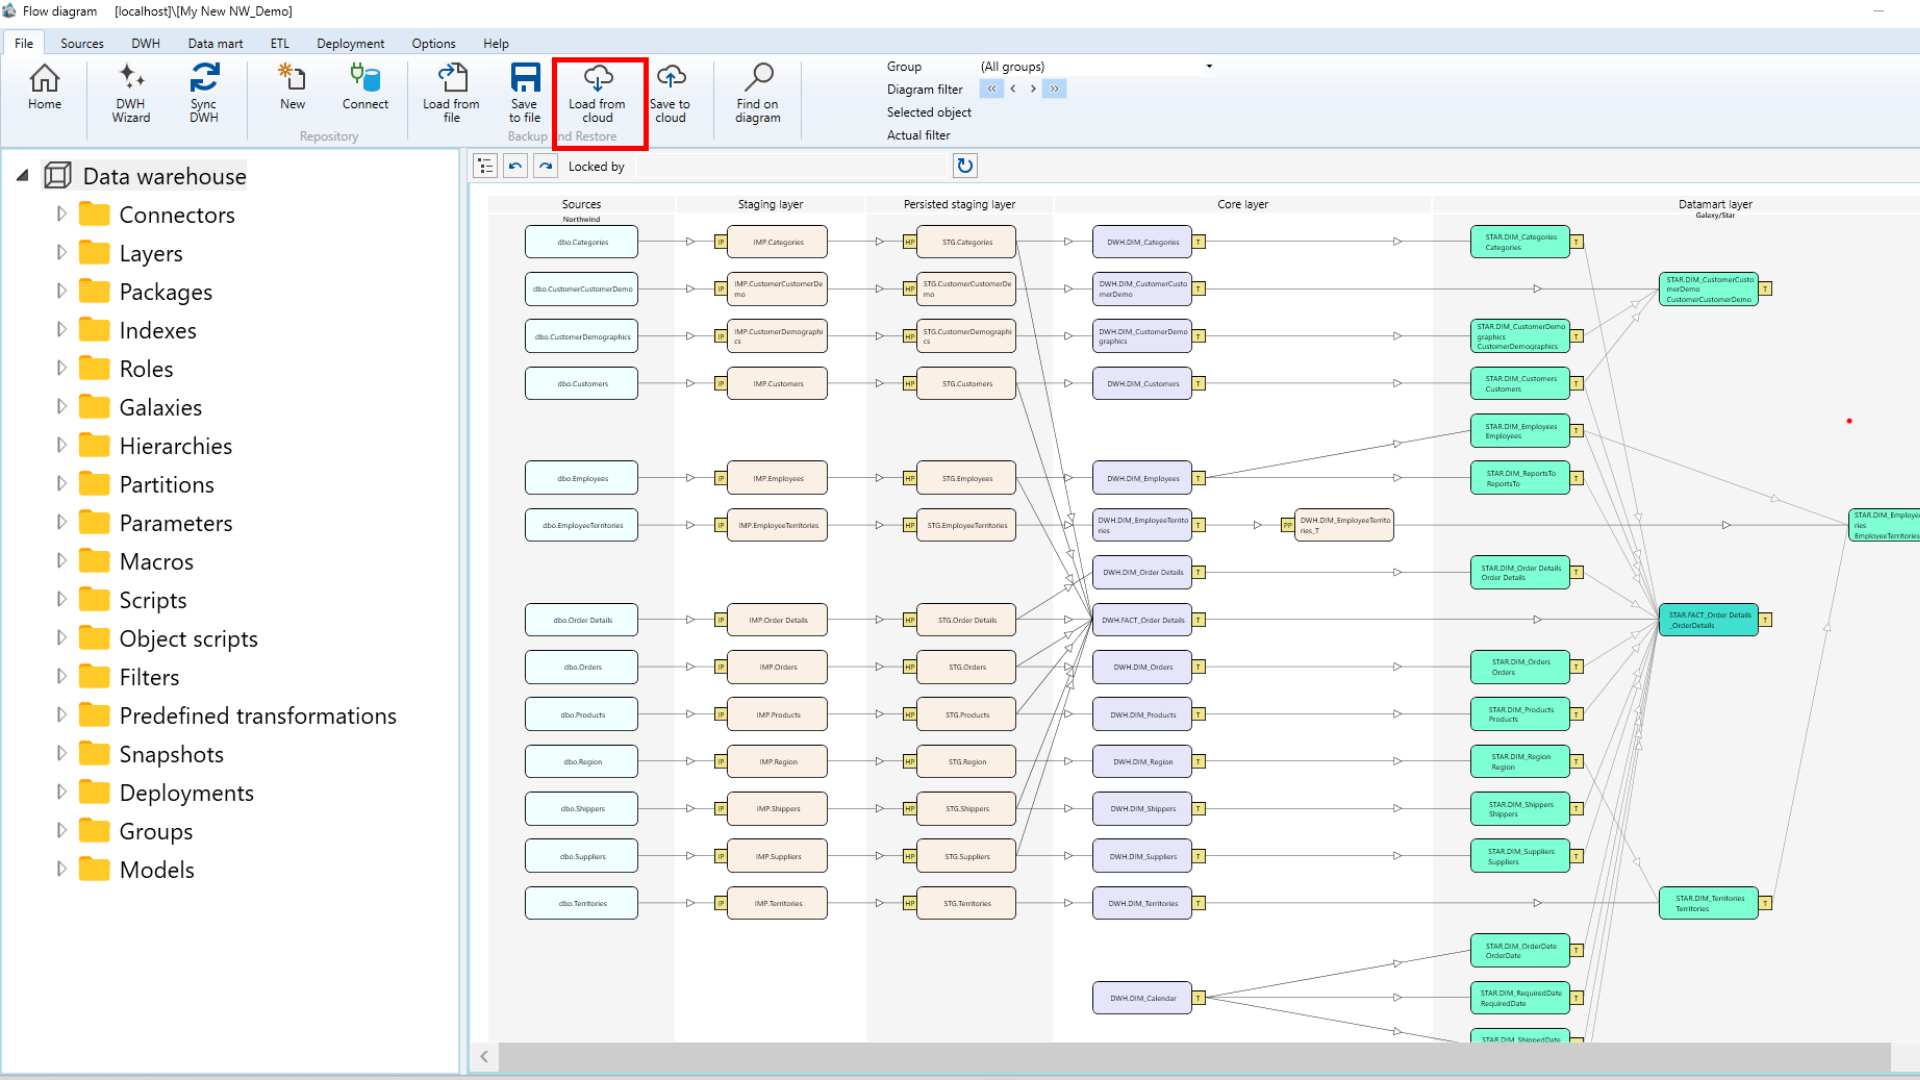 - Choose NW_Demo.
- Enter a name for your new repository (default:
- Choose NW_Demo.
- Enter a name for your new repository (default: NW_Demo).
- Note: This repository contains metadata only—no data is moved.
AnalyticsCreator will automatically generate all required project parameters.
🎥 Watch Demo Video
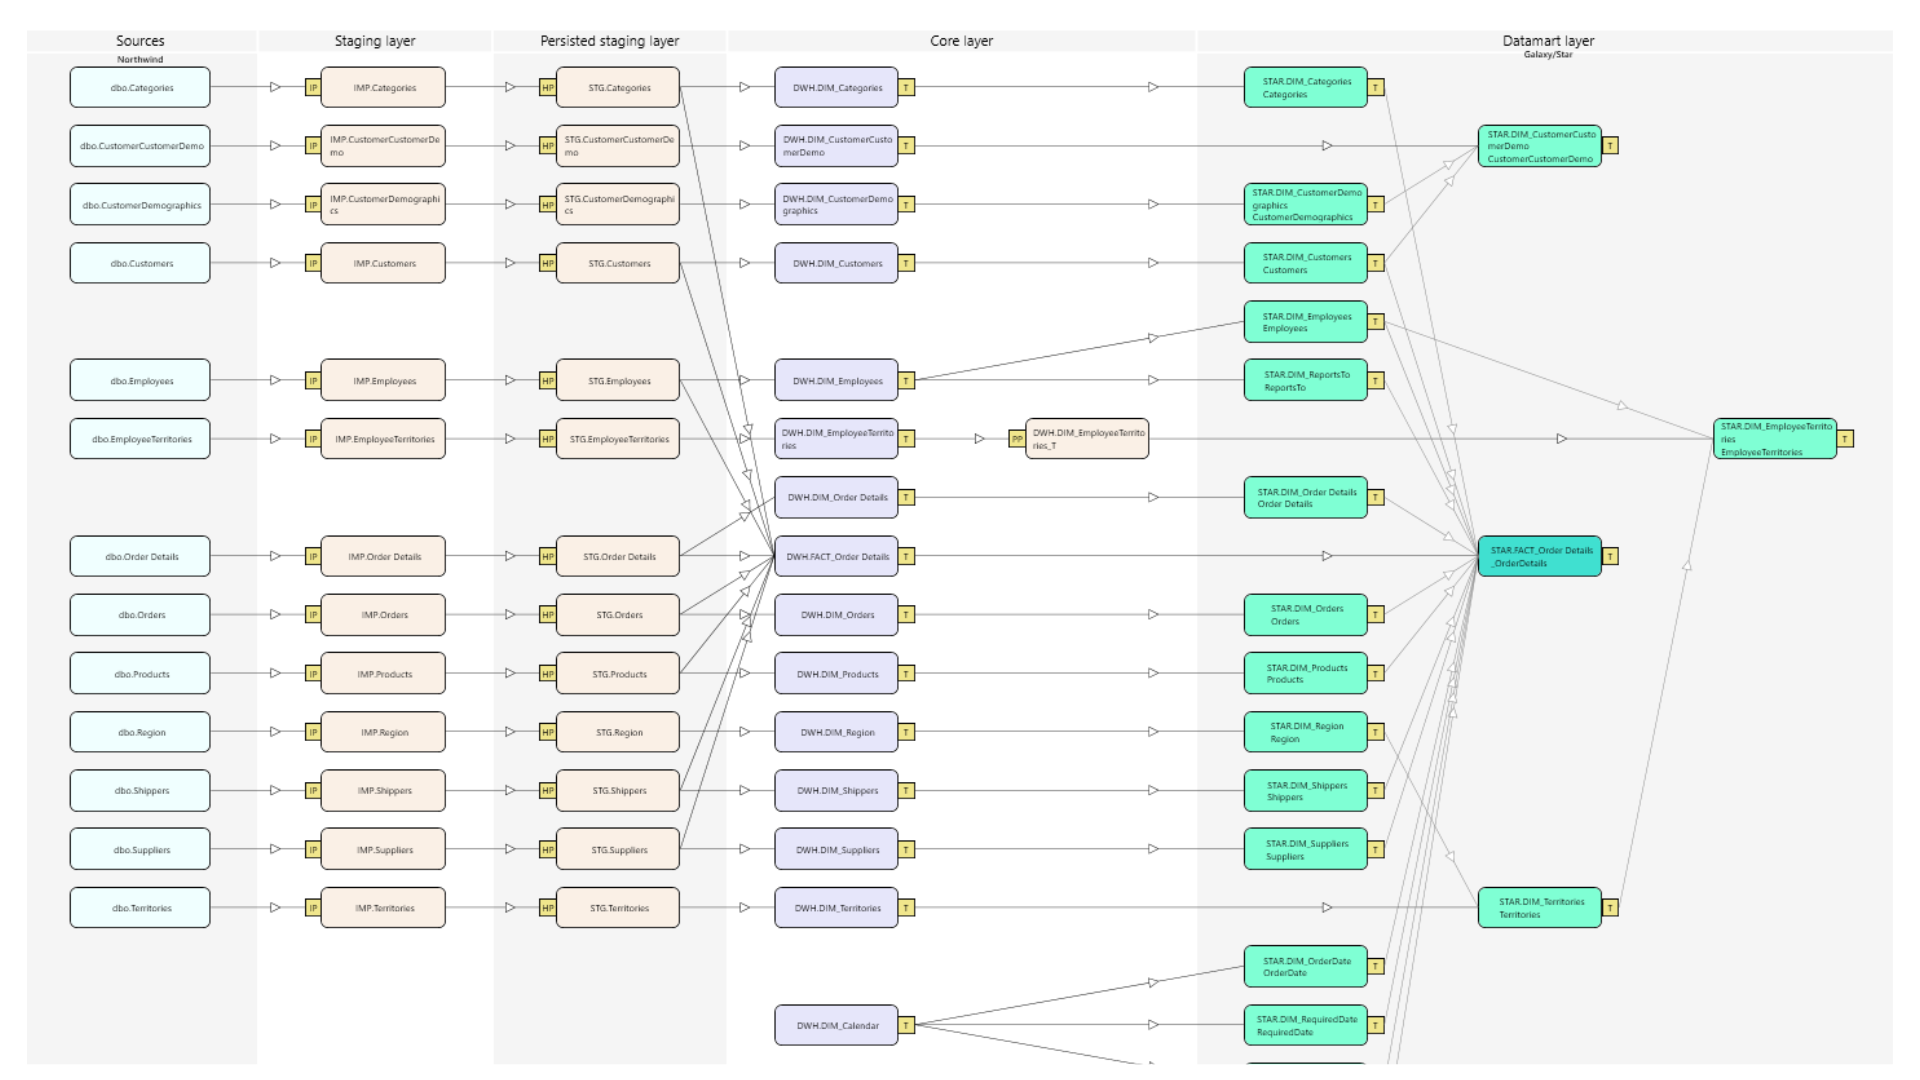
AnalyticsCreator will generate a Data Warehouse project with five layers:
1. Sources
Raw data from the source system (Northwind OLTP).
2. Staging Layer
Temporary storage for data cleansing and preparation.
3. Persisted Staging Layer
Permanent storage of cleaned data for historization.
4. Core Layer
Integrated business model—structured and optimized for querying.
5. Datamart Layer
Optimized for reporting—organized by business topic (e.g., Sales, Inventory).
 Open SQL Server Management Studio (SSMS) and verify that the Northwind database is present.
If yes, skip to the next section. If not, proceed to Step 2.
Run the setup script from Microsoft:
🔗 Download Script
Or copy-paste it into SSMS and execute.
Run this query to confirm installation:
Open SQL Server Management Studio (SSMS) and verify that the Northwind database is present.
If yes, skip to the next section. If not, proceed to Step 2.
Run the setup script from Microsoft:
🔗 Download Script
Or copy-paste it into SSMS and execute.
Run this query to confirm installation:
sql
USE Northwind;
GO
SELECT *
FROM INFORMATION_SCHEMA.TABLES
WHERE TABLE_SCHEMA = 'dbo'
  AND TABLE_TYPE = 'BASE TABLE';
Once confirmed, you can proceed with the next steps to configure the AnalyticsCreator Connector with your Northwind database.
Keep in mind that AnalyticsCreator uses only native Microsoft Connectors, and we do not store any personal information.
Step 3: Change Database Connector
Navigate to Sources > Connectors.
 You will notice that a connector is already configured. For educational purposes, the connection string is not encrypted yet. To edit or add a new connection string, go to Options > Encrypted Strings > Add. Paste your connection string as demonstrated in the video below.
After adding the new connection string, it's time to test your connection. Go to Sources -> Connectors and press the Test button to verify your connection. Step 4: Create a new Deployment In this step, you'll configure and deploy your project to the desired destination. Please note that only the metadata will be deployed; there will be no data movement or copy during this process. Follow the instructions below to create and set up a new deployment. 1. Navigate to Deployments in the menu and create a new deployment. 2. Assign a name to your deployment. 3. Configure the connection for the Destination 4. Set the project path where the deployment will be saved. 5. Select the packages you want to generate. 6. Review the connection variables and click Deploy to initiate the process. Finally, click Deploy to complete the deployment. 7. Finally, click Deploy to complete the deployment.
In this step, your initial Data Warehouse project is created. Note that only the metadata—the structure of your project—is generated at this stage. You can choose between two options for package generation: SSIS (SQL Server Integration Services) or ADF (Azure Data Factory), or both. SSIS follows a traditional ETL tool architecture, making it a suitable choice for on-premises data warehouse architectures. In contrast, ADF is designed with a modern cloud-native architecture, enabling seamless integration with various cloud services and big data systems. This architectural distinction makes ADF a better fit for evolving data integration needs in cloud-based environments. To execute your package and move your data, you will still need an Integration Runtime (IR). Keep in mind that AnalyticsCreator only generates the project at the metadata level and does not access your data outside the AnalyticsCreator interface. It does not link your data to us, ensuring that your data remains secure in its original location. For testing purposes, you can run your package in Microsoft Visual Studio 2022, on your local SQL Server, or even in Azure Data Factory